Among the multitude of devices available today, how do you choose the camera that’s right for you? A compact, hybrid, DSLR, or bridge camera? What’s the best camera for travel or hiking adventures? These questions seem simple on the surface, but the truth is there’s no single “best” camera! The best travel camera for you depends largely on your expectations and what you’re looking to achieve with it.
- Are you looking for a good quality camera that’s small and discreet enough for travel?
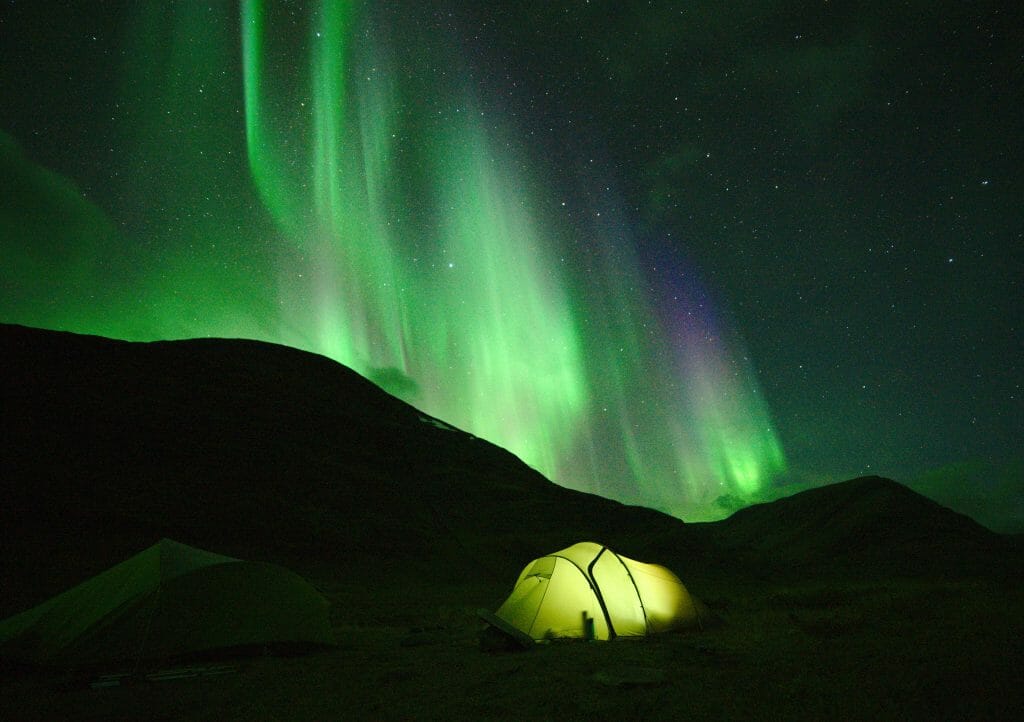
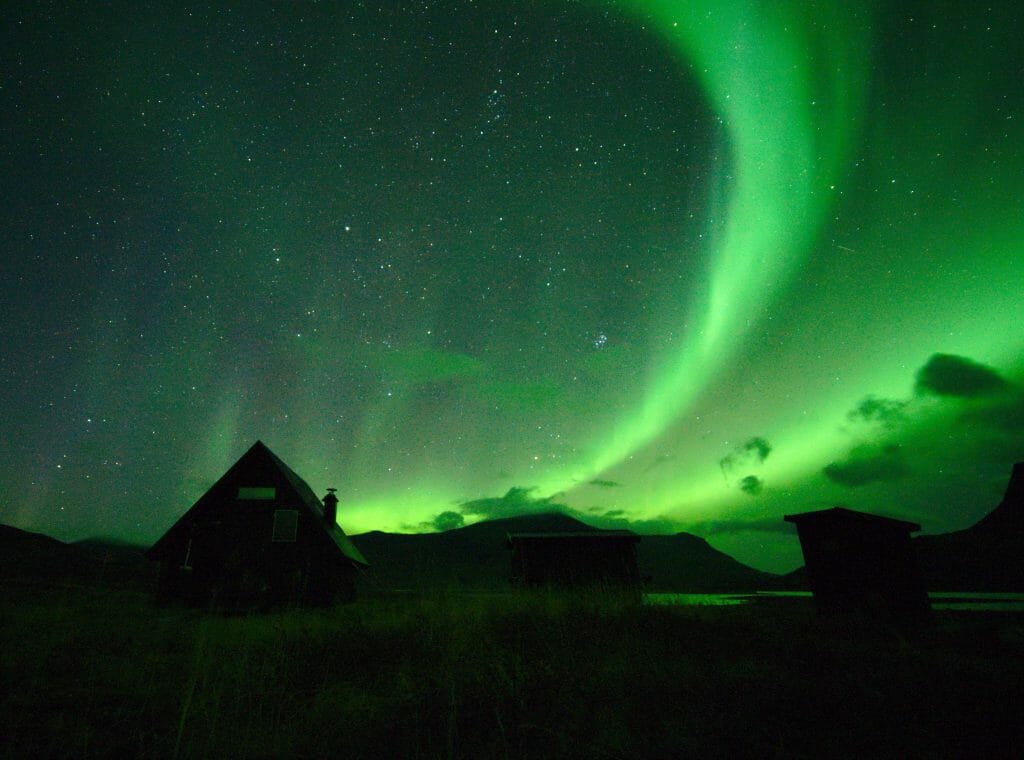
- Do you want a camera for capturing beautiful night shots or northern lights during your next trip to Scandinavian countries?
- Will your camera mainly be used for beautiful portraits with nice background blur or simply stunning landscapes?
- Are you also interested in video?
- Is your budget limited, so you’re looking for an affordable camera with good value for money?
This is where the nightmare begins for many people… We’ve received MANY questions from readers about our photography gear. How and which camera to choose for specific situations? There are hundreds of different cameras available, and it can be extremely difficult to navigate if you don’t know certain important criteria and differences.
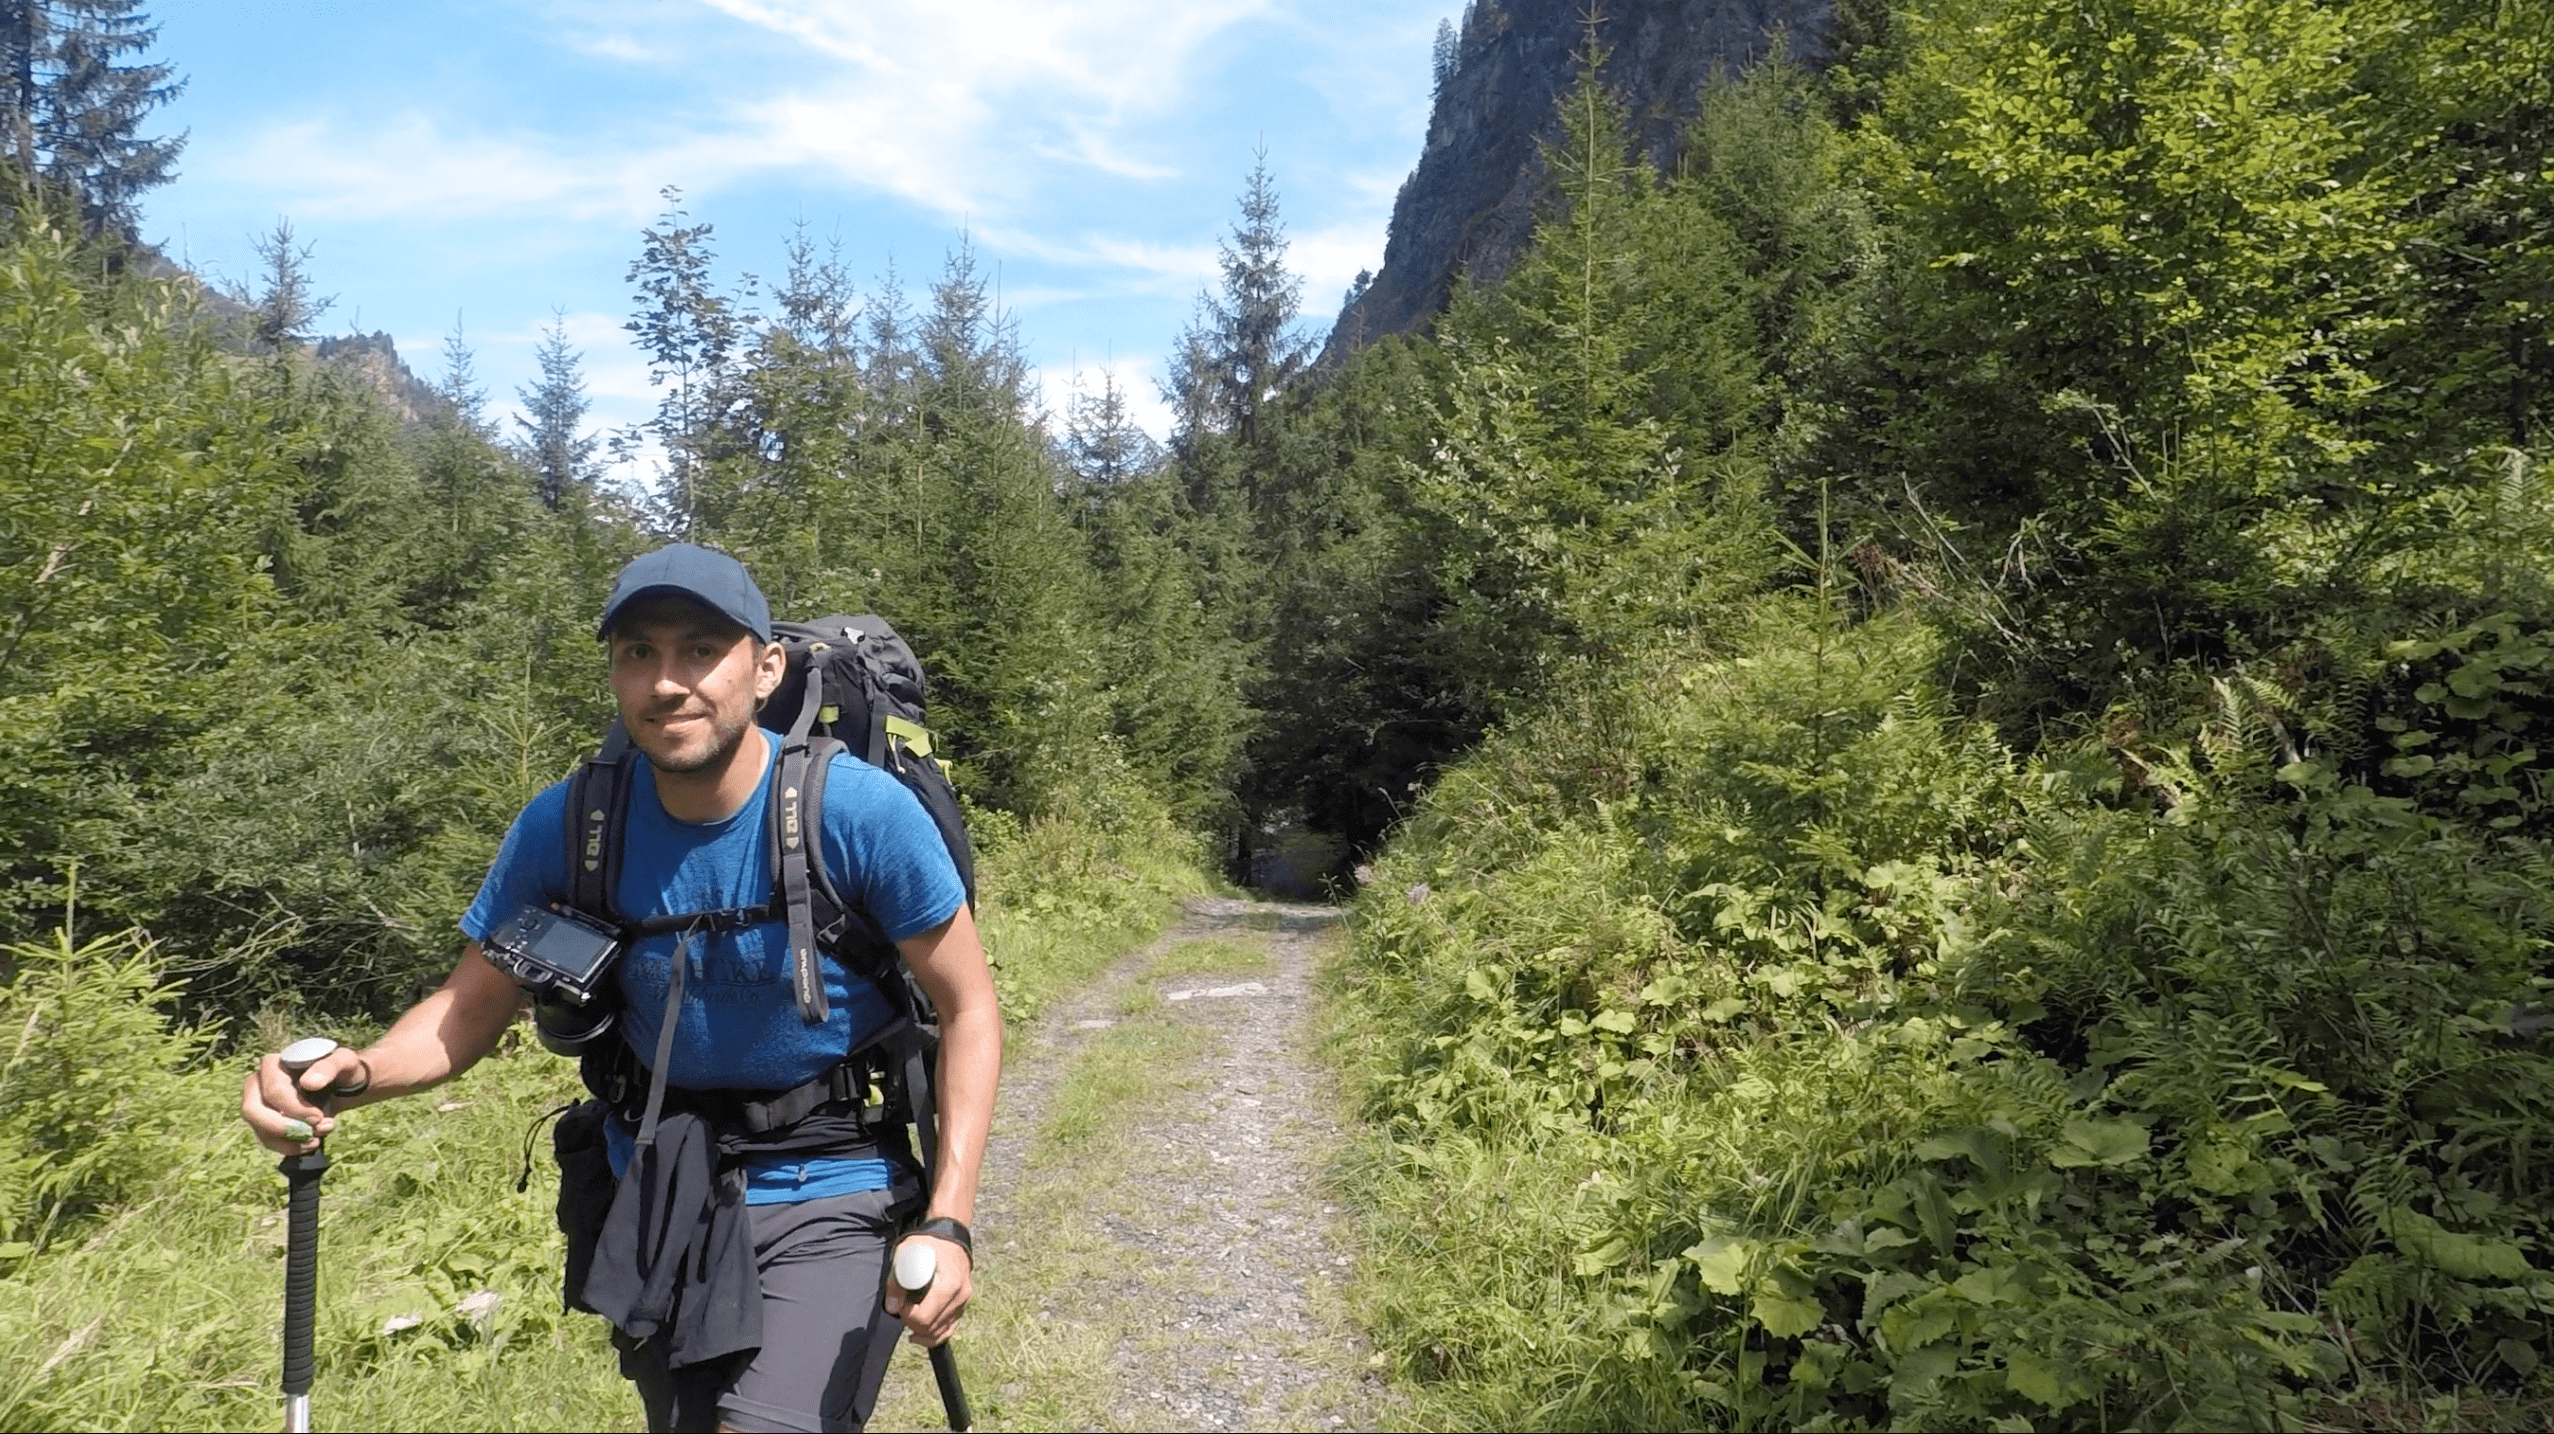
Since we traveled around the world, I (Ben) became passionate about photography. You can find our best photos here or on Instagram. As a result, I invested a lot of time finding quality equipment that I can take everywhere during our travels.
My goal in this article is to share my experience on this topic with you. By the end, you’ll have all the tools you need to choose and buy the best camera for your travels, hikes, or hobbies.
This article contains affiliate links to different camera models. Please know that we’re not sponsored by any camera brands and we purchased all our equipment ourselves. I’ve tried to remain as neutral as possible despite my personal preferences. If you buy a camera through one of our links, you won’t pay a penny more and we’ll simply receive a small commission that helps us continue working on our site and providing this kind of free, independent content. Additionally, we don’t include any Amazon links and recommend buying your equipment from other sites (B&H) or even buying second-hand on eBay.
Best camera for travel
We remain primarily a travel blog and receive many questions about which camera to choose for round-the-world trips, hiking, short trips, etc. Here are some tips and suggestions for these scenarios.
Factors to consider
To choose the camera that will suit you perfectly, there are several criteria to consider! Depending on your travel destination, duration, and travel style, your needs will be different. For a road trip, you can afford to bring a camera body with multiple lenses, for example. Planning a world tour or a multi-day or even multi-week trek? Then the question is whether you’re willing to carry your photography equipment or opt for a lightweight and discreet compact camera.

Your photography practice
If you’re a beginner and looking to take nice photos without getting too caught up in settings, then an expert compact will work perfectly. But if you want to improve your photography skills during your travels, go for small mirrorless models (APS-C sensor size) that remain relatively discreet and will help your photography practice evolve.
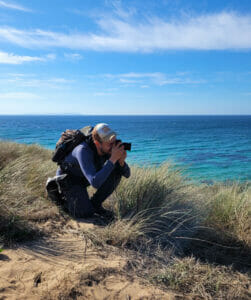
Weight
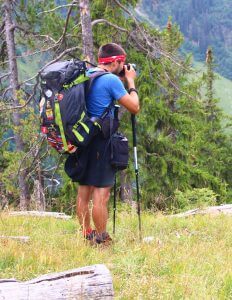
Whether you’re doing a 15-day trek through New Zealand, a safari in Africa, or a world tour, your needs won’t be the same. For us who travel with backpacks, weight is an essential criterion! You can quickly reach 2 kg of photography equipment, and 2 kg is a lot of the total weight of a backpack! Also, even if you’re not backpack traveling, it’s always nice to limit baggage weight a bit to be more mobile.
Size, discretion
For me, the size of a camera is an essential criterion for travel. I think particularly of South America and all the countries where it’s better to avoid showing too much that you can buy expensive equipment. From experience, I prefer using a small mirrorless or compact camera in these cases rather than pulling out my Full Frame body with large lenses that attract attention.
My selection of travel cameras
For travel, it’s better to go with expert compacts/point-and-shoot cameras (if you don’t want to get too caught up in settings) or small mirrorless cameras (APS-C format sensor). These 2 types are perfect for taking very beautiful photos in practically all situations while remaining reasonably small and discreet.
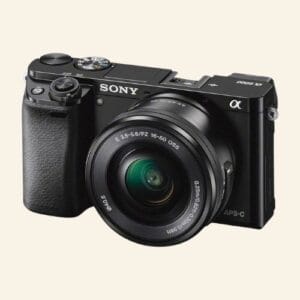
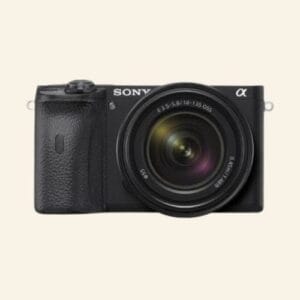
For example, for expert compacts, I would recommend a Panasonic TZ200 or Sony RX100 M5, which have excellent value for money. For hybrid cameras, if you have a small budget, go for the Canon EOS M50 M2, very high quality for its price. If you have a bigger budget, the Fuji XT4 and Sony a6600 are the best options in my opinion.
For more information on different cameras, check out our camera comparisons:
Comparison of the best cameras for travel and hiking
Under 400 euros
Today, in 2026, it’s not easy to find quality cameras for under 400 euros… If you want to find something at this price, it’s on the second-hand market that it happens.
You could look at the first models of the Sony RX100 compact series on eBay, the RX100 III, for example. These remain very good expert compacts that have aged rather well.
Otherwise, for mirrorless cameras, try searching on eBay for older models from the Sony a6000 series (like the a6100 or a6500) or the Fujifilm X-T series (like the X-T2, for example).
Under 800 euros
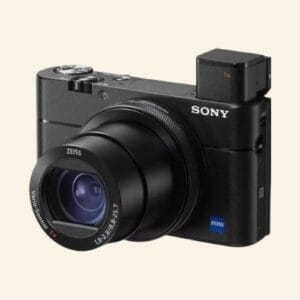
For under 800 euros, you can already get a great expert compact camera. I particularly recommend looking at the Panasonic TZ200 or Sony RX100 M5, which both offer excellent value for money. For 800 euros, you have a great camera for travel and bringing back nice memories of your adventures.
If you lean more toward mirrorless, you can get the excellent Olympus EM10 M4. It’s a very good little mirrorless camera in micro 4/3 format, packed with qualities: in-body stabilization, 4K, tilting touch screen.
In APS-C format, you’ll find the Canon EOS M50 M2, which is really high quality (4K, 180-degree flip screen) for such a small price!
Under 1200 euros
In this price category, no point talking about compacts! Well, we do mention the excellent Sony RX100 M7 if you’re willing to spend 1000 euros on a compact! Otherwise, we can immediately move to the mirrorless family! In the hybrid family, the best options under 1200 euros are notably the Fujifilm X-T30 II and the Sony a6600.
The first is a featherweight (383g body only) and has everything to delight even the most demanding (APS-C sensor, good image quality in all situations, 4K). Its only small flaws are that it’s not weather-sealed, doesn’t have in-body stabilization, and that’s probably why it remains so light. As for the Sony a6600, it’s a little heavier but includes in-body stabilization and a tilting touch screen for selfies. In short, it’s my favorite camera of 2026!
If you want to try a Full Frame sensor, you could also be tempted by the Sony A7 II whose price has dropped significantly since the arrival of its bigger brothers, A7 III and A7 IV.
Between 1200 and 2000 euros
Since prices can go very high, I voluntarily put a ceiling of 2000 euros. Beyond this price, we move to cameras that mainly target professionals, and my goal here is to present the best cameras for the general public. Pros generally don’t need this kind of article to know what they want ;).
For mirrorless cameras, competition is fierce in this price range! I’d say the most versatile cameras are the Sony A6700 and Fujifilm X-T5 in APS-C format. If you prioritize video, choose the Sony, which is more performant in this area, while the Fujifilm is more performant in photography.
For a Full Frame mirrorless camera, the Sony A7 III is certainly the body that offers the best value for money in 2026. There’s also Panasonic’s new Full Frame mirrorless, the Panasonic S5II, which is worth considering for both video AND photography and remains below the 2000 euro limit.
Different types of cameras
To go a bit further and understand our advice above, you need to have some photography basics. In fact, there are several major camera families, and the first step in choosing a model suitable for travel and hiking is to decide which is the best type according to your usage. The 3 main camera families are compacts, DSLRs, and hybrids (mirrorless). There are other families like bridges, but I won’t talk about them in this guide. In my opinion, they’re uninteresting and obsolete compared to the latest-generation mirrorless and compacts.
Compact/point and shoot camera
Characteristics of a compact
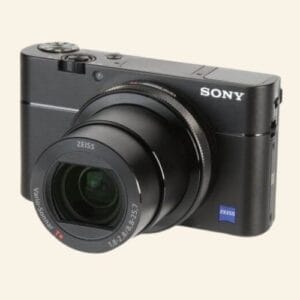
Compacts are the camera family with a single fixed lens. They’re generally very small and light, between 200 and 400g, making them very interesting for travel photography. They’re compact, discreet, and easily fit in any pocket.
There was a time when compact meant small sensor, which limited performance in low-light or high-contrast lighting situations.
Also, performance in terms of speed was rather poor (focus and shutter speed). This made photographing moving subjects difficult. But those days are over! There’s now a range of expert compacts that combine the advantages of compacts (size, weight) with larger sensors, quality lenses, and quite good speed performance.
But then, is the expert compact the ideal travel camera? Hmm, not quite… This will obviously depend on your photography practice. Even though compacts have evolved a lot in recent years, they remain less performant and less versatile than DSLRs or mirrorless cameras. The restriction of the fixed lens obviously doesn’t suit everyone. Some people will prefer to have a slightly larger, more ergonomic, and more versatile camera.
Advantages and disadvantages of a compact
| Pros | Cons |
|---|---|
|
|
If size and weight are paramount criteria for you and you still want a quality camera, invest in an expert compact. Otherwise, simply travel with a good smartphone that will take as beautiful photos as an entry-level compact.
DSLR camera
Characteristics of a DSLR
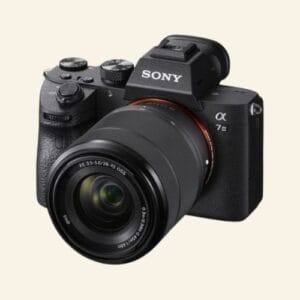
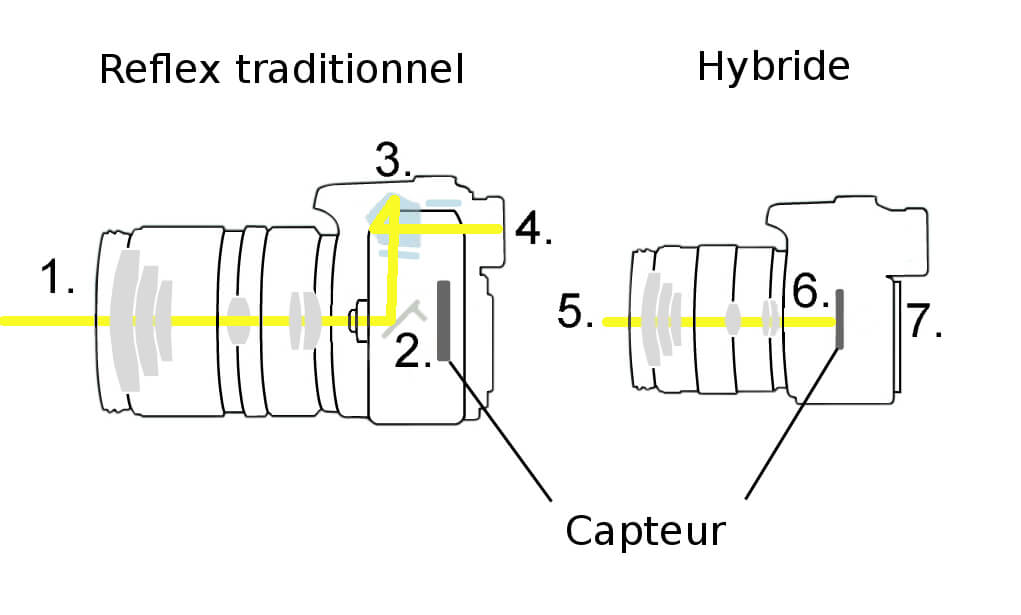
Opposite to compacts, DSLR cameras consist of a body and interchangeable lenses. What makes them special? They have a mechanical mirror system inside the body and an optical viewfinder. This is why DSLR bodies are larger and more cumbersome. Mirrorless cameras don’t have mirrors and have electronic viewfinders.
Note: on this subject, mirrorless cameras have clearly taken over from DSLRs in recent years. There’s good reason to believe this family will gradually disappear in the coming years!
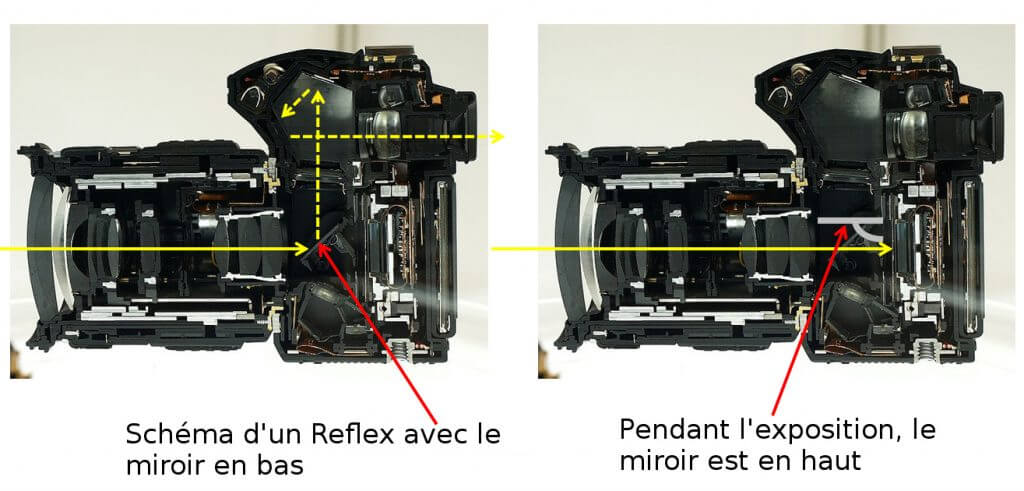
Image quality first depends on the body’s performance (sensor size, speed). But it’s mainly the lens quality that greatly influences the final image rendering. Keep in mind that the whole point of a DSLR camera lies in the ability to change and use the right lens for a given situation. I’ll return below to all the important criteria for choosing a body or lenses. Know that a DSLR is aimed more at people interested in photography and wanting to learn to make the right settings for each situation. If you don’t want to invest some time understanding how a DSLR works, then the automatic mode of a compact will be more than sufficient. (Well, note that even with an expert compact, it’s really worth mastering the basics!)
Advantages and disadvantages of a DSLR
| Pros | Cons |
|---|---|
|
|
If you’re getting seriously into photography, I recommend orienting yourself toward mirrorless cameras! Indeed, all the new developments have been made for this camera family. In the long term, DSLRs will certainly gradually disappear from the market.
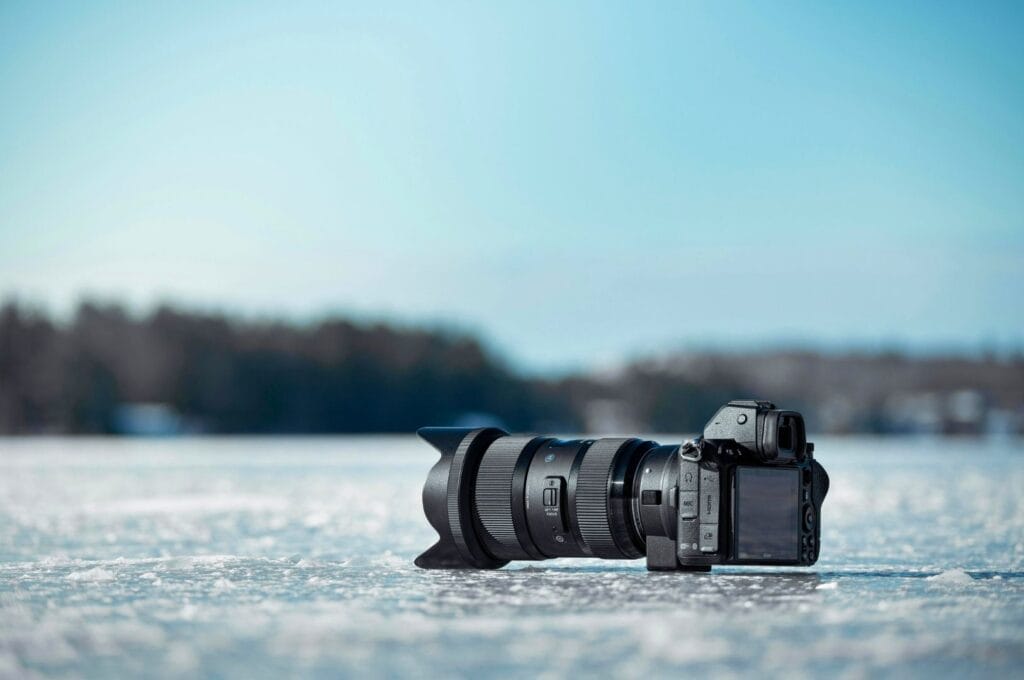
Mirrorless/hybrid camera
Characteristics of a mirrorless
Mirrorless cameras have largely dominated the camera market for several years. The basic idea is quite good! It’s about gaining weight and size by removing the mechanical mirror system from DSLRs while keeping the ability to change lenses. The result is quite interesting! The bodies are smaller and lighter for equivalent performance.
But then, why buy a traditional DSLR if you can take a hybrid with similar performance while gaining weight and size? Again, I’d say it’s primarily a matter of preference. DSLR users sometimes find that mirrorless cameras aren’t very ergonomic. Others don’t particularly like electronic viewfinders. They also find that with larger lenses, the camera is no longer very “balanced.” Whatever the case, mirrorless cameras are the future of photography and all new developments have been made for this camera family. If you’re getting into photography right now, there’s not much to hesitate about :).
Advantages and disadvantages of a mirrorless
| Pros | Cons |
|---|---|
|
|
If you already own a DSLR and lenses, it’s not necessarily worth switching to mirrorless. But if you’re going on short or long-term travel and are interested in photography, then mirrorless cameras are extremely interesting! The weight and size savings compared to a DSLR are significant and the possibilities are the same. It’s actually this camera family that I chose for our photography equipment.
Important technical criteria
Now that you know more about the 3 main camera families, let’s talk about the different criteria that will help you choose your travel camera well. You’ll find all these aspects in the different comparison tables above to choose among the best models from each family.
Weight and size
I chose this criterion first because it’s paramount for more and more people. Many travelers like us aren’t ready to sacrifice several kilograms in their backpack for photography equipment. To give you an idea, a DSLR with 2-3 lenses weighs 1.5 to 2 kg! Additionally, in some countries, it’s better to have a small discreet camera to avoid attracting attention.
If weight and size are important criteria, you’ll surely find what you’re looking for in the expert compact range or possibly mirrorless cameras with a fairly light and versatile lens.
Lens(es)
Whether you have a compact, DSLR, or mirrorless, the lens (or lenses in the case of mirrorless and DSLRs) is a fundamental component! It will greatly influence the quality and style of your images. Even though there are many criteria for choosing a lens, here are the main factors you need to know.
Focal length
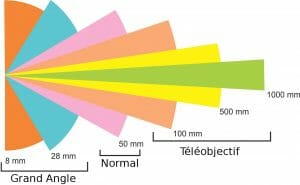
Focal length (or focal distance) is generally written on the lens. For example, 16-35mm, 50mm, or 70-200mm. It represents the distance between the optical center of the lens and the camera sensor. Therefore, it defines the lens’s angle of view and magnification. It determines how much a lens will enlarge or shrink a subject compared to what we see with the naked eye.
To give you an idea, the smaller this number, the smaller your subject will be and the wider your angle of view. Basically, you’ll be able to fit more things in your image. Conversely, the larger this number, the more your subject will be enlarged compared to what you see. Therefore, you’ll be able to include fewer things in your image. Telephoto lenses have large focal lengths and allow you to zoom in significantly on a subject.
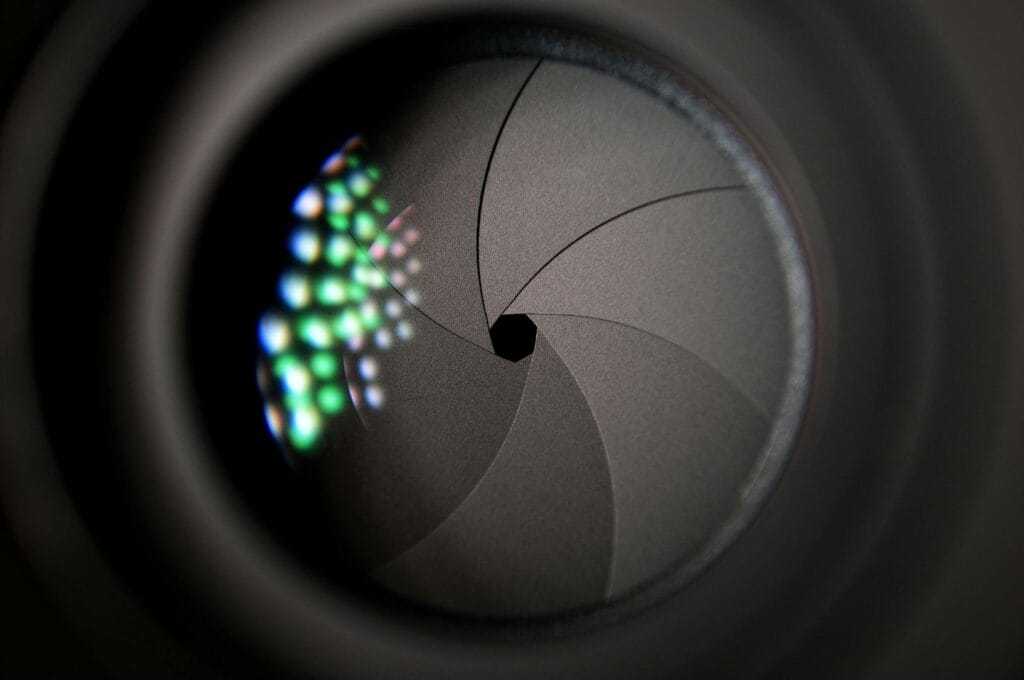
Maximum aperture
The maximum aperture is represented by the f-number, generally indicated right next to the focal length. For example, f/1.8 or f/3.5-5.6. This number represents the maximum aperture the lens can achieve at a given zoom. Simply put, it’s the amount of light entering the camera. The smaller this number, the larger the lens’s maximum aperture will be. For example:
- 16-35 mm f/4: this wide-angle lens allows varying the focal length between 16 and 35mm while maintaining a constant maximum aperture at f/4;
- 18-55 mm f/3.5-5.6: this versatile lens allows varying the focal length between 18 and 55mm with a maximum aperture of f/3.5 at 18mm and f/5.6 at 55mm.
Generally, having a lens with a small f-number (and large aperture) is a mark of quality. The smaller the f-number, the more light the lens will let through. It’s therefore perfect for taking photos in low light without reducing exposure time too much and increasing ISO sensitivity. Additionally, you can also achieve a smaller depth of field to create beautiful background blur, the famous bokeh.
But be careful, lenses with a small and constant f-number across the entire focal range generally cost more and are also larger and heavier. For world tours or hiking, it’s about finding the best compromise between a large focal aperture and reasonable weight.
Style
We tend to look mainly at the purely technical characteristics of a lens. In my eyes, the style or character of a lens is equally important. I always look to see if a lens produces a beautiful star effect (or sunstar in English) facing the sun and if the background blur pleases me. In the end, these kinds of details are just as important in the image produced!
Zoom lens or fixed focal length lens?
A zoom is a variable focal length lens to zoom in more or less on your subject. Even though a zoom seems like a better investment, you shouldn’t necessarily trust appearances… Here are the advantages and disadvantages of each:
| Zooms | Fixed focal lengths |
|---|---|
|
|
If you buy a DSLR or mirrorless camera, it’s worth investing a bit more to buy a good quality lens in addition to the kit lens, whose quality often leaves much to be desired, or to buy the body alone with another lens. Basically, for better results, it’s better to have a good lens on an entry-level body than the reverse.
Sensor size
The sensor corresponds to the electronic surface sensitive to light. It’s the essential element of the body and replaced film (you know, photo film!) in the digital photography era.
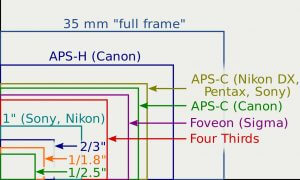
Without going into too many technical details, know that the larger the sensor, the better its performance in low light conditions (better light sensitivity) and in very contrasted light conditions (greater dynamic range). For example, by combining a Full Frame sensor, a lens that lets in a lot of light, and a long exposure time, you can take beautiful night photos!
Concretely, the expert compact range has small sensors, from 1 inch to APS-C, which is 1.5 times smaller than Full Frame. The DSLR and mirrorless ranges have larger sensors, from APS-C to Full Frame.
Resolution or megapixel count
Often used as a marketing argument, resolution is a less important criterion than it appears. The thing is, practically all cameras now have sufficient resolution. It often revolves around 16-20 megapixels to make beautiful and large prints (posters, frames…). The only advantage of having higher resolution is being able to crop your images significantly in post-processing (zoom on part of the image, for example) while maintaining sufficient resolution.
Durability (resistance, weather sealing, tropicalization)
Camera durability is an important criterion, especially if you’re planning to leave for a long trip like a world tour. Believe me when I tell you it’s difficult to avoid dust, dirt, or humidity while traveling! The idea isn’t to have a camera that’s completely shockproof and waterproof, but to have a camera well-designed enough to resist use in humid, dusty, windy conditions, etc.
In this area, you’ll surely hear about tropicalized cameras, meaning they’re supposed to resist the conditions mentioned above. The problem is that each brand uses this term somewhat in its own way… It’s better to rely on user reviews to know what a camera can endure, which is what we’ve tried to do in our comparison tables.
Image stabilization
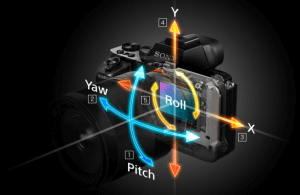
Stabilization is a mechanical device that compensates for the micro-movements the photographer makes to avoid blurry photos (motion blur) as much as possible. Since the camera is stabilized, you can increase exposure time and still get a sharp image. This is extremely useful in low-light situations without a tripod.
Stabilization is also very important in video to eliminate unpleasant micro-movements seen when filming handheld.
There are 2 types of image stabilization:
- In-body stabilization: it compensates for the photographer’s movements by moving the sensor inside the body. It’s very interesting because it allows stabilization regardless of the lens used.
- In-lens stabilization: the lenses inside the lens move to compensate for the photographer’s movements.
I would tend to recommend a stabilized body if you can afford it. I find it brings real added value in several situations (low light, when zooming on a distant subject, video) regardless of the lens. For me, it’s become essential!
Additional features
I’ve grouped all features that aren’t necessarily important for everyone in this category. Personally, I couldn’t do without certain features that I find really very useful. Here are some:
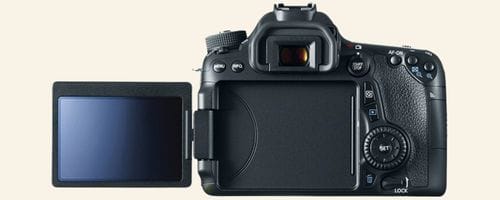
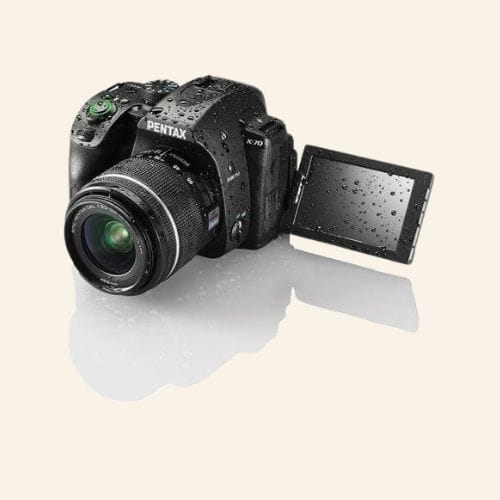
- Pivoting screen: it’s interesting to be able to tilt or rotate the screen in situations where it’s not possible to put your eye in front of the viewfinder. For example, when the camera is close to the ground, higher than your head, for discreet photos…
- Touch screen: the touch screen is a really interesting feature for navigating menus more easily, focusing with your finger (essential for videographers, for example)…
- Applications: sometimes you can install applications to make timelapses, overlay multiple images, or do other things that would normally only be possible in post-processing. I’m personally very fond of this kind of application! They save me time or avoid carrying certain filters, like ND filters that can be more or less replaced by overlaid images.
- Connectivity: I’m thinking particularly of WiFi, which allows for directly sharing photos on social media, uploading them to the cloud, or transferring them to a smartphone. Bluetooth and NFC are also useful for easily transferring photos to a smartphone or computer without cables.
- Customizable buttons: assigning certain functions or settings I use often to certain buttons to save time is something I appreciate!
- And certainly many other features! Don’t hesitate to mention them in comments.
Battery life
Battery life is obviously a criterion to keep in mind, especially when traveling, but it’s often difficult to compare models. DSLRs often have better battery life than compacts or mirrorless cameras. But I’d say that having one or two spare batteries and avoiding spending too much time looking at photos on the screen, you shouldn’t have any battery problems!
If you know you’ll be tight on battery for a few days, disable the screen and only use the optical or electronic viewfinder to take your photos if possible. Does your camera have features like WiFi, Bluetooth? Think about disabling them to save battery. And in very cold temperatures, always keep your batteries warm, close to your body to prevent them from discharging.
Video (4K or even 6K cameras)
Video is very popular right now with drones, action cameras… Maybe your next long trip or hikes will make you want to bring back some beautiful videos for editing. Know that all models from expert compacts to DSLRs will allow you to record videos at least in full HD, which is already very good for the average person!
However, if you really want to do more advanced video editing, orient yourself toward mirrorless cameras. They have autofocus technology integrated directly on the sensor (system also found on some DSLRs). Additionally, they’re lighter than traditional DSLRs. Finally, more and more affordable models offer 4K, even 6K, like the Panasonic S5 II. This higher resolution than Full HD offers better image quality and allows for better cropping and stabilizing of images.
Creative modes or PASM modes
PASM modes are normally present on all expert compacts, mirrorless, or DSLRs, but it’s better to check! Thanks to them, you precisely control the 3 exposure parameters:
- aperture;
- shutter speed;
- ISO sensitivity.
Even if you’re a beginner in photography, I really recommend learning to use these modes and not trusting your camera’s automatic modes! Your shots will only be better.
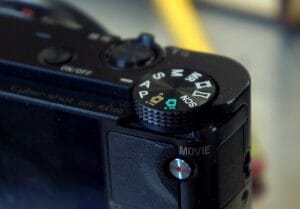
P for program
The camera measures brightness and suggests several aperture/speed pairs that give normal exposure to the image for a given ISO sensitivity. I never use this mode which I find mainly useful for learning the relationship between aperture and shutter speed in the image.
A or Av for aperture priority
It’s simple, you set the aperture you want as well as ISO sensitivity and the camera calculates the ideal shutter speed for a well-exposed image. It’s the ideal mode to use if you want to manually control your depth of field to make beautiful portraits with background blur, for example.
S or Tv for shutter speed
It’s the opposite of A/Av mode. You set the exposure time and ISO sensitivity you want, and the camera calculates the aperture for a well-exposed image. It’s an extremely useful mode for photographing moving subjects (waterfall, running…), when you know you’ll need a short exposure time.
M for manual
As its name indicates, you choose all the settings yourself using manual mode. It requires a bit more experience, but it is essential when you feel your camera isn’t choosing the right settings.
For more details on how to use PASM modes or improve in photography, I invite you to read the useful resources section at the end of the article.
Format: JPEG or RAW?
Again, JPEG and RAW are 2 formats present on almost all expert compacts, DSLRs, and mirrorless cameras. However, check that the RAW format is present; it’s important! To understand the difference between these 2 formats, let’s review the characteristics.
JPEG
JPEG is the most used image compression format on the web! Practically all the images you see online are in JPEG format. But compression means loss of information to create lighter images. So when you save your images in JPEG with your camera, your images are indeed light and ready to use, but they also contain much less information than in a RAW file. You’ll therefore have much less latitude to modify your images in post-processing and you let the camera make certain choices for you.
RAW
RAW corresponds to the raw format of an image containing all the information recorded by the sensor. All information means very heavy images! Indeed, a RAW file is generally between 20 and 60 MB. In short, you’d better have a big external hard drive. Additionally, a RAW file isn’t properly an image. It must be post-processed with software to be usable, meaning photo editing is mandatory! However, it’s obviously the file that leaves the most possibilities and control for editing with specialized software (Lightroom, for example).
I strongly recommend recording your shots in RAW if you’re interested in photography (and therefore post-processing) and in JPEG + RAW if you’re not sure (each image is recorded in both formats). In my case, I only became really interested in photography after our world tour and only recorded photos in JPEG. Now, I bitterly regret not having them in RAW files… So I can’t exploit them to their full potential. And even if recording both formats for each photo takes up space, an external hard drive of several TB costs less than 100 euros these days! So why deprive yourself?
Our photography equipment
History
You need to keep in mind that we renewed our photography equipment in 2016, a year after returning from our world tour. Thus, all the models presented above weren’t yet available at that time.
Since we travel and hike a lot, we didn’t want equipment that was too heavy. But on the other hand, I was starting to get really interested in photography and wanted equipment that would allow me to evolve without limiting me.
At that time (in 2016), Sony was making a lot of noise with its Full Frame mirrorless range (A7 II, A7RII or A7S). They were by far the most compact and light Full Frame bodies on the market! Additionally, Sony also offered the very good A6000 as a lighter and cheaper alternative model with an APS-C sensor. Since we weren’t using any particular brand, we thought mirrorless cameras were really ideal for us and opted for the Sony brand. Within a few months, we had bought the Sony A6000 and the Sony A7 II.
Current equipment
Body
Then, after 5 years of good and loyal service around the world, our Sony A7 II gave up. We replaced it with its big brother, the Sony A7 III, since we had a good range of lenses for the Sony mount. Even though this body represents a significant investment, we’re more than satisfied with it and highly recommend it! Its advantages? It’s weather-sealed, has very good low-light performance, and 5-axis in-body stabilization.
But as I said above, bodies are only half the equation. We still needed to buy some quality lenses to cover most of our photography needs. So at the time, I decided to invest in a versatile lens (zoom) suitable for landscape photography (wide angle) for the Full Frame body of the A7 II.
Lenses
The problem with lenses that exploit large sensors is that they’re larger and therefore heavier than lenses made for APS-C sensors. So to keep the body’s lightness advantage, you have to make compromises on the lens side. Impossible therefore to buy a lens that opens to 2.8 while maintaining reasonable weight. Generally, lenses with smaller f-numbers are larger and heavier.
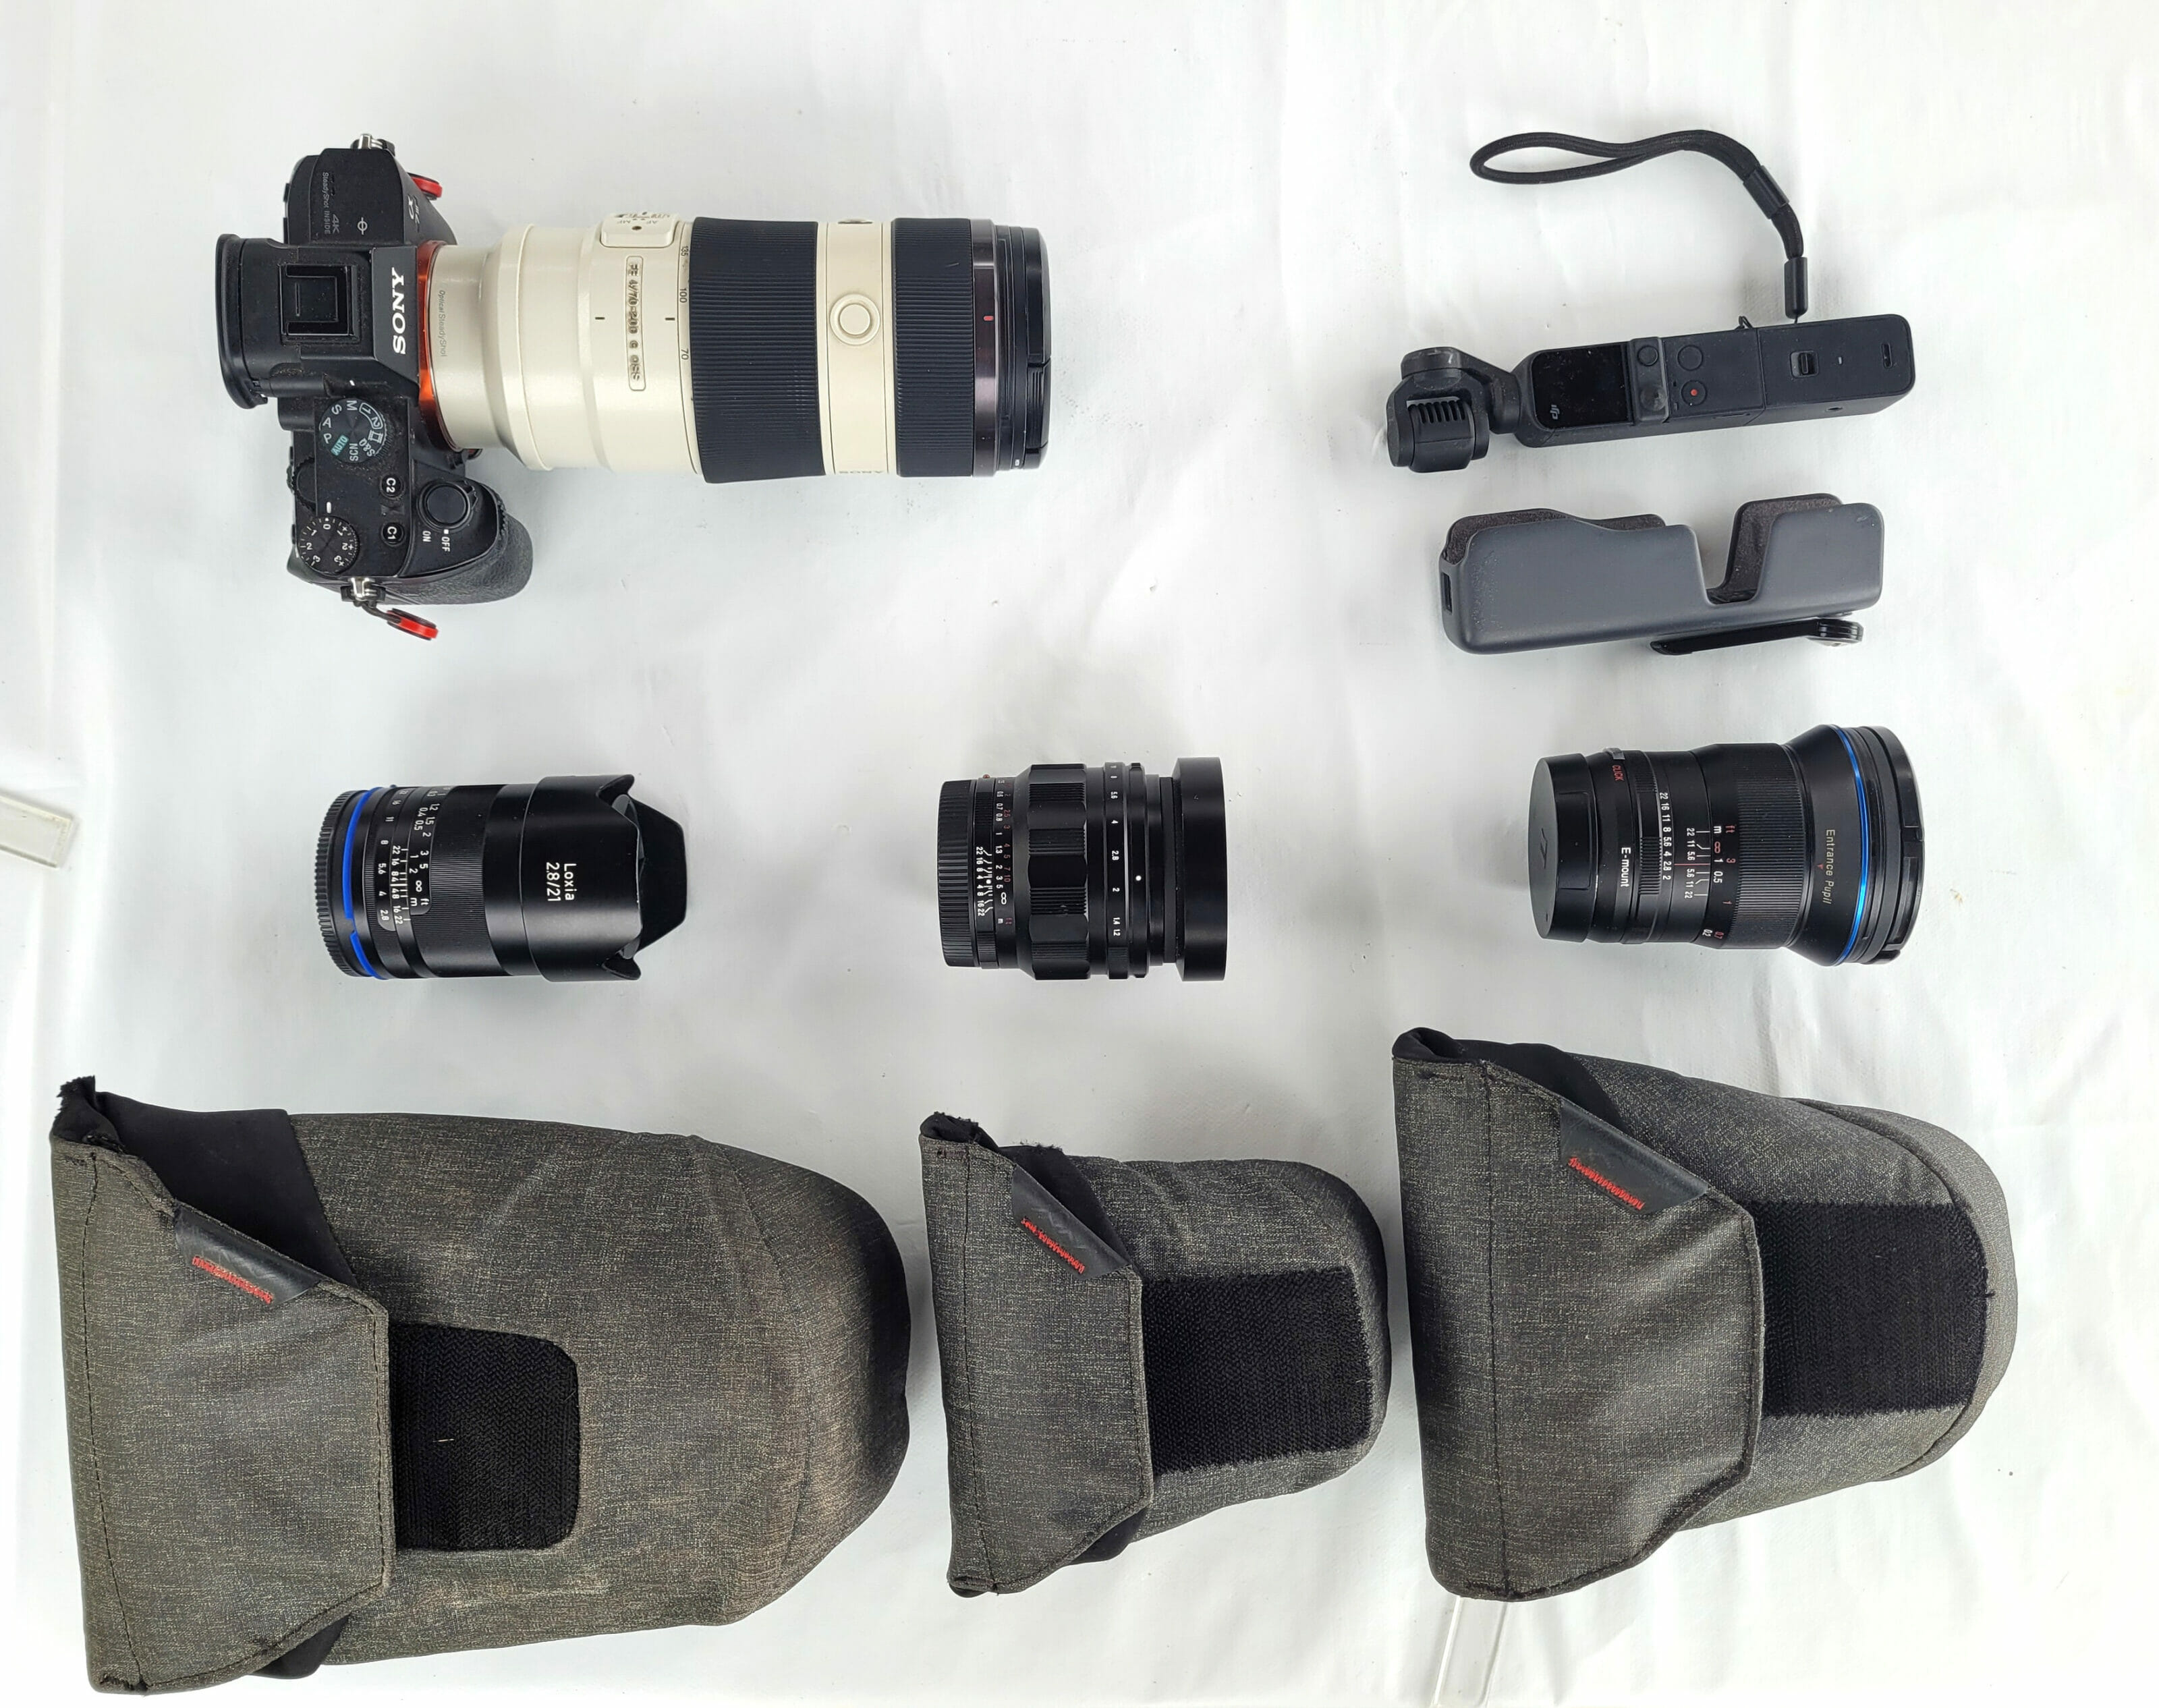
I therefore chose the Zeiss FE 16-35 F/4 OSS lens which, despite its price, fully satisfied me. It’s the focal range I used 50% of the time during that period. Its performance is remarkable on many points (see a test here) and its weight is acceptable (500g and 1.1kg with the body). And despite its relatively low maximum aperture (f4), I still manage to take acceptable night photos. Plus, I rarely need to change lenses in low-light situations bare-handed, without a tripod.
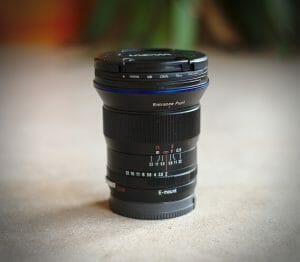
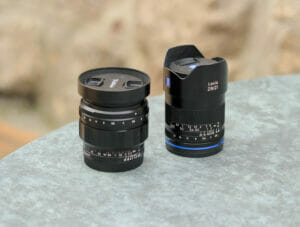
For our last trip to Lapland, I invested in a new wide-angle and brighter lens for northern lights photography: the Laowa 15mm f/2 FE Zero-D. This lens is a little gem that opens to f2 while having very reasonable weight and size for a Full Frame wide-angle lens. But be careful, it’s a manual focus lens. To go further, read the test here. Otherwise, in the following months, I also bought out of curiosity an old manual 50mm fixed focal length, the Minolta MC Rokkor 50mm 1:1.4 (read the test). Finally, I find myself using it often when I need depth of field. Bonus: it’s excellent value for money.
I also received a nice birthday gift one day: the Sony FE 4/70-200 G OSS lens. However, I don’t always carry it because even though it’s very light in its range, it still weighs 840g and I don’t always need such zoom. Well, I still managed to carry it for 3 weeks of self-sufficient hiking on the Via Alpina!
Finally, over the years, I realized that for the f15-f50 focal range, I don’t really need an autofocus system since I mainly do landscape photography. So I now prefer to invest in manual fixed focal length lenses. This type of lens is generally smaller, brighter, and allows me to be more creative in my photos.
Following this logic, I recently bought the Voigtländer Nokton 40mm F1.2 (read the test here) and the Zeiss Loxia 21mm F2.8. These 2 lenses are very compact and bright, and I generally prefer them to the larger Zeiss FE 16-35 F4 zoom, which is bigger and less creative. Actually, if you do landscape photography, I really recommend testing manual lenses!
So here’s what our photography + video equipment looks like most of the time in 2026. Because yes, we also have an Osmo Pocket 2 for video, but we might talk about that another time.
Would I make the same choices if I had to buy my equipment again today?
Difficult question! I could be tempted to stay with APS-C format with a body like the Sony Alpha A6600 (or Fujifilm X-T4) rather than going Full Frame. I would buy brighter lenses, with smaller f-numbers than f4. This way, I could still save weight without losing too much in low light (although I’d need to test). Especially since these two cameras are weather-sealed, stabilized, and can shoot 4K video.
But for now, the weight of the A7 III doesn’t bother me that much and I’m really completely satisfied with its performance. So I don’t really have a reason to change!
Useful photography accessories for travel
In addition to the body and lenses, it seems important to mention some photography accessories in the context of this camera article. There are indeed some objects I simply couldn’t do without in my travel photography practice!
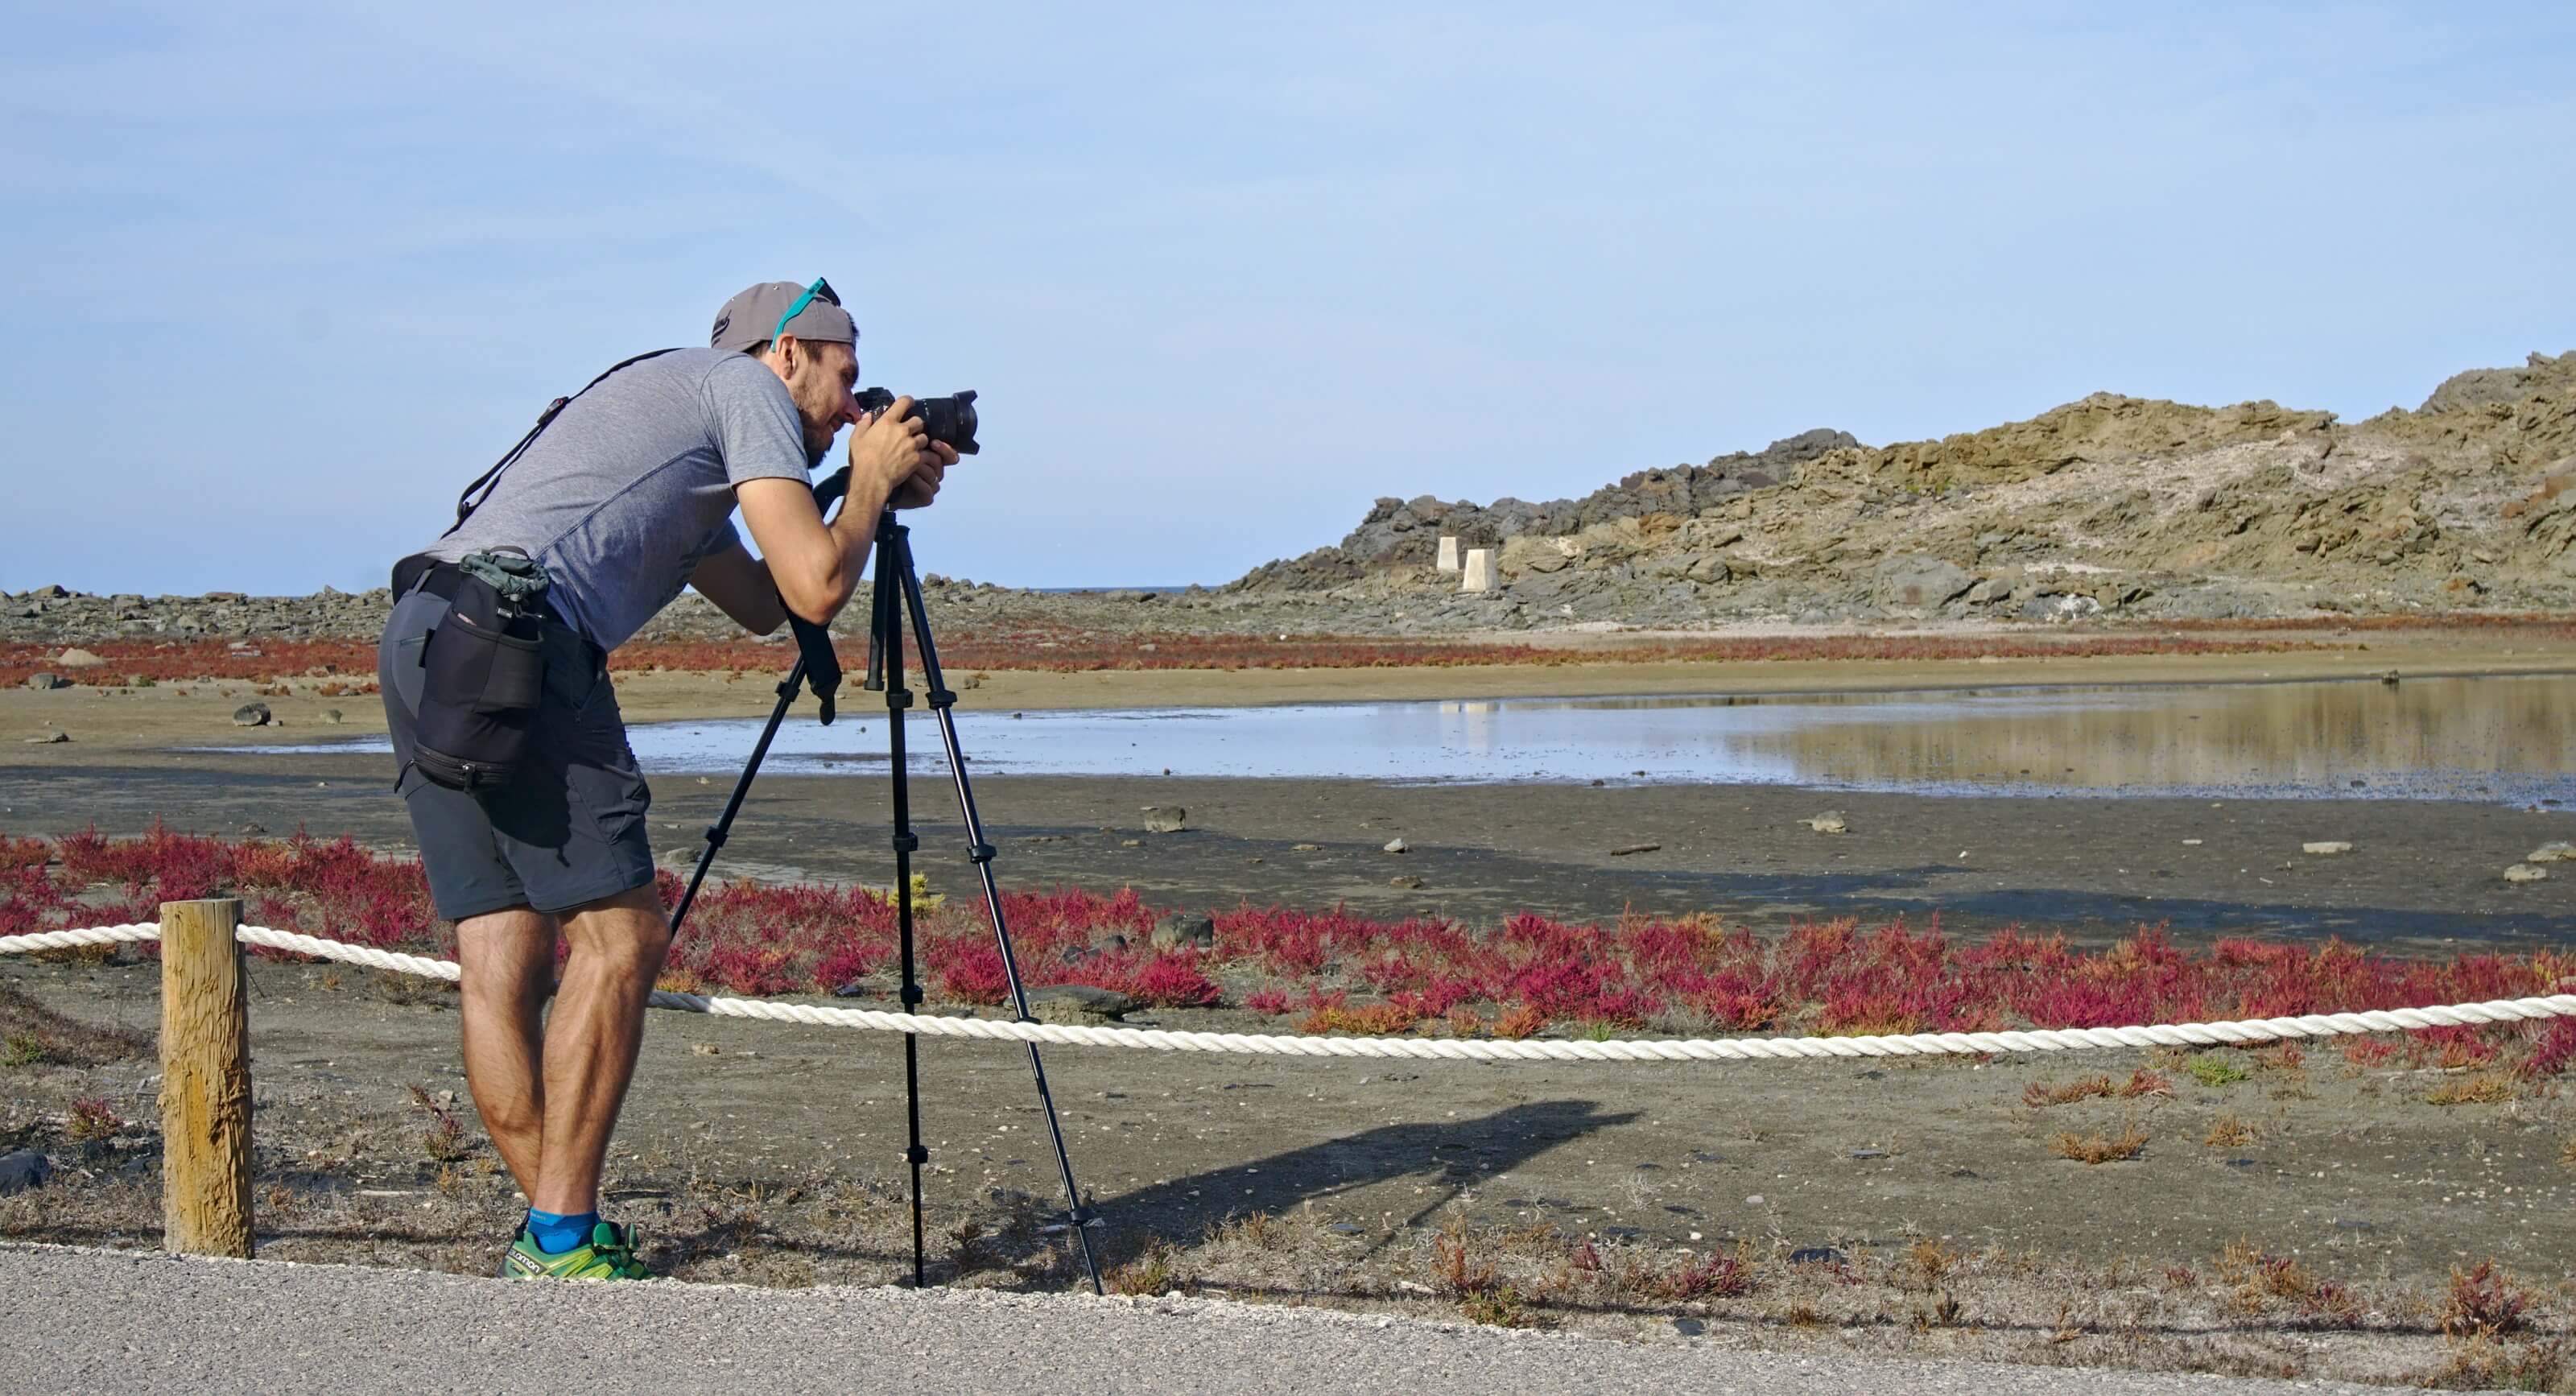
Tripod
A tripod is the essential element for taking beautiful night photos, cool long exposures (to smooth water, for example), making timelapses, or just taking photos of yourself when no one else is there.
I own 2 tripods, a GorillaPod and a more standard, very lightweight carbon Sirui tripod.
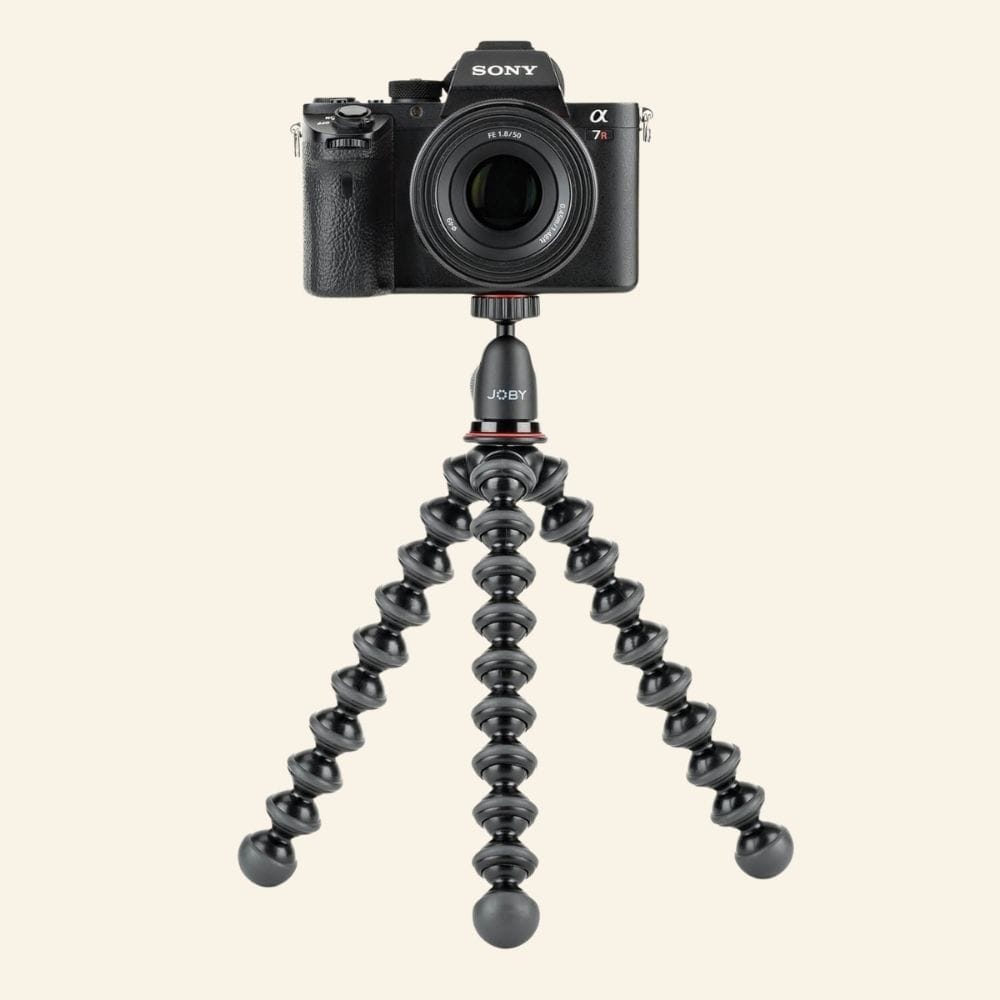
GorillaPod
The GorillaPod is a flexible and very practical tripod that can attach anywhere thanks to its malleable feet. We take it with us when we need to watch weight in our backpacks, it’s very compact and light (something like 400g). We had it, for example, when we hiked 23 days self-sufficiently on the Via Alpina trails in Switzerland.
Even though it’s a very good tripod, it’s still less stable than a more standard tripod because of its small size. When it’s windy, it’s a bit annoying. And since it doesn’t have telescopic legs, it doesn’t allow you to do everything either. But typically for long-term travel, it’s probably the choice I’d make.
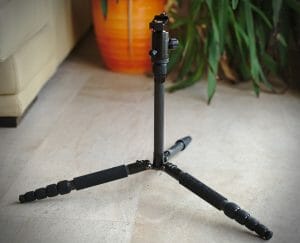
Sirui
I invested in the Sirui T-025X Carbon tripod and tested it for the first time on the Kungsleden, a 7-day trek in Swedish Lapland and I’m DELIGHTED! This tripod is ultralight, between 700 and 800g if you leave or don’t leave the center column to gain some height, but it makes no compromises on stability. Plus, it’s compatible with the capture pro clip, which means I no longer need to unscrew the clip plate when I want to use the tripod. In short, I should have invested earlier!
Fastening systems and straps
If there’s one accessory brand I recommend, it’s Peak Design. This brand has super innovative products that make the photographer’s life easier and are of very good quality. I own 2 accessories I couldn’t do without now:
- the Capture Pro clip: since we hike a lot with our backpacks, we quickly noticed it’s annoying to have the camera dangling and bouncing with each step. But thanks to this accessory, it’s over! We simply attach the Capture Pro clip to the backpack strap or belt, which allows us to easily clip and unclip the camera while hiking. This clip is so good that we bought a second one and never move them from the backpacks.
- the Slide strap: again, there’s nothing worse than a strap that doesn’t easily come off the camera when you want to put it on a tripod or stabilizer. Thanks to the ingenious and robust system of the Slide strap, I can easily clip and unclip the camera from the lanyard when I need to. Really a must!
Lens pouches
Before, when lenses were in the backpack, I was often too lazy to open the bag to change lenses. Plus, I was also looking for lens protection covers, mainly for transport in a backpack. I didn’t want to buy a special camera backpack, not flexible enough for my needs.
So I killed two birds with one stone by buying protection pouches that attach to the belt. When I’m out and about, I always have one or two lenses available on my belt. Plus, these covers have built-in rain protection just in case. And when we travel, I can use them to protect my lenses while carrying them in any backpack. Honestly, thanks to these pouches, I no longer hesitate to change lenses to take the photo I want. In short, these pouches were my best investment in 2017!
Other accessories
- Microphone: if you do video, you’ll probably want to invest in a small microphone to record quality sound.
- Filters: personally, I mainly use neutral UV filters to protect my lenses for now. I also have polarizing filters, which, in addition to protecting lenses, eliminate certain reflections and allow for more beautiful skies. However, they let less light through. As for me, I don’t have ND filters, useful for reducing light entering the lens and making long exposures in broad daylight. Actually, I can more or less replace them by overlaying multiple photos for a similar result.
- SD cards: We have several standard 128GB SD cards for photography and video without too much hassle.
Tips for taking beautiful photos while traveling or hiking
Once you’ve chosen the right camera, it’s time to get practicing! Here are a few tips to improve the quality of your photos.
- Don’t be afraid of manual modes (PASM)! Your camera’s automatic mode won’t always make the right choices for you. Take some time to understand the three fundamental components of photography: aperture, sensitivity, and exposure time. By taking control of your camera, you’ll get better results.
- Go out in the morning and evening. The light after sunrise and just before sunset (the famous golden hour) is warmer and softer and will enhance your shots.
- Think about the foreground. When photographing a landscape, always try to add an element in the foreground to enrich the photo.
- Want to take beautiful photos at night or of the Northern Lights? Luckily, I’ve written a whole post on this subject ;).
- Theory is good, but practice is even better. Take your camera out as often as possible, experiment, change your perspective, make mistakes… It’s always through practice that we improve the fastest ;).
Useful resource
Here is one site I really like and on which I learned a lot for my photography practice.
Philippe Reeve: this English site is run by a few independent photographers, not sponsored by brands. It’s my reference for everything related to Sony brand photography. I learned about the interest in reviving old manual lenses on Sony Full Frame bodies there. Additionally, I find lots of information about equipment or photography advice there.
Well, I think I’m done with this guide which, I hope, will guide you in purchasing your future travel camera! I try to keep this article updated as well as the camera comparisons, but if you have any remarks, don’t hesitate to comment on the article below. And if you like this guide, share it around you!
Pin it


The world of camera’s! I love how vast and diverse it can be, but at times it seems like to much to handle! articles like this help break down that creeping anxiety that always seems to come back around when its time to look into a new rig. Thank you for that!