
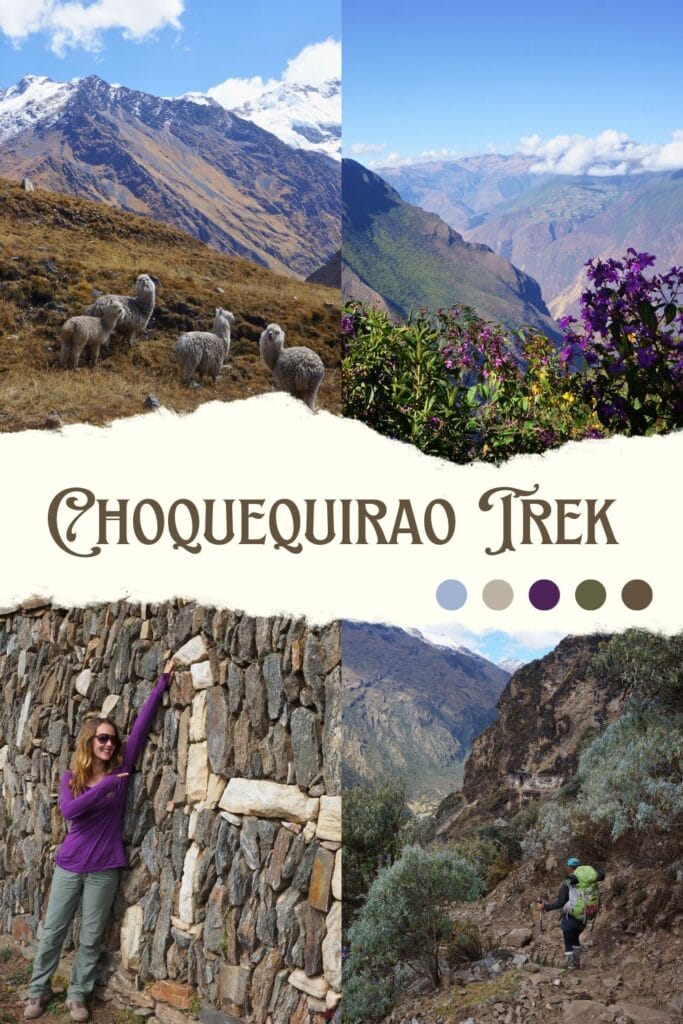
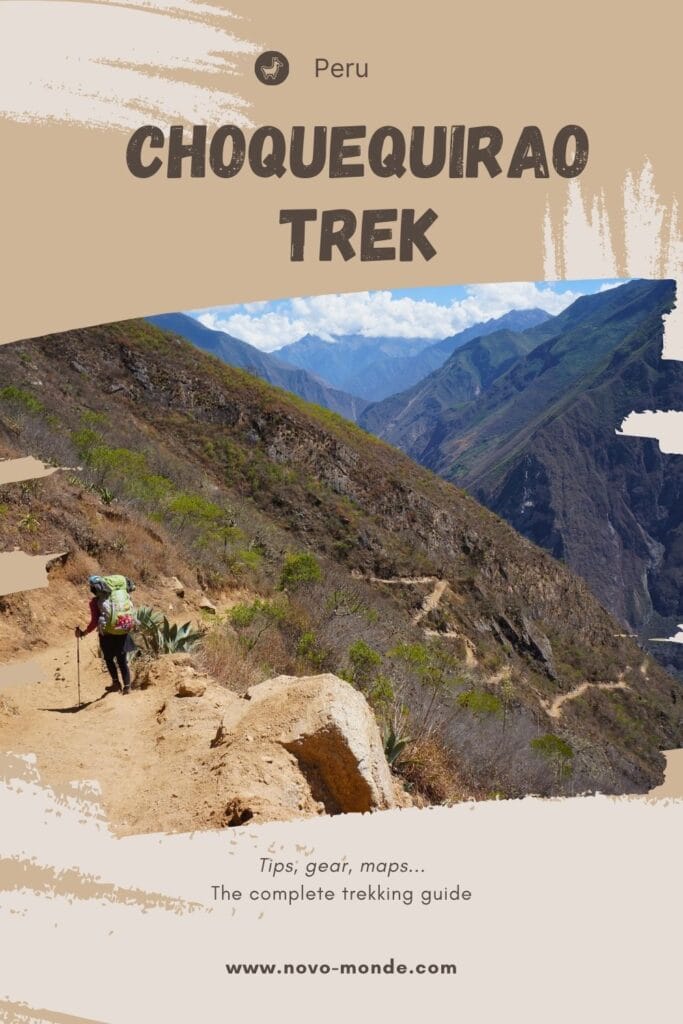
The Santa Cruz trek and the hikes in Huaraz were just a taste of the Peruvian trails. To cap off our journey in Peru magnificently, we decided to walk to reach the famous Machu Picchu. The problem? During the peak tourist season, the classic treks are packed with people, and the prices for Machu Picchu hikes skyrocket. So, we decided to go solo. We set out on a 9-day trek to reach Machu Picchu passing through its little sister, the ruins of Choquequirao, all on a tight budget! It’s the most significant physical challenge of our world tour and one of the most incredible adventures of our journey! Are you coming? Let us tell you all about the Choquequirao trek!
- Choquequirao – Machu Picchu Trek: By the Numbers and Maps
- Video of our Choquequirao trek
- Choquequirao trek: with a guide or independently?
- Choquequirao trek solo: gear, food, and prices for 9 days
- Day 0 of the Choquequirao trek: Cusco – Cachora
- Day 1 of the trek: Cachora – Chiquisca
- Day 2 of the trek: Chiquisca – Marampata
- Day 3 of the trek: Marampata – Choquequirao – Pinchaunuyoc
- Conclusion and information on the Choquequirao trek in 3, 4, or 5 days
- Day 4 of the trek: Pinchaunuyoc – Maizal
- Day 5 of the trek: Maizal – Yanama
- Day 6 of the trek: Yanama – Totora
- Day 7 of the trek: Totora – Playa
- Review before tackling Machu Picchu
- Day 8 of the trek: Playa – Aguas Calientes
- Day 9 of the trek: Aguas Calientes – Machu Picchu – Hidroelectrica
- Conclusion of the Choquequirao trek
We did the Choquequirao trek in 2014, but the article was completely revised and updated in March 2024. If you see any price changes or have additional information that might be relevant, please feel free to leave us a comment!
Choquequirao – Machu Picchu Trek: By the Numbers and Maps
The classic Choquequirao trek typically lasts for 3, 4, or 5 days (we detail it here). We followed this itinerary but with a slight twist. Here, we took the Yanama route, which has the advantage of passing through both the vast regional conservation area of Choquequirao, accessible only on foot, and also through the historic sanctuary of Machu Picchu! In summary, it’s a 2-in-1 trek that we highly recommend 😉. For more inspiration, we’ve written a whole section on other treks leading to Machu Picchu.
Choquequirao trek in brief
- Trek duration: 9 days (7 days of trekking and 2 days visiting Choquequirao and Machu Picchu)
- Distance: approximately 132 km
- Starting point: Cachora
- Ending point: Intihuatana passing through Aguas Calientes and the famous Machu Picchu
- Ascent: 9210 m
- Descent: 9200 m
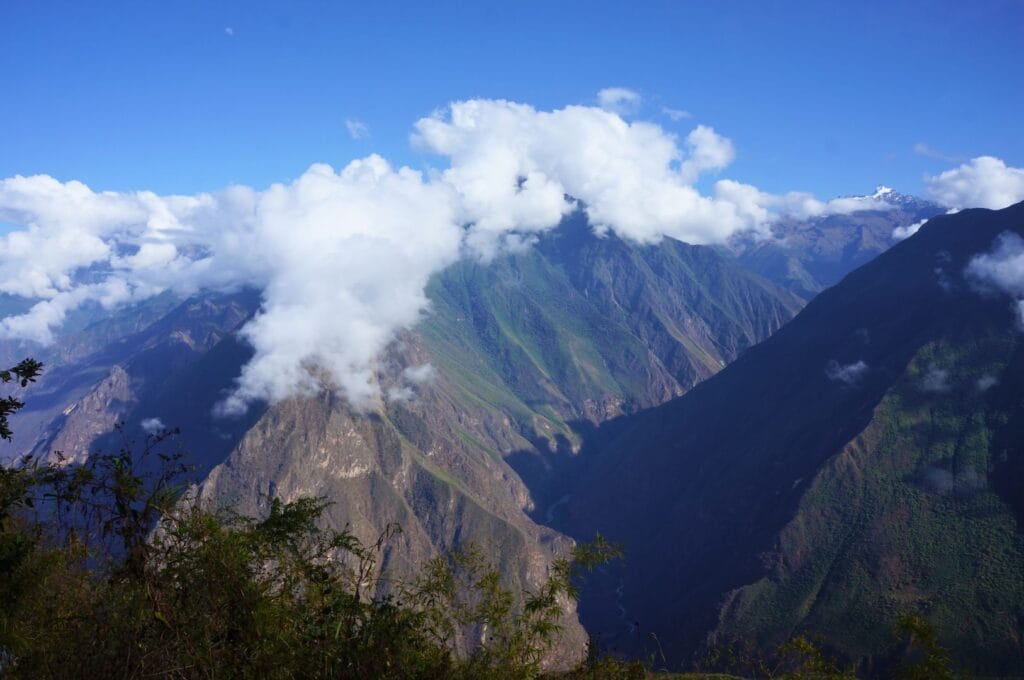
- Difficulty: I would be lying if I said it was an easy trek! In itself, it is accessible to all without real dangers, but good physical condition and motivation are required! You will likely struggle along the way, but your suffering will fade in the face of the wonders you’ll encounter 😉 Don’t forget to acclimatize! You’ll pass through extreme altitudes: the trek ranges between 1500 and 4600 meters above sea level. For this, we recommend passing through Huaraz to train your body for altitude.
- Direction: it’s entirely possible to do the Choquequirao trek from Machu Picchu to Cachora. However, would we recommend it? Not sure… If you want to take a mule, you’ll have more difficulties finding one in this direction than starting from Cachora. Also, wouldn’t Machu Picchu be the reward after 9 days of intensive walking?!
- Season: the best period to do the Choquequirao trek is the dry season, from May to October. This long hike can also be done during the rainy season, but the route may be altered due to possible floods and landslides.
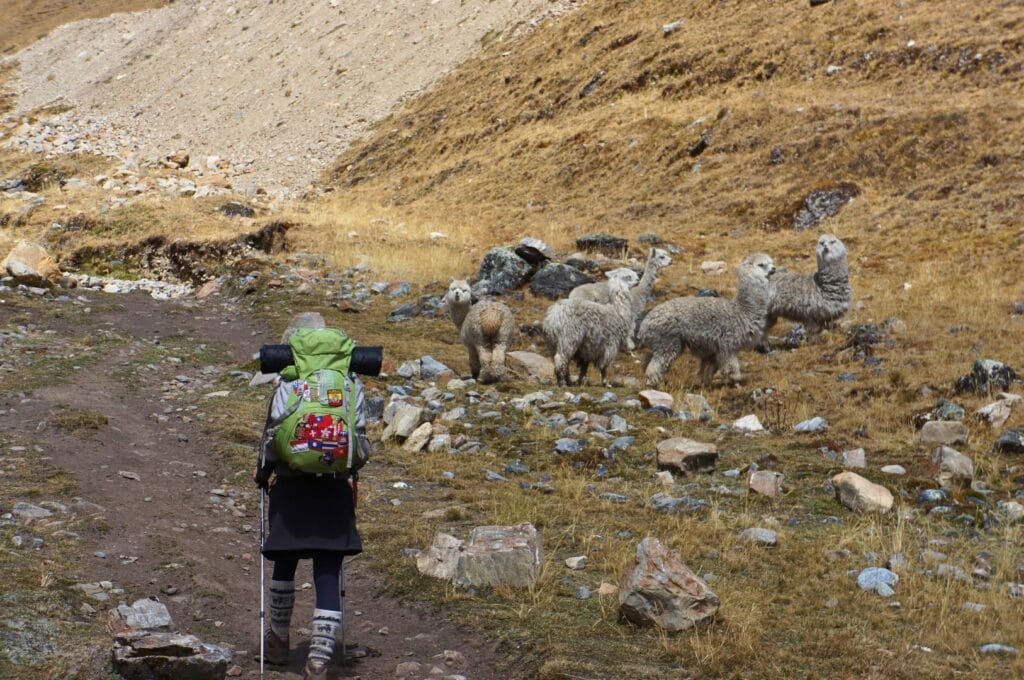
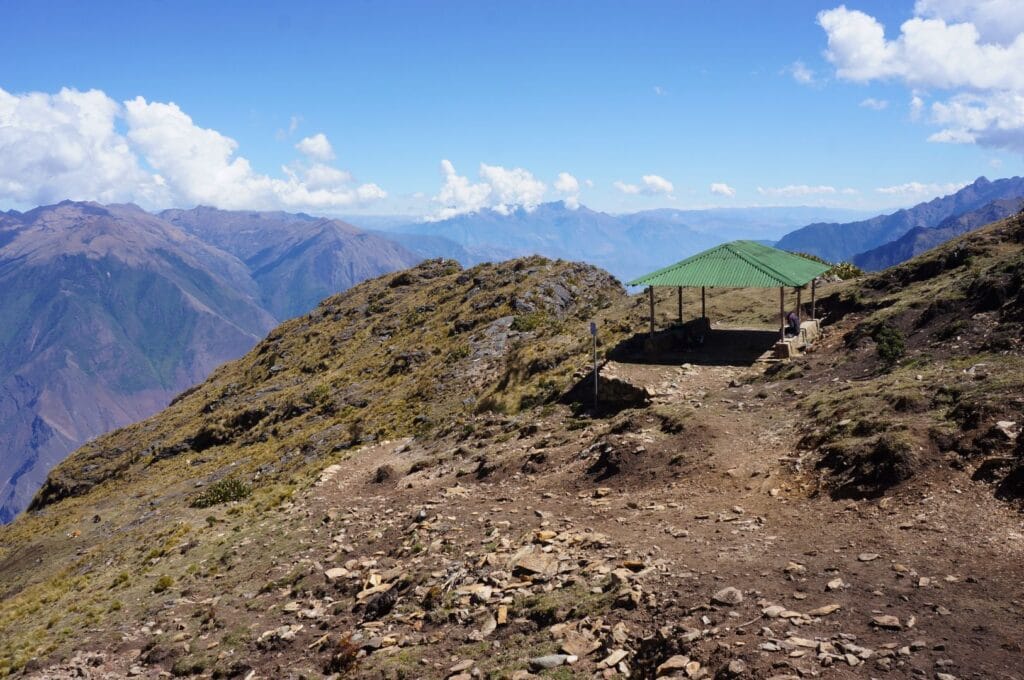
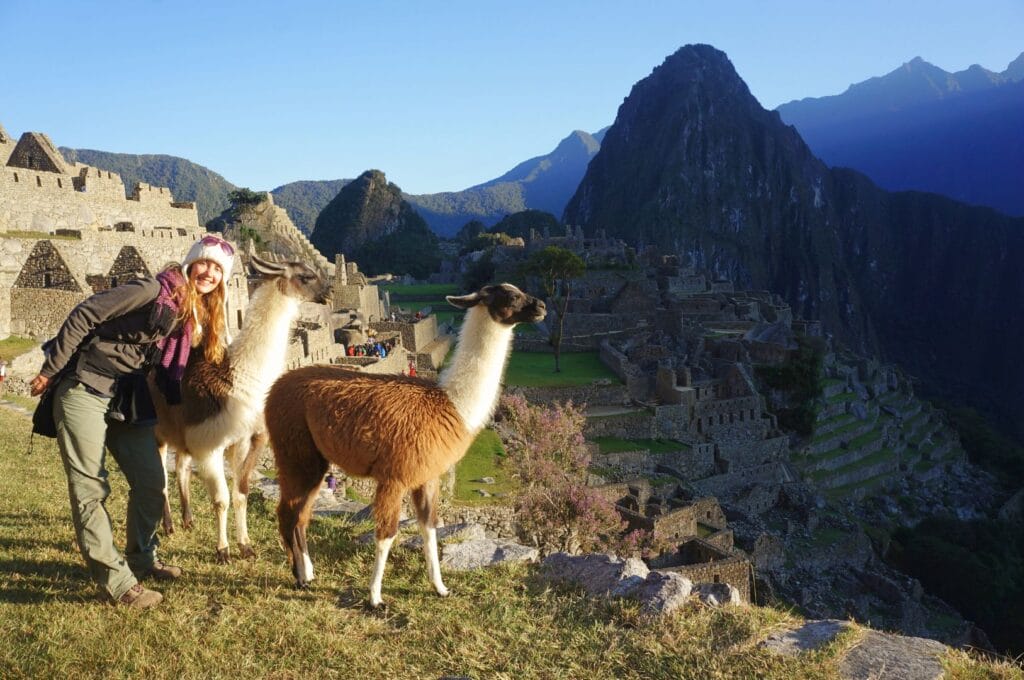
- Trek highlights: the ruins of Choquequirao, the panoramic view passing through the San Juan pass, Machu Picchu (don’t forget to buy your tickets before the trek!), and of course, the peace (we only encountered one other couple on the trail!)
- Number of llamas encountered: 5
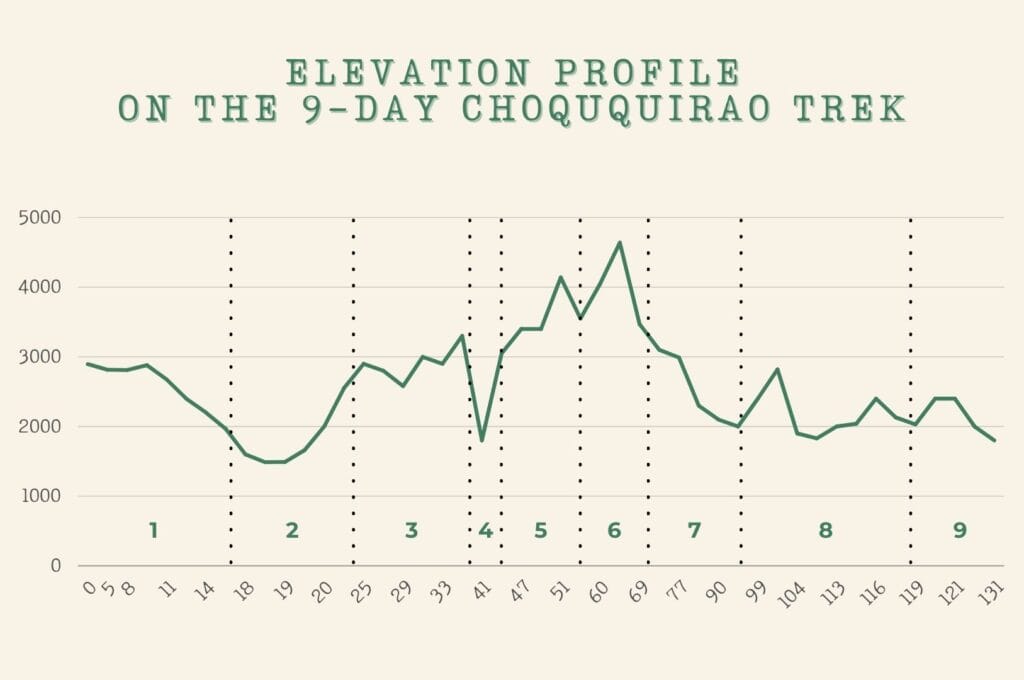
Choquequirao – Machu Picchu trek map
To give you an idea, here’s a representation of the elevation gained over kilometers/days.
And for orientation, here is a trekking map that you can download. We’ve also included maps of each day in the trek description. We recommend having them on your phone; you’ll find plenty of information on them throughout the trail about places to resupply.
To download the track you simply need an account (free). From there, you can export the map in the format of your choice. Note: for this trek, we strongly advise you to have access to an “offline” map.
Free version: create an AllTrails account and download our map in KML format. Then import this track into the maps.me application (also free).
Alternative: You can create an AllTrails+ account and access the map offline from your phone. The AllTrails+ account normally costs €29,99 per year but by going through our link, you will benefit from a 30% discount the first year.
Video of our Choquequirao trek
To give you an overview of what we saw and experienced during these 9 days, here’s the Choquequirao trek in video! Find all our other travels on our YouTube channel!
Choquequirao trek: with a guide or independently?
The Choquequirao trek is one of several multi-day hikes leading to Machu Picchu that can be done with a guide or independently. Both have their advantages and disadvantages!
- Price: this is the first criterion to consider in the final decision. The all-inclusive solo trek will cost you around $250 per person; we detail this budget a bit further down. Through an agency, you’re looking at a minimum of $500 per person!
- Guide and safety: it has to be said that this is no easy trek, and knowing that there’s a guide and all the necessary assistance in case of injury or the slightest glitch is reassuring! In any case, the trail is well-marked, and with downloaded maps, you shouldn’t get lost. Tip: if you opt for the 9-day trek on your own, we recommend at least 2 people. As the trail is long and not very busy, it’s best to be accompanied to avoid any problems! On the other hand, it’s no problem to go as far as the Choquequirao ruins and come back on your own for 4 days.
- Food: with a guided tour, you don’t have to worry about your future meals because a chef accompanies you on the trek to prepare delicious dishes. In short, no need to calculate food and you will have varied menus. Also, you don’t have to carry your provisions on your back, the mules will take care of them for you.
- Camping equipment: this is undoubtedly one of the most important criteria… Are you ready to walk with a backpack of over 10 kg on your back for 4 or 9 days? If you have no camping gear, you will need to rent or buy it in Cusco (there is no shortage of shops!). With a tour, everything is provided (except perhaps the sleeping bag which you can rent and hiking poles) and the equipment is transported by mules. Independently, you may find a muleteer who will agree to accompany you and relieve you on the journey.
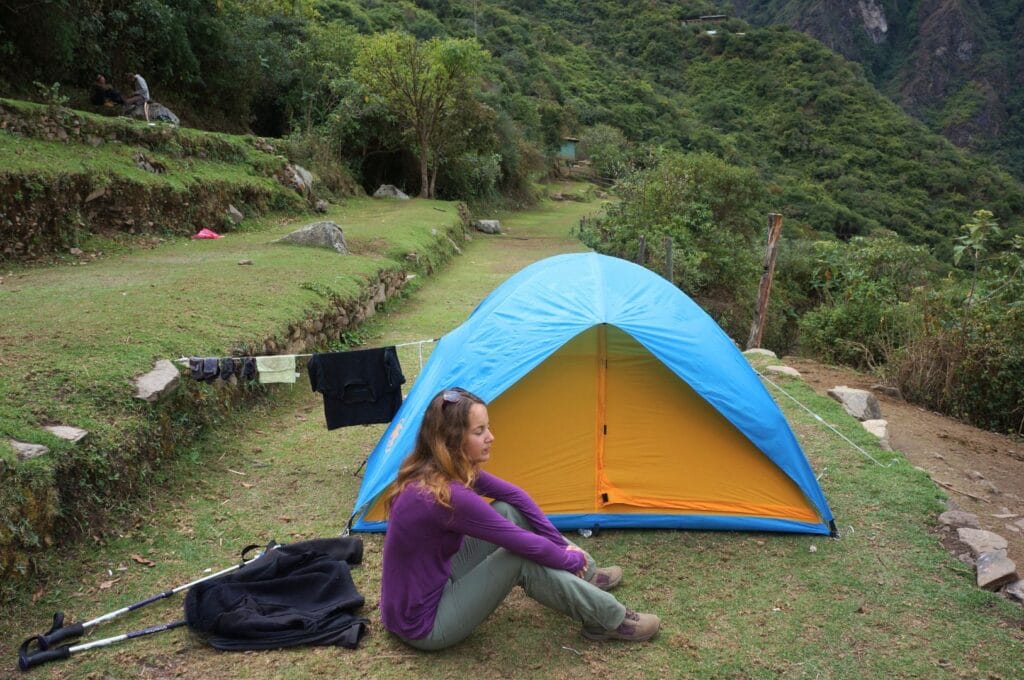
- Accommodation: no worries when going with a guide, you will have a good tent and everything you need for comfort. Independently, you are free to pitch your tent in one of the many campsites along the trek. They mostly offer meals and showers. For your information, campsites predominate (it costs about 5 soles per tent), but you have the option of spending a night in accommodation at certain stages of the Choquequirao trek. We have specified the different types of accommodations in the practical information for each day. However, we advise against doing the trek only with accommodation rather than camping because it will make for long days of walking. Furthermore, you can imagine that the choice of solid establishments is limited, so it’s better to book in advance!
- Freedom: that’s one of the advantages of doing the trek solo! You stop when you want, walk and take breaks as you please… Plus, there’s a chance you’ll be alone in the world until Aguas Calientes!
Note: however, if you’re thinking of using an agency, be careful. Prices vary widely and you might be tempted to choose the cheapest trek. However, by opting for these tours, agencies take a big cut from the wages of guides and muleteers. Moreover, you’re more likely to end up with poor-quality equipment and unfriendly staff… The tours we present are in the average price range, which ensures you good equipment and values the work of the guides.
This article contains affiliate links to partner sites. When you use our links to book accommodation, a car, or an activity, you don’t pay anything extra, but we get a small commission. This helps us to offer you free, independent, and ad-free content. Thank you for your support!
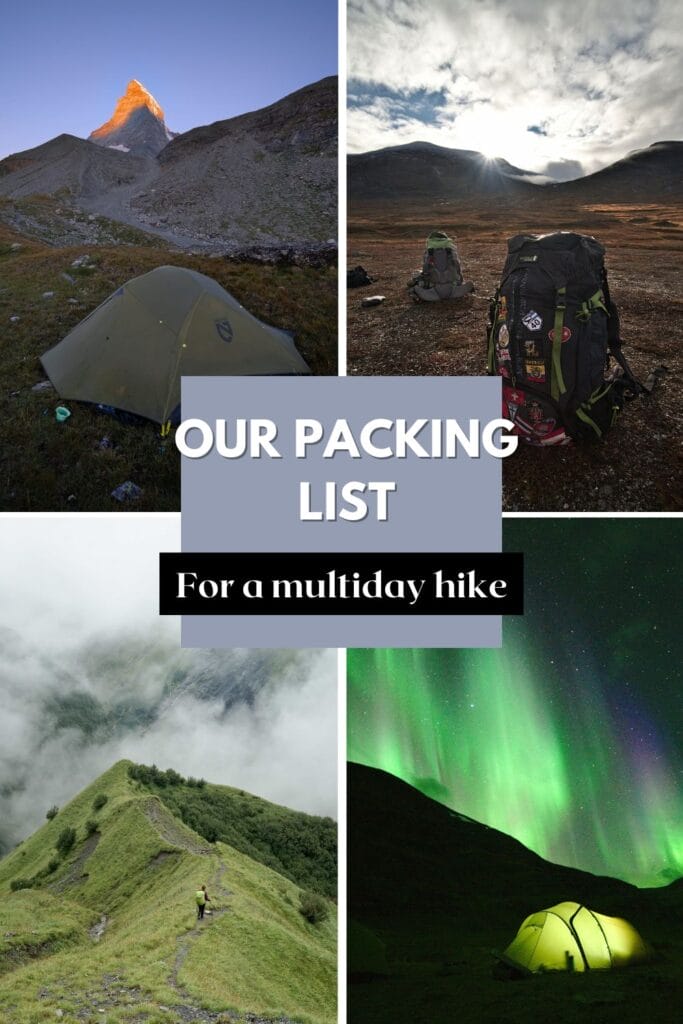
Choquequirao trek solo: gear, food, and prices for 9 days
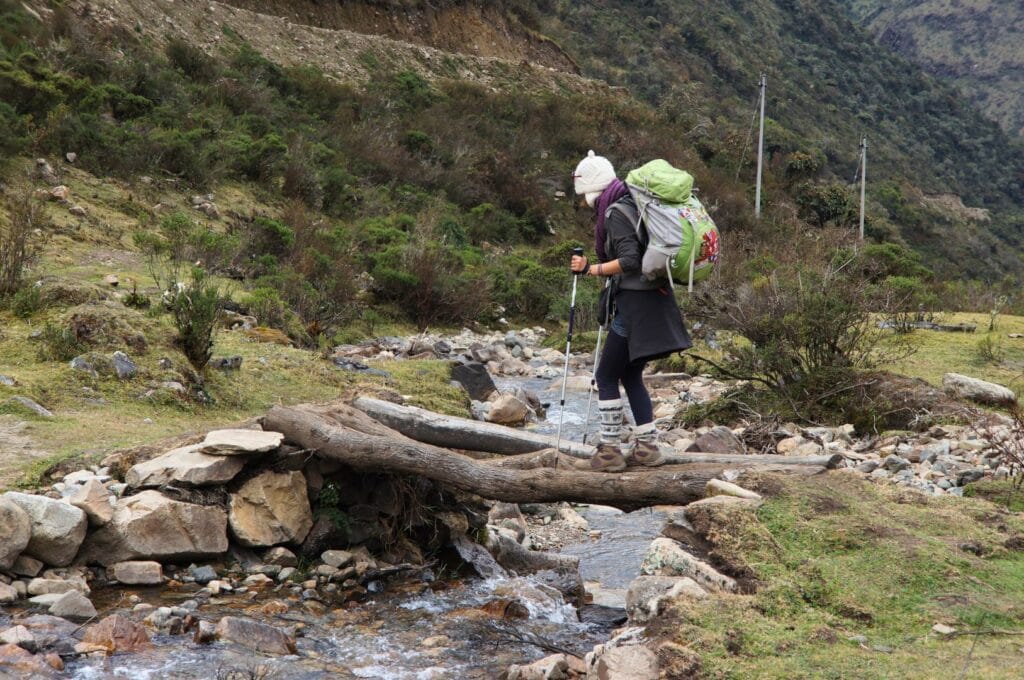
A solo trek without a guide or mule requires some planning! You need to organize yourself and only take the essentials to avoid being overloaded. The gear is heavy, after all!
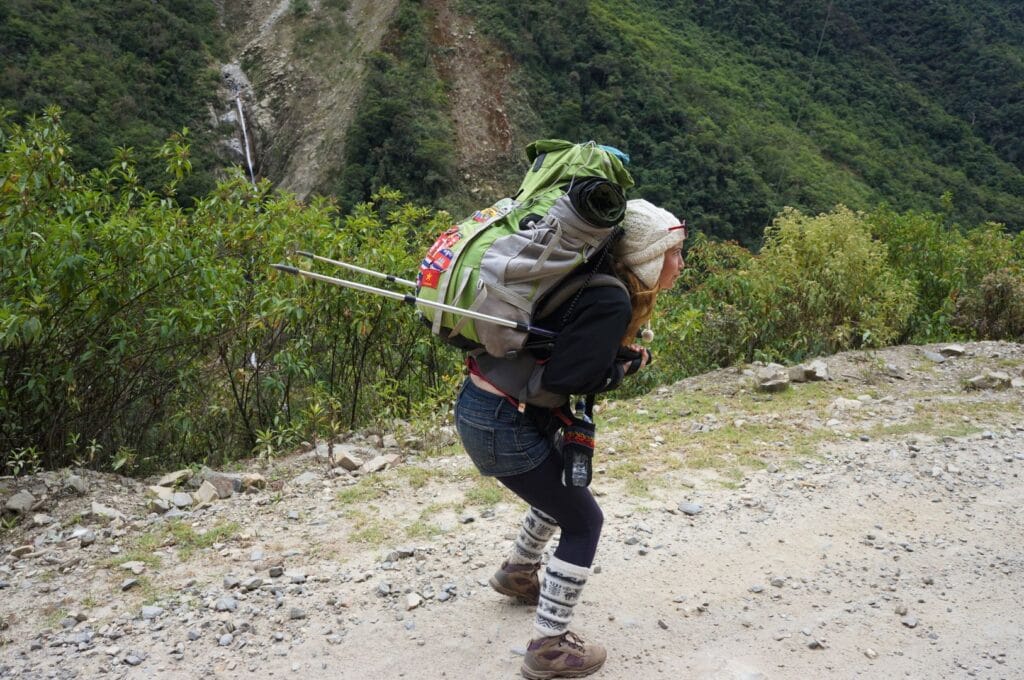
Well, it’s no secret that I’m not an outstanding hiker. So, I meticulously packed my backpack to carry the minimum. I then flattered my man extensively about his Apollo-like muscles so that he naturally decided to take a good portion of the common gear. (Well, ladies, you’ll know that flattery works wonders in these situations!)
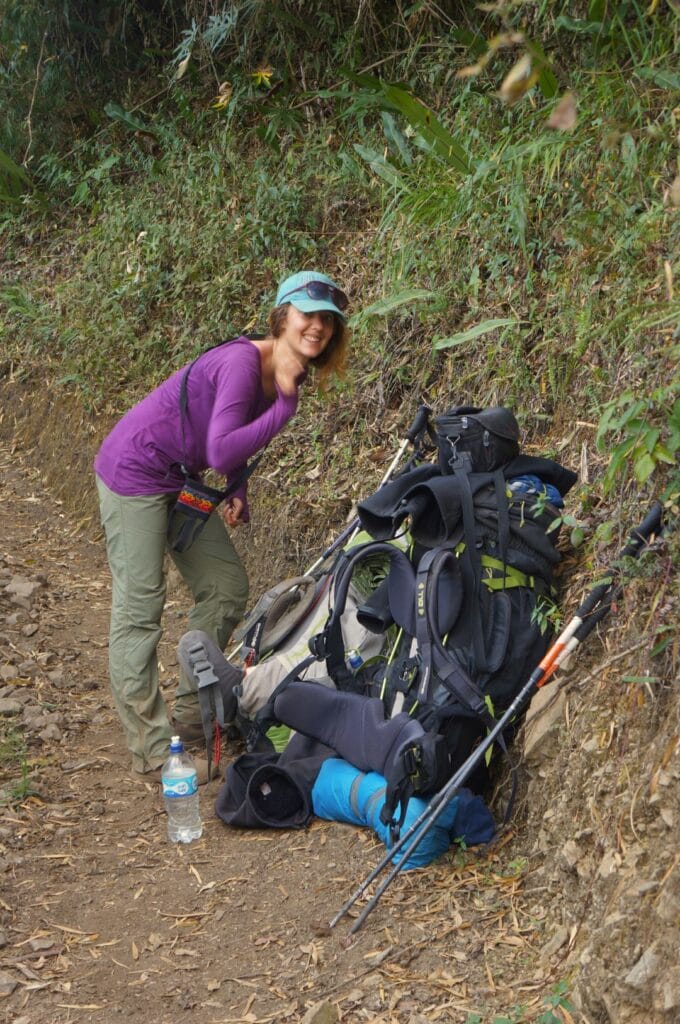
In the end, I embarked on the trek with a backpack weighing about 10-12 kg, and Ben, 18-19 kg! A perfectly balanced distribution! Monsieur carried the tent, cooking equipment, canned food, and snacks… On my side, I had the toast bread, toilet paper, sugar, and the deck of cards! It may sound unfair like that, but I guarantee you that considering our respective physical conditions, it rather equalized the chances…
Tip: once again, keep only the bare minimum with you. The Choquequirao trek is demanding, so every gram counts! We left the rest of our belongings in our accommodation in Cusco. Most establishments will keep your luggage for free or for a few soles.
It’s better to organize directly in the village of Cachora if you want a mule for several days. You will indeed have plenty of choices! Make sure to inquire about the living conditions of the mules, which can be alarming… Some tours and independent muleteers have no qualms about mistreating their animals. Expect to pay 100 soles per day for a mule and a muleteer (arriero): 40 for the mule and 60 for the muleteer, including 20 soles for his meals. Also, plan to pay for the days it will take him to return to Cachora.
Equipment
In our backpacks, we each had:
- a sleeping bag with a comfort temperature of -10 degrees;
- a small self-inflating camping mattress;
- a headlamp;
- a fleece, a softshell and a windbreaker;
- 2 T-shirts, 1 pair of pants, 2 pairs of socks and 3 spare underwear;
- gloves and a hat;
- hiking poles.
Regarding the weather, it can be quite varied between the first days when the sun beats down, the passes where the temperatures drop, and the last days when you get closer to the rainforest around Machu… So, it’s ideal to vary the layers to adapt as best as possible to the temperature changes.
Additionally, in Fabienne’s backpack:
- a mini first-aid kit with some adhesive bandages and painkillers as well as Micropur tablets to purify spring water (count 2 liters/person/day) if you don’t have a lifestraw filtering bottle (more effective than tablets);
- 2 rolls of toilet paper;
- a deck of cards;
- sunscreen;
- mosquito repellent;
- a microfiber towel;
- toothbrushes + toothpaste, hairbrush, soap, cleansing wipes, deodorant.
In Ben’s bag:
- a compact 3-seater tent;
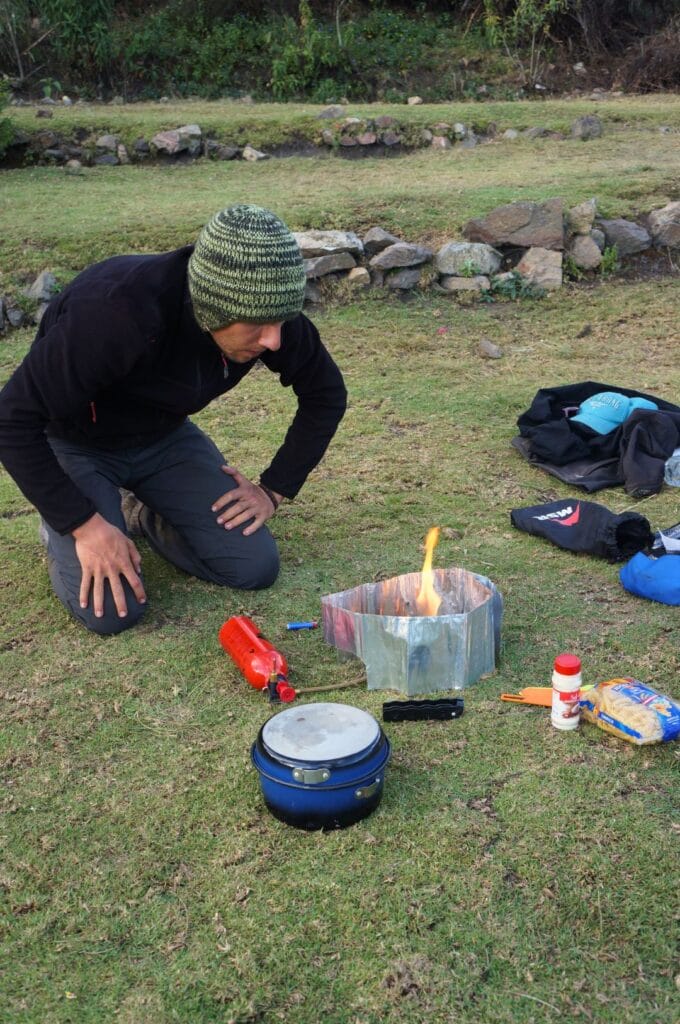
- an MSR gas-powered cooking stove;
- a small camping pot and 2 forks;
- Swiss Army knife (of course!);
- thermos flask;
- most food and snacks;
- a topographical map of the area.
For more details on equipment, see our article on trekking gear and our bivouac guide. Also, you’ll find plenty of specialized outdoor stores in Cusco to rent or buy what you need.
Food
Main meals
In terms of food, it’s a bit more complicated… On the Choquequirao trek, you can eat in people’s homes for about 10-15 soles per person throughout the trail.
A few very basic tiendas (small shops) sell basic ingredients along the way like potatoes, rice, canned goods, pasta, and sweet drinks.
Otherwise, the campsites also offer meals. For more details, we have indicated all the points of supply in the practical information for each day.
In the end, we left with the equivalent of 6 breakfasts, 4 dinners, and 4 suppers. Chef’s menu? 50 toasts, 800g of ham, 200g of cheese, mayo, dulce de leche for morning toast, 500g of pasta, 500g of polenta, 2 sachets of instant soup, 4 cans of tuna or chicken, 2 cans of tomato sauce, a pack of 12 tortillas for quick sandwiches, and a ton of snacks! To stock up, prefer Cusco to Cachora where the choice will be more than limited.
Snacks
In terms of snacks, we had close to 800g of chocolate, 15 cereal bars (the big ones), nuts, and a hundred caramels. Snacks are just essential to give yourself a sugar boost during climbs. Conclusion: no regrets about taking all that! (Actually, except for 10 caramels, we ate everything…)
In total, the food weighed nearly 8.5 kg for 2 people! In addition to this, we had 2 liters of water each in our bags. We filled the bottles gradually in the streams with our filtering bottles.
Note: our way of eating in trekking has evolved a lot. Truthfully, we wouldn’t take the same things at all if we had to do this trek again now! In fact, what we took is much too heavy! We even dedicated an entire section to food on trekking. Today, it would be more like 6-7 kg for the two of us.
Price of the Choquequirao trek
For once, we don’t have a detailed budget. The numbers below are from Nolwenn, a reader who did the Choquequirao trek and who shares her budget with you.
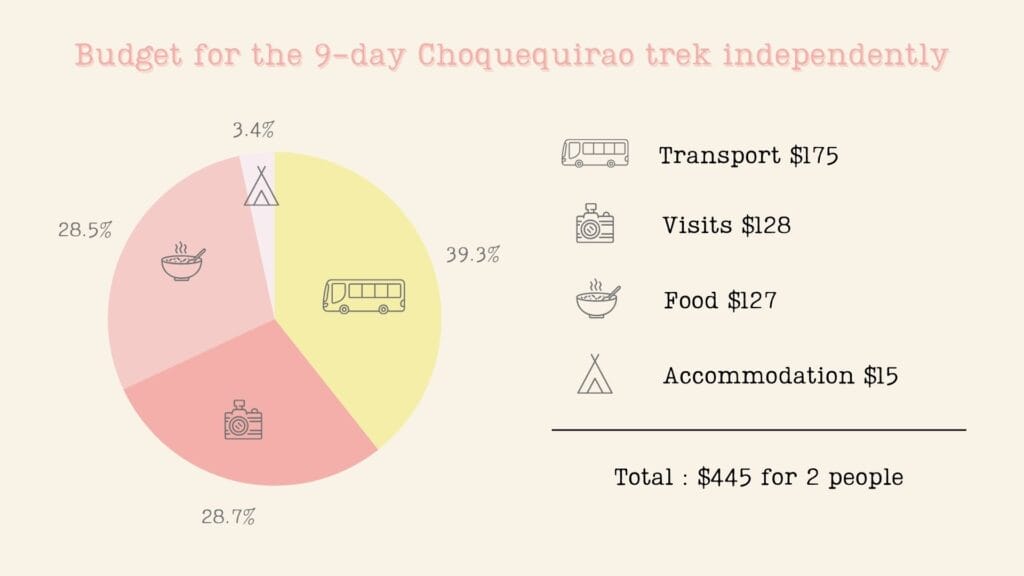
This budget includes absolutely everything, from transport from Cusco to the entrance ticket to Machu Picchu via Choquequirao. We wrote a whole section on booking tickets for Machu.
Day 0 of the Choquequirao trek: Cusco – Cachora
From Cusco to Cachora
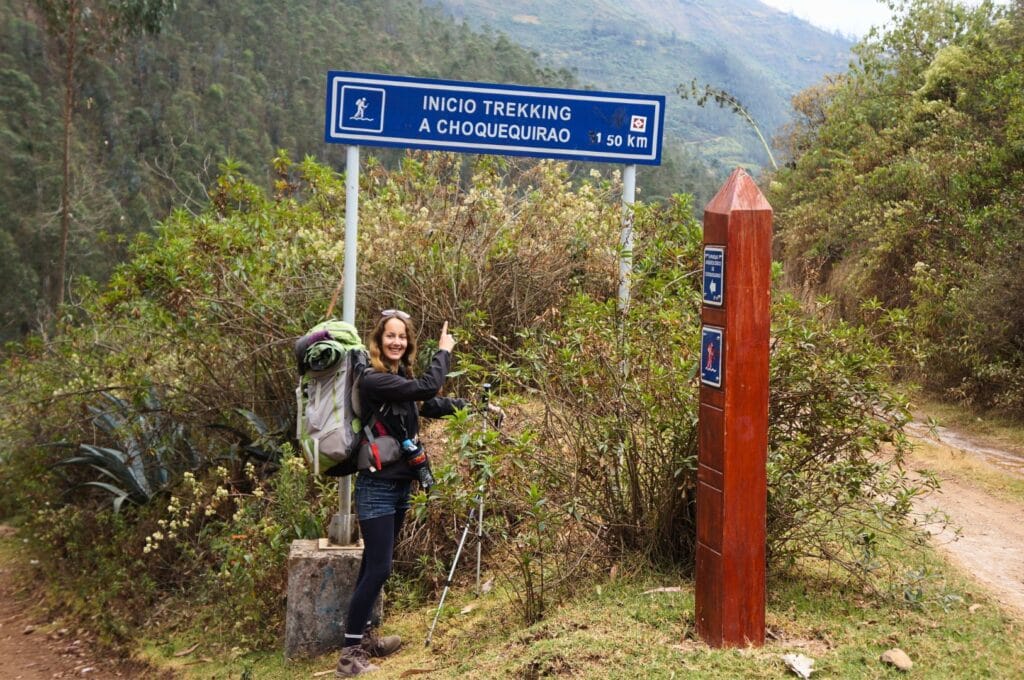
To do the Choquequirao trek to Machu Picchu, you must first go to a small village called Cachora (full name San Pedro de Cachora). From the Cusco land terminal, take one of the buses going to Abancay. Ask the driver to stop at the Cachora junction, Ramal de Cachora. From there, a taxi or a collectivo will take you to the village in 40 minutes. Another possibility is to walk down 8 km, as an introduction to the trek!
Once in Cachora, we quickly found a very basic but extremely cheap hostel. So, full of enthusiasm, we set off to explore the village a bit. The street is deserted, but that doesn’t bother us too much. Then, a little girl opens a door and says to me: “The wasps are going to sting you!”
Attack from the sky
Huh? I think I must have misunderstood… I smile and we continue on our way. Less than 3 minutes later, we are literally attacked by bees! But not our usual bees, huh! Here, these are real killers attacking! One ended up trapped in my hair… Let me explain that I started to struggle like a fool, and in the meantime, Benoit was being chased and running like crazy in the village!
Suddenly, a man opens his door and tells us to come inside! He puts our heads underwater (well, let’s call it a dressed shower). Afterwards, he started laughing! “Only gringos hang out in the streets when bees attack!” Ah, apparently, it’s a common thing… It’s off to a good start! After inspecting our scalps (a few stings for me), we finally have dinner at this really adorable gentleman’s place. A good last meal to replenish our strength for the walk the next day!
Every day, several buses leave Cusco for Abancay. Book your tickets here or here, starting from 50 soles for a 4-hour journey. Once you arrive at the Cachora junction, a whole taxi will cost you 30 soles (don’t hesitate to share with other travelers), or wait for a collectivo to fill up (5 soles per person).
For accommodations, Cachora has a few hotels for less than 100 soles per night (including breakfast) and several campsites. We preferred to spend the night there to start the trek directly the next day. If you prefer to start the same day, you can reach Capuliyoc and its campsite at the beginning of the trek, 9 km from Cachora.

Day 1 of the trek: Cachora – Chiquisca
A tough start to the trek
First day and also the first real contact with our backpacks. The verdict? It’s heavy! After 300 meters, I’m already wondering if these 9 days of trekking are a good idea… Well, maybe I’m not an athlete, but stubborn for sure!
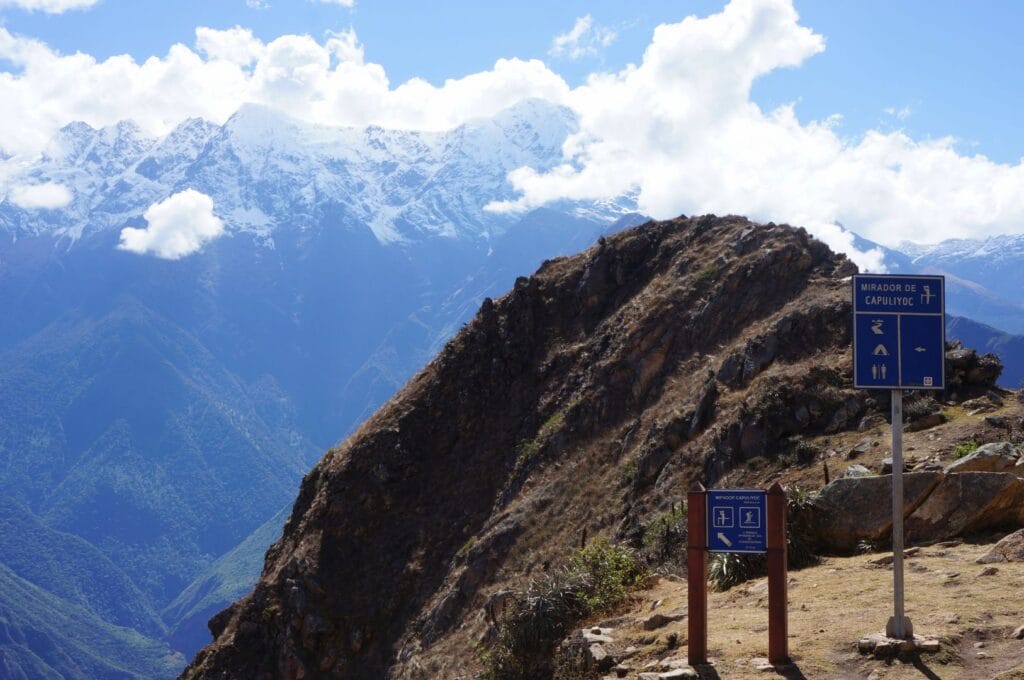
The first 9 kilometers of the day go well, we start with a little descent to the bottom of the village, then a gentle ascent to the Capuliyoc Mirador. It takes us a little less than 3 hours to do this first stretch. Fortunately, my shoulders are slowly but surely getting used to the weight of the backpack!
Alternative: you can take a taxi from Cachora to save yourself these 9 kilometers, it will drop you off less than 1 kilometer from the Capuliyoc Mirador for 30 soles.
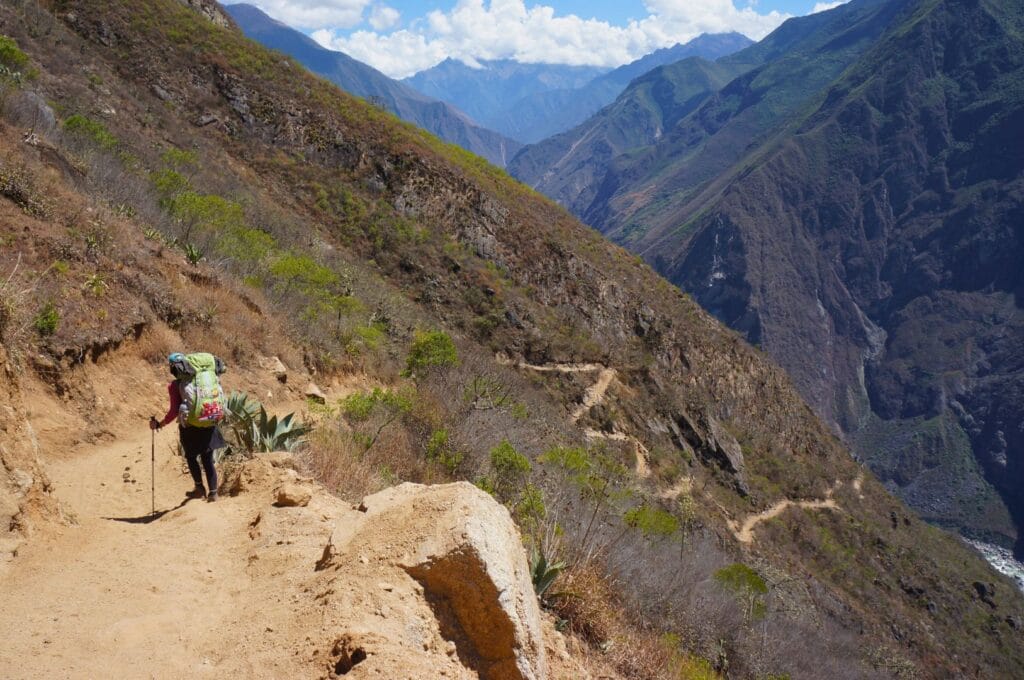
However, the torture began for me during the next 9 kilometers… Losing 1000 meters of elevation over 7 km is really not a pleasure with my knee problems. So we start the descent to Chiquisca at a very leisurely pace. It’s 2:30 p.m. and it’s fair to say that we’re already quite tired! And it’s only the beginning…
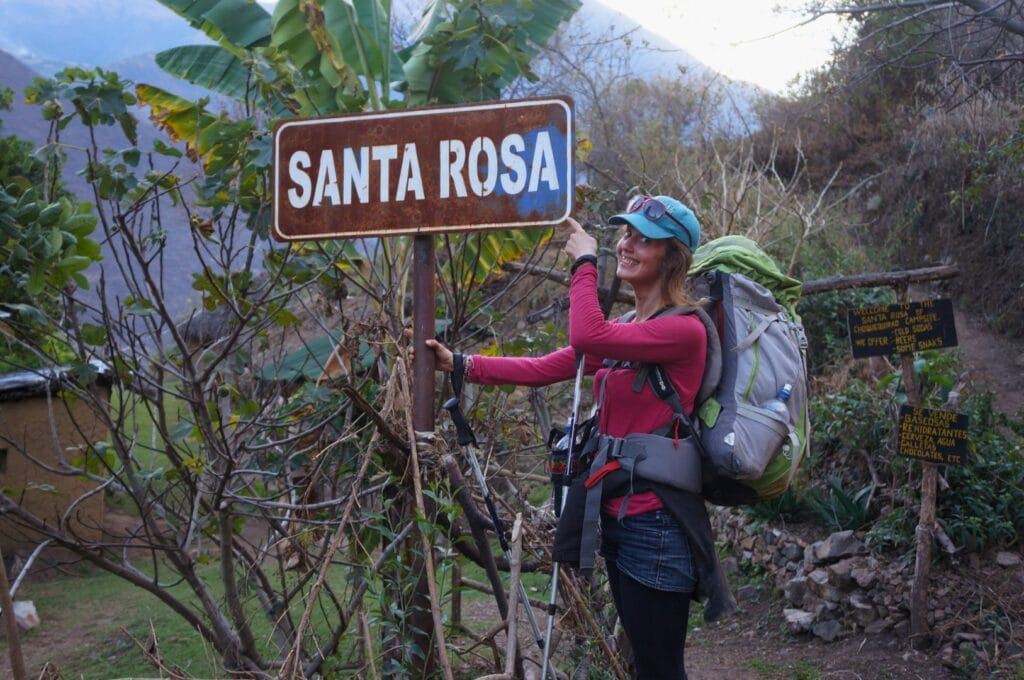
Change of campsite
Originally, we stopped at the Santa Rosa campsite on day 1 and at the Choquequirao campsite on days 2 and 3. However, the Choquequirao campsite is now closed. So we redesigned the routes: for the first two days, you will walk about 8 km twice, and on the third day, you will visit the ruins of Choquequirao by joining the next campsite. We don’t necessarily recommend staying 2 nights in Marampata. You will certainly have a day to visit the ruins, but the following day may be very sporty: 2000 m of positive elevation gain and as much negative!
Day 1 of the Choquequirao trek: from Cachora to Chiquisca
- Distance: 16.8 km
- Elevation gain: 878 m
- Elevation loss: 1939 m
- Duration: environ 7 h
- Logistical stops:
- Capuliyoc: campground, meals, shops
- Cocamasana: campground
- Chiquisca: campground, accommodations, meals, shops
Day 2 of the trek: Chiquisca – Marampata
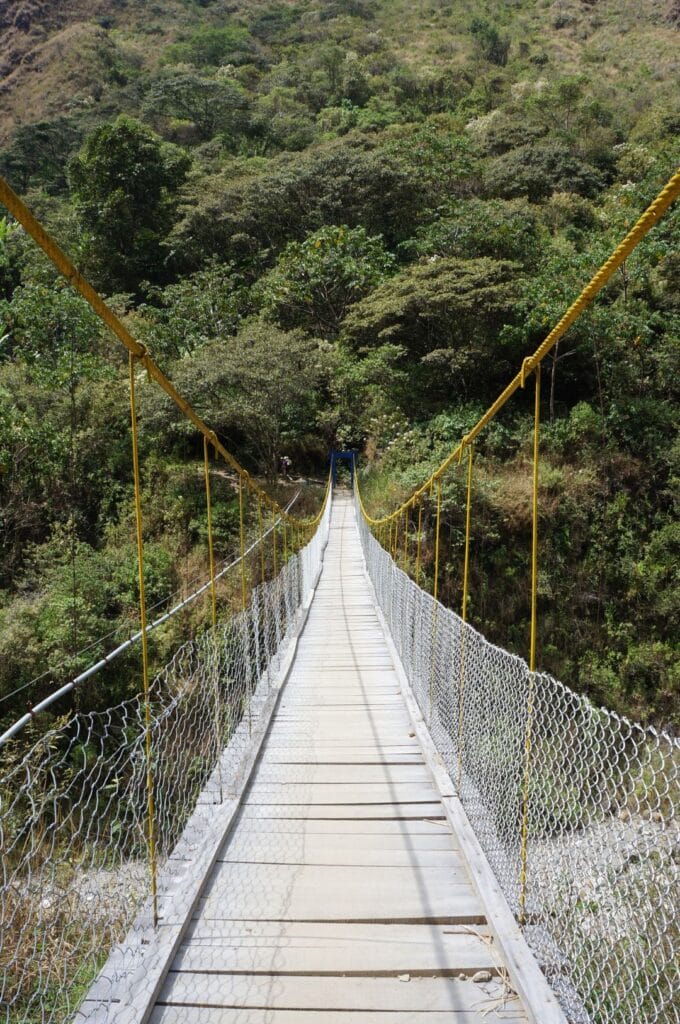
Bridge, gastroenteritis, slope
The beginning of this day is marked by a thrilling river crossing, Peruvian style! After the closed Playa Rosalina campsite, the trail crosses the Rio Apurimac. There’s a bridge, sure, but it’s under construction! So, we resort to Plan B to cross the canyon… Plan B? A basket is suspended on a cable where you sit, and then a guy pushes with all his might, allowing the basket to reach the middle of the river. Then, it’s all about using your arm strength to pull yourself up to the other side! Would you believe me if I said I didn’t exactly love it? Don’t worry, though, the bridge has been repaired since our adventure.
Anyway, once on the other side, we know we have 3 km and 550 m of elevation gain left to reach the next camping spot, Santa Rosa Baja! When we arrived, we stumbled upon a small house offering meals for dinner. So, to save our fuel, we took the opportunity to eat at the restaurant. On the menu? Tuna spaghetti, a hiker’s dream! But after a few bites, I feel like my stomach isn’t entirely on board… I end up giving my plate to a French guy who seems to have an ogre’s appetite!
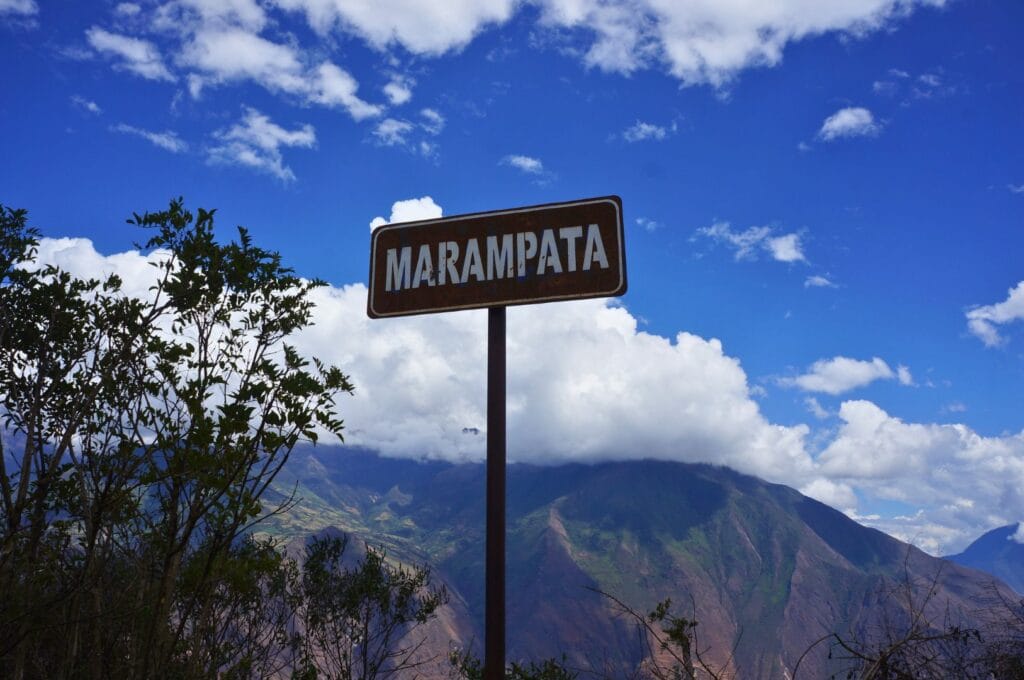
Marampata: home-cooked meal in Peru
So, with the energy of a narcoleptic tortoise and thunderous stomach cramps, we reach the small village of Marampata. We’ve had better preparations for climbing up to the Choquequirao ruins tomorrow!
After a good plate of white rice, I’m ready to rest while waiting for the next hiking day! Benoit, on the other hand, is trying to recover from his carb-rich meal… When you eat with locals, you have to know that there’s no menu, you eat what you’re served! And in Ben’s case, he got a plateful of rice, accompanied by homemade fries, all topped with a fried egg… Enjoy!

Day 2 of the trek: from Chiquisca to Marampata
- Distance: 7.9 km
- Elevation gain: 1557 m
- Elevation loss: 511 m
- Duration: about 4 h
- Logistical stops:
- Santa Rosa Baja: campground, accommodations, meals
- Marampata: campgrounds, guesthouses, shops, meals, mules
- Note that after Marampata, you won’t find anything to eat until Maizal. So, don’t hesitate to buy some snacks in advance and stock up on water!
To be honest with you, we were a little worried that we wouldn’t make it the next few days… So, we tried to find a mule driver to help us out on this day. We asked around the village of Marampata (the only village along with Cachora where there are muleteers), but we couldn’t find any mules. Most of them were already booked by a group of tourists arriving the next day. Also, the mule drivers didn’t seem very excited about continuing on the camino de los locos towards Machu Picchu.
It’s somewhat understandable since we only needed one mule for just 1 or 2 days. Not very interesting for the mule drivers compared to a group of 10 tourists! So, we gave up our search, thinking that maybe we’d come across a mule driver on the trail who would agree to carry our bags for the ascent. Well, a little dreaming doesn’t hurt, right?!
Day 3 of the trek: Marampata – Choquequirao – Pinchaunuyoc
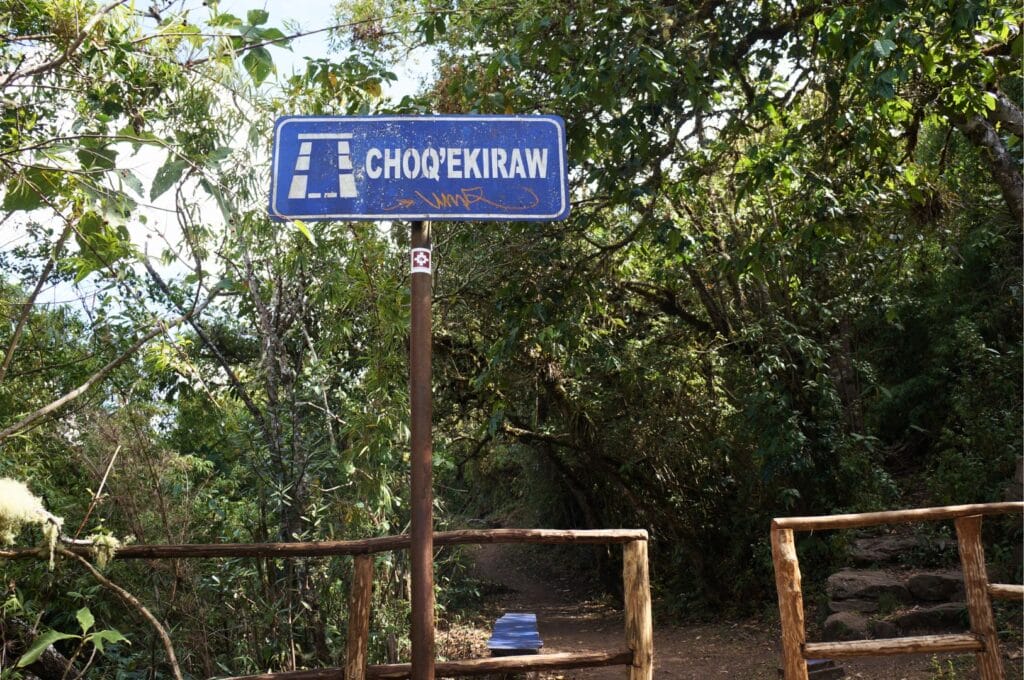
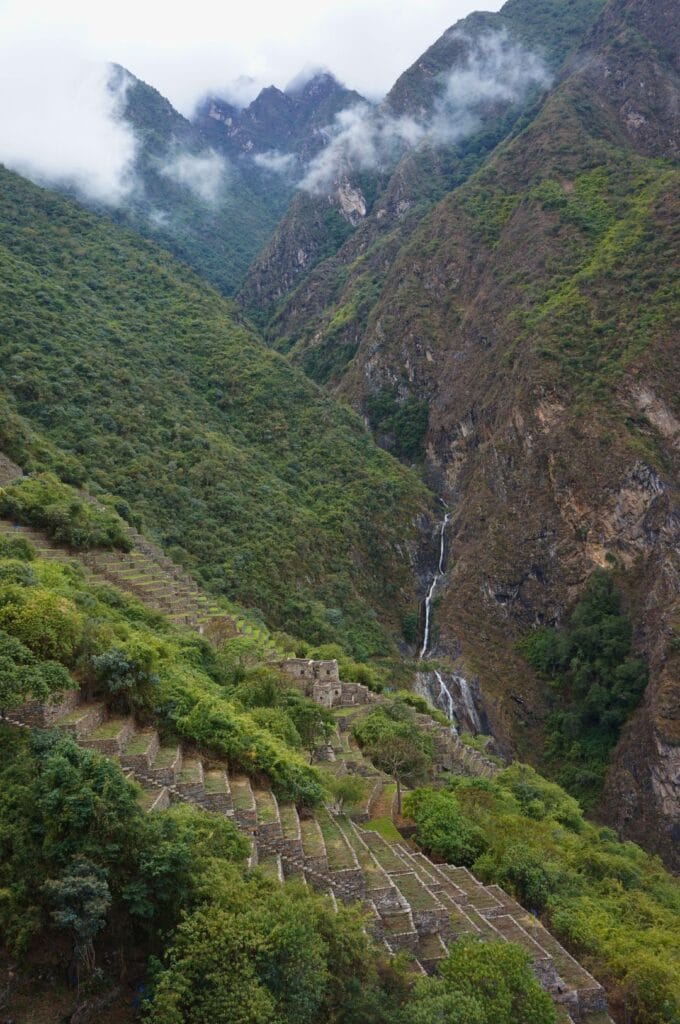
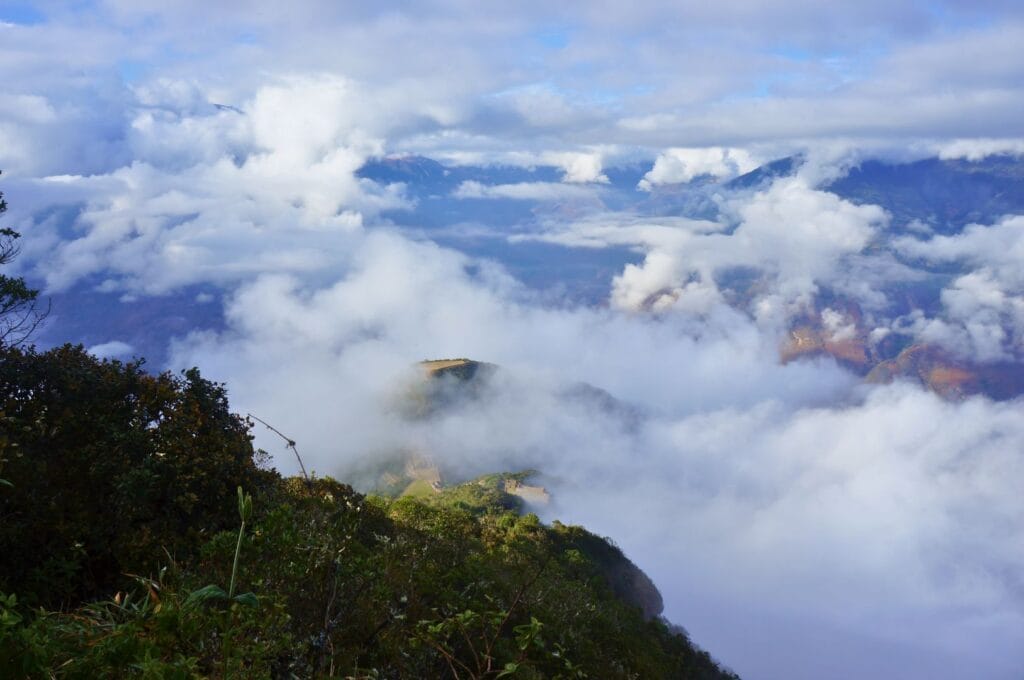
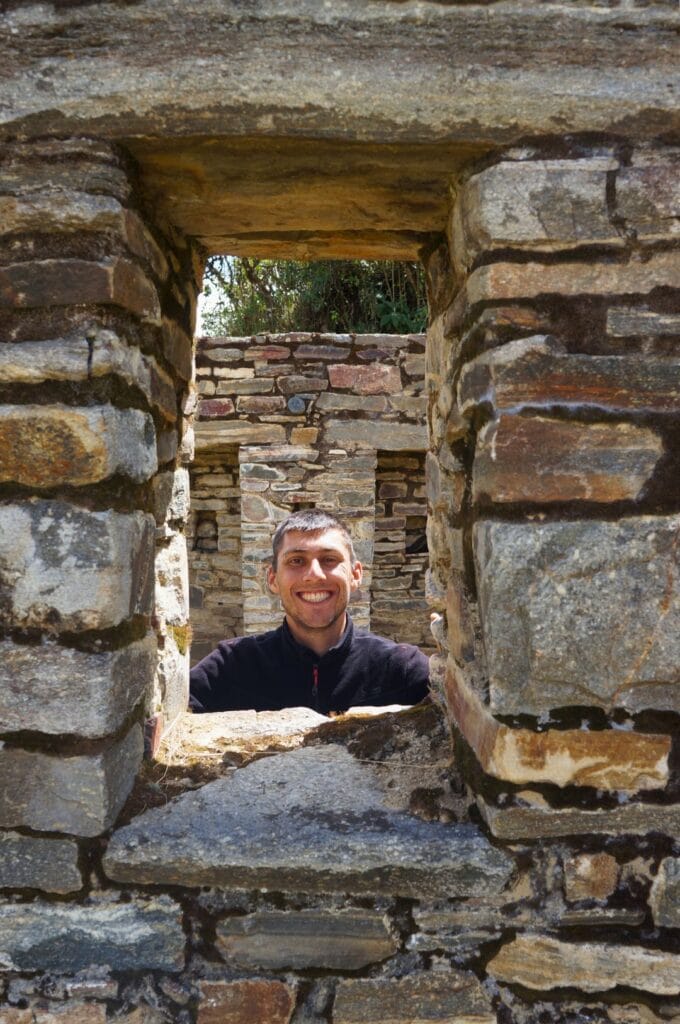
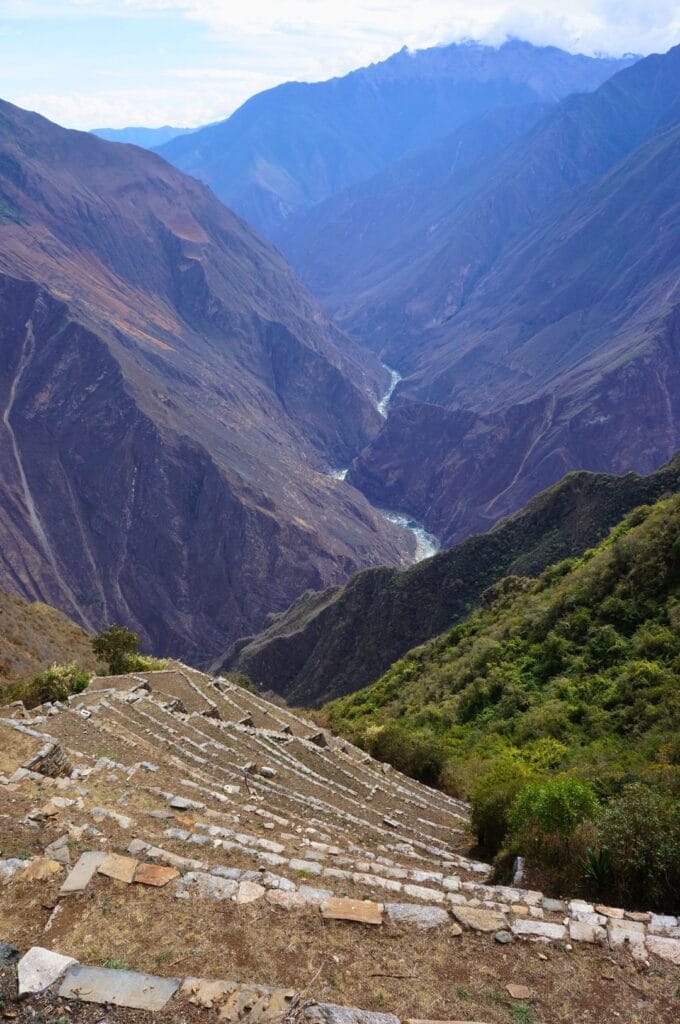
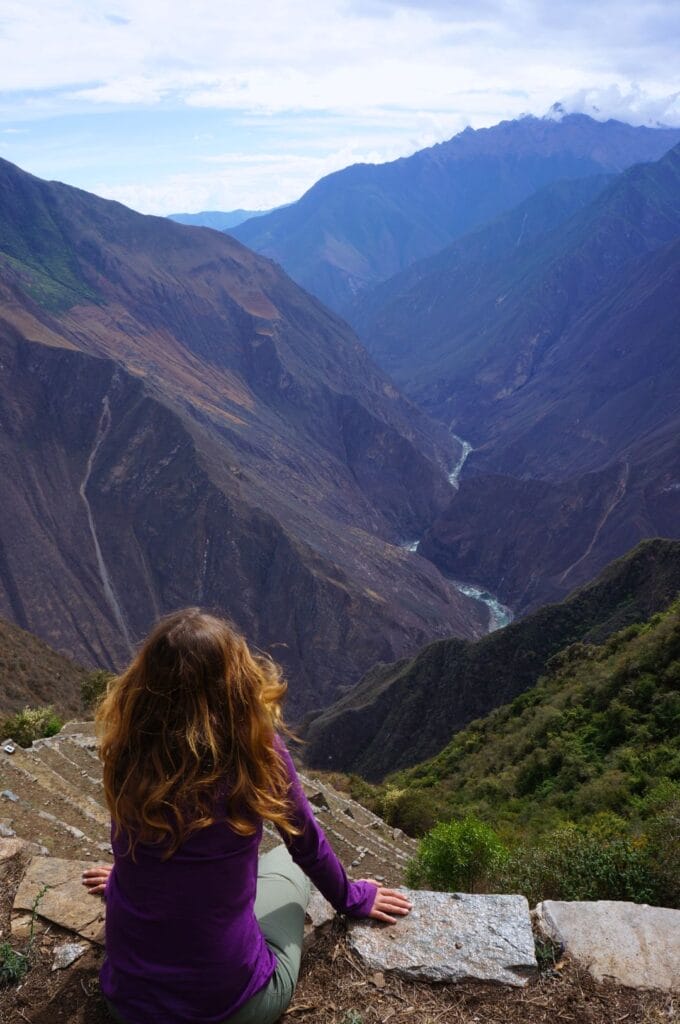
So, rested and in better shape than the day before, Benoit and I tackle the most intense day of the Choquequirao trek! Several hundred meters after the village, we reach the entrance point of the ruins site. This is where you have to pay the entrance fee of 60 soles per adult. It’s also when we get our first glimpse of the impressive terraces that make up the lower part of the site! In just 2 short hours of walking, we reach the ruins, and the visit can begin.

Some agencies offer to stay only a few hours at Choquequirao before heading back to Cusco. Frankly, in our opinion, that’s a real shame… The site is huge, and in 2 hours, you absolutely don’t have enough time to enjoy it! But don’t worry, a day-long visit to Choquequirao is no walk in the park! Those darn Incas loved to build things on slopes, on the mountainsides!
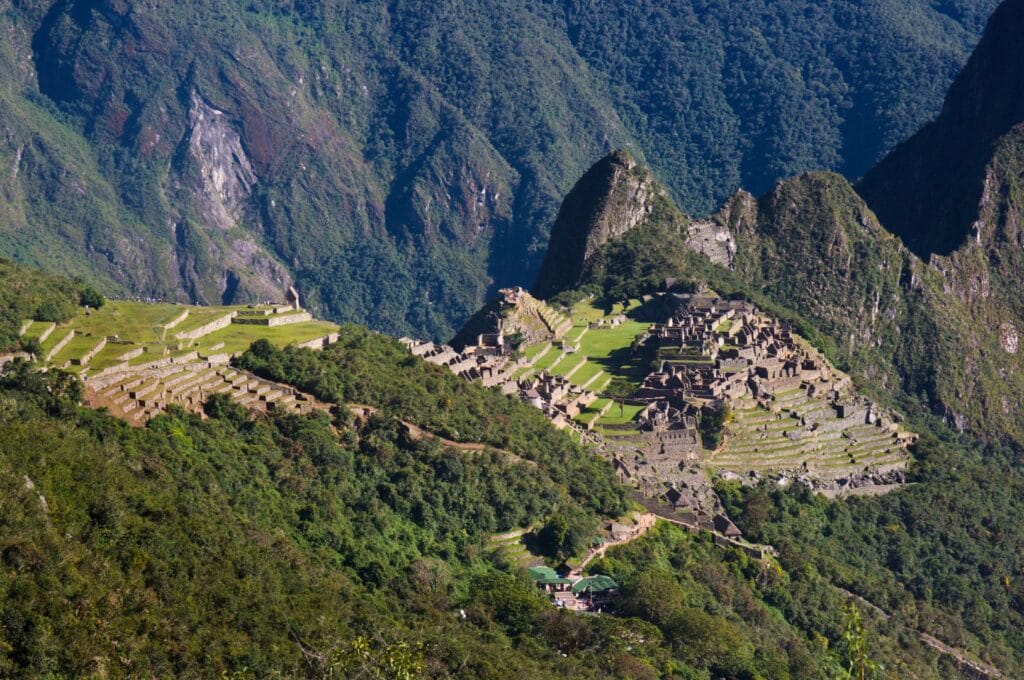
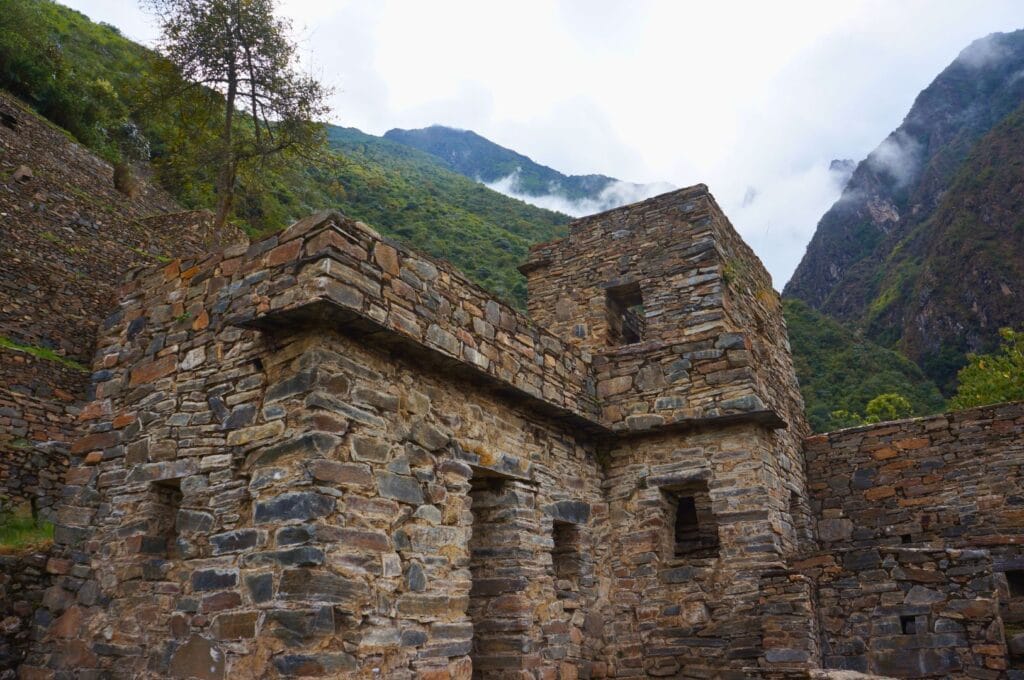
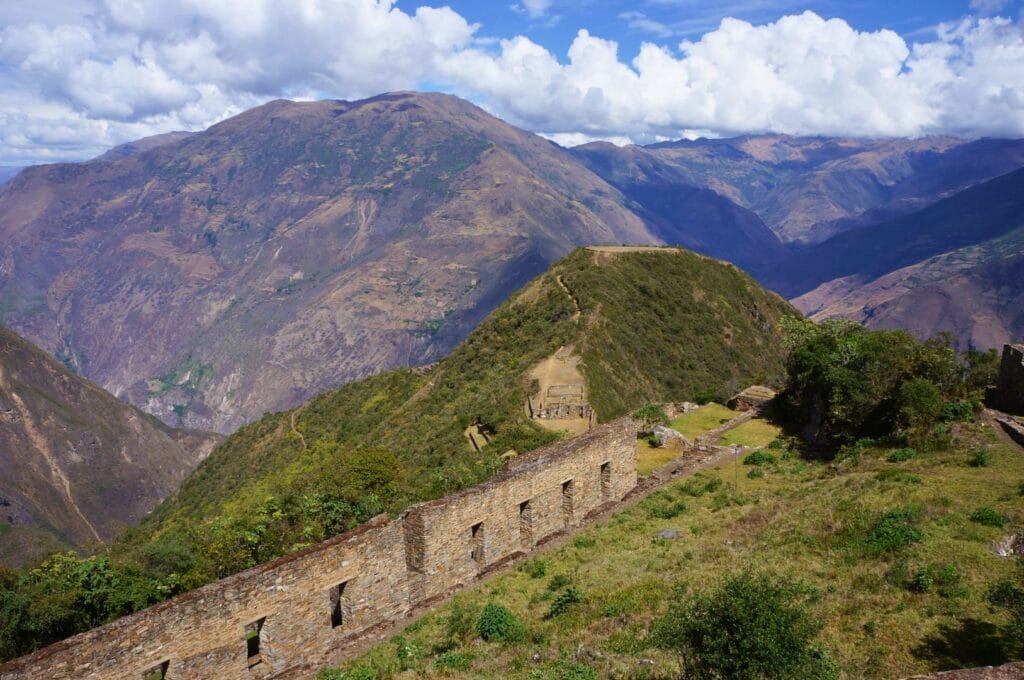
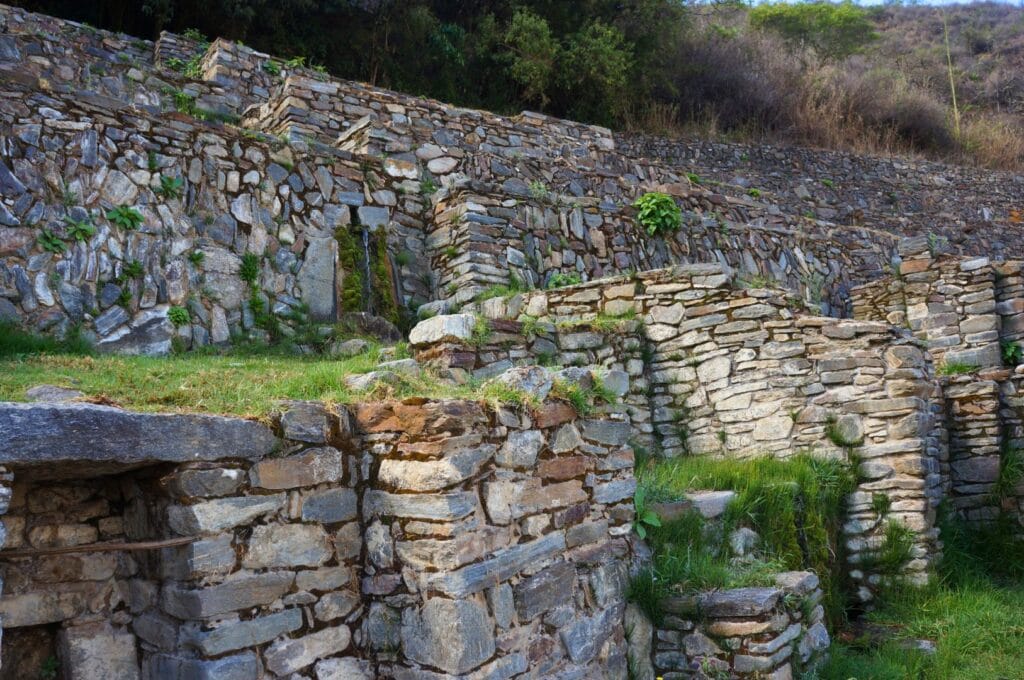
A few words of history on Choquequirao
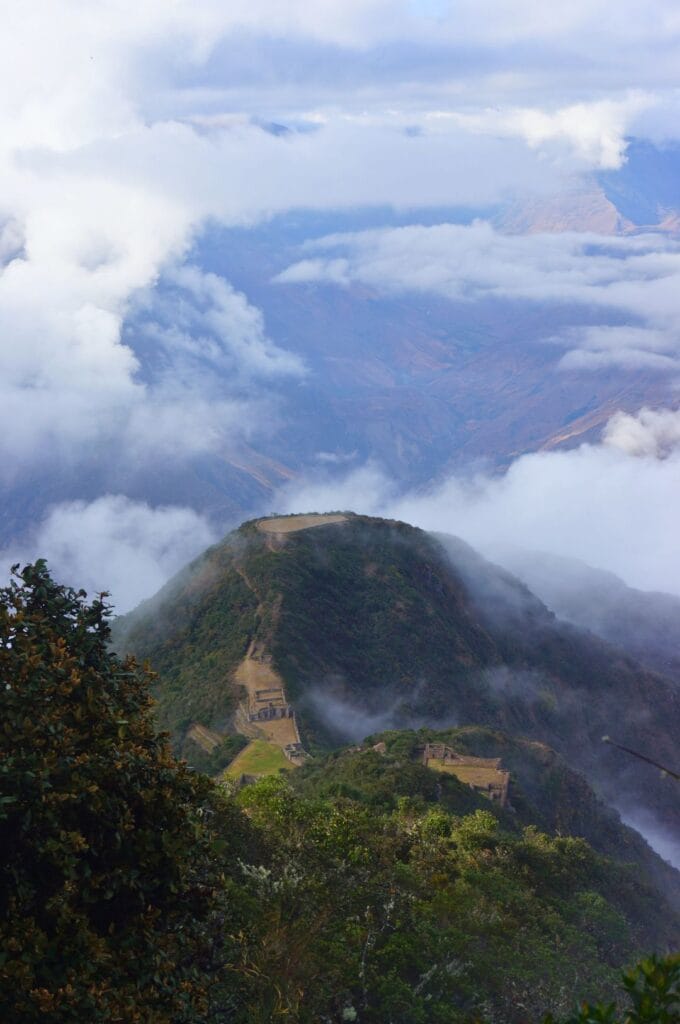
Dubbed the little sister of Machu Picchu, Choquequirao is an ancient Inca city that sits at an altitude of 3035 meters in the Salkantay range. Located in the Vilcabamba mountain range, its name comes from the Quechua chuqi k’iraw, meaning golden cradle. Built in the 15th century following the same model as the Inca sacred cities, the citadel served political, religious, economic, and social functions. It’s believed to have been built as a control point for the Apurimac canyon.
Choquequirao was the last refuge of the Incas, driven from Cusco by the Spanish conquistadors. They abandoned the site after the execution by the Spanish of Túpac Amaru, the last Inca emperor of Vilcabamba.
It wasn’t until 1909 that the site was visited and thoroughly described by Hiram Bingham, an American archaeologist, the same one who discovered Machu Picchu! However, it wasn’t until the late 20th century that excavations were undertaken to uncover the buildings buried under vegetation. The complex consists of various structures: terraces, squares, temples, fountains, canals, which extend over 200 hectares. It’s estimated that only 30 to 40% have been discovered! In the end, it could well surpass Machu Picchu in size…

Itinerary of our day in Choquequirao
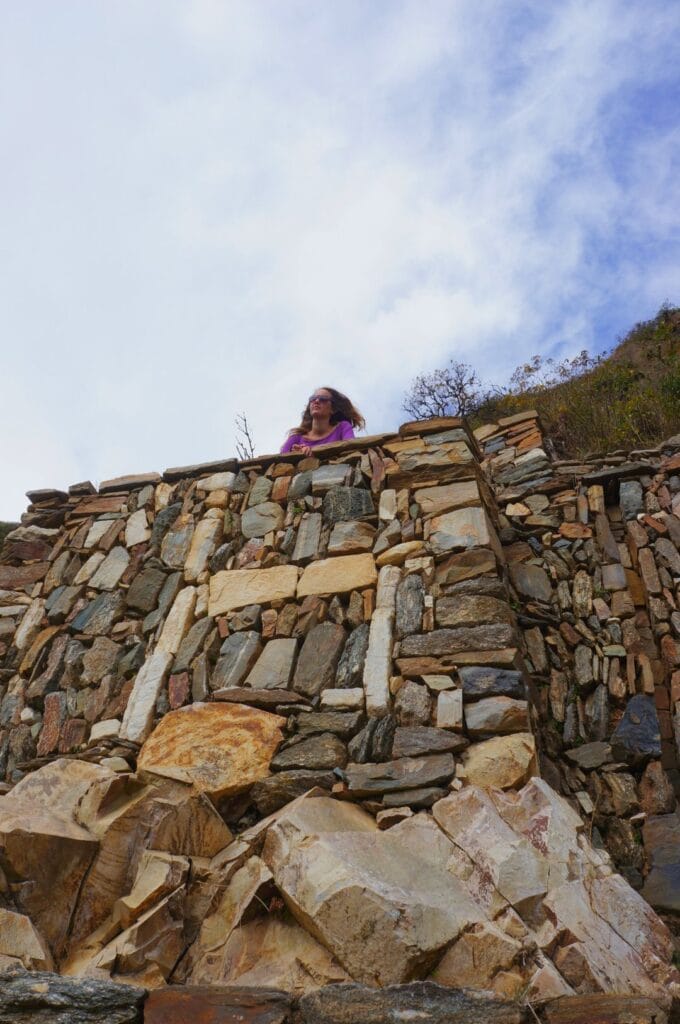
The Choquequirao ruins are divided into several sectors with specific functions. Let’s be clear, the visit is physical! We start our day by checking out sector 10, Paqchayoc and Paraqtepata, with the terraces below with the Paqchoyc waterfall and the Casa de la Caída del Agua (the house of the waterfall). After about 100 m of descent, we find ourselves in the heart of Inca ruins. The height of happiness? We are absolutely alone, not a soul in sight! So, we calmly visit this lower part of the ruins before tackling the bulk of the day.
Pikiwasi and Ushnu
On the way down, we pass through Pikiwasi, sector 9, where houses and workshops were built. You can’t miss Ushnu (sector 5), the ceremonial center where sacrifices of men and llamas took place. At the top of this truncated hill is an observation platform ideal for observing the stars (notably the Inca constellation llama) by the Incas.
Hurin, the lower part of the center
Then, after a good climb, we find ourselves in the main square of Choquequirao, Haucaypata, surrounded by dwellings of the local elite, workshops, and buildings for ceremonies (kallankas). These two sectors, 3 and 4, are truly impressive, especially since once again we are alone! So, right in the heart of ruins dating back over 500 years, we began our little picnic.
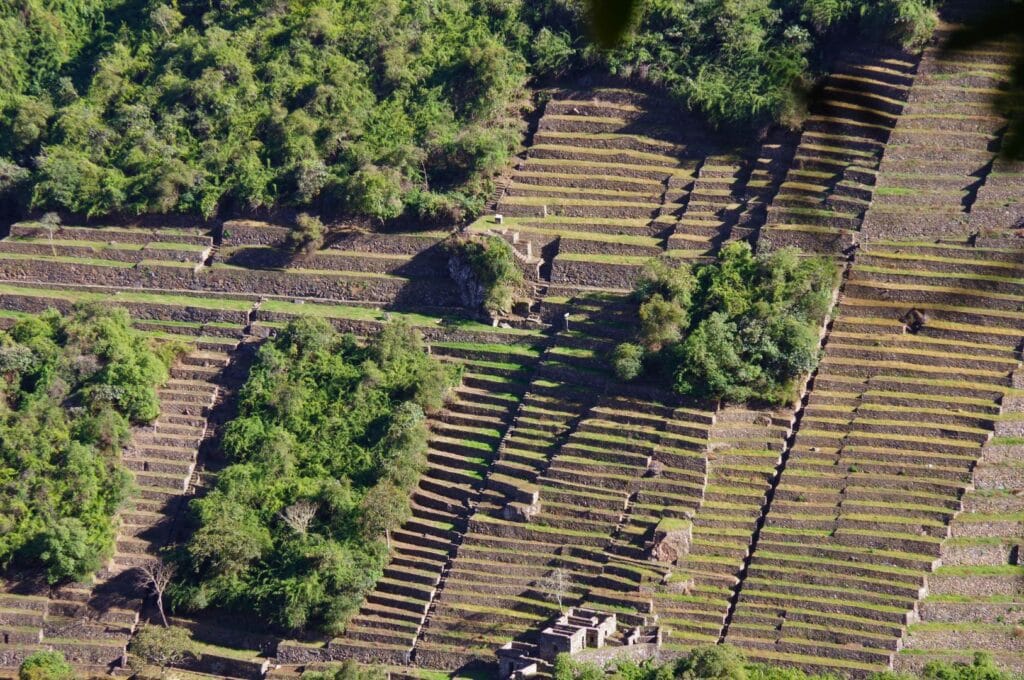
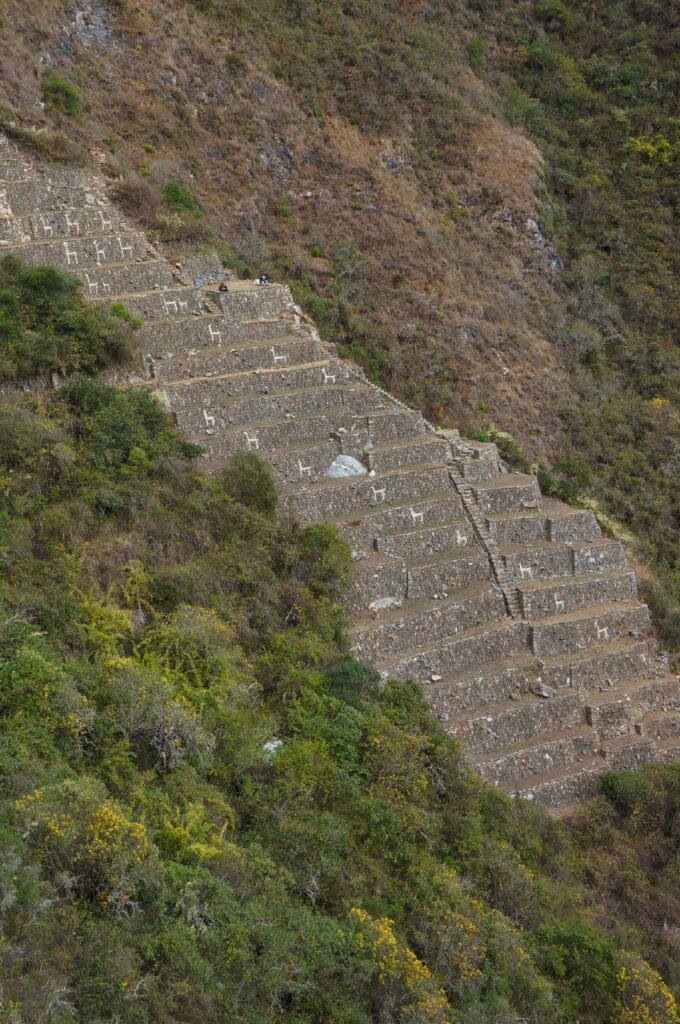
Terraces with llamas
The highlight of the visit? The 24 llamas! Sorry to disappoint you, no hairy beasts to show you, but our Inca buddies probably figured we’d be a bit disappointed not to see real ones. So, they plonked them right into a part of the 130 terraces in sector 8! Thanks, guys! Well, once again, you have to work your calves to reach them because they’re 150 m below on the other side of the mountain! But honestly, with a panorama like that, it’s worth a little effort, right?

Hunan, the upper part of the center
To leave the site and reach the Choquequirao Pass, the path isn’t necessarily easy to find. From the main square of the ruins, follow the irrigation canal upwards. You’ll then pass through the upper ruins (Hanan), consisting of temples and warehouses (sectors 1 and 2). When you come across a hiking trail, then turn left.
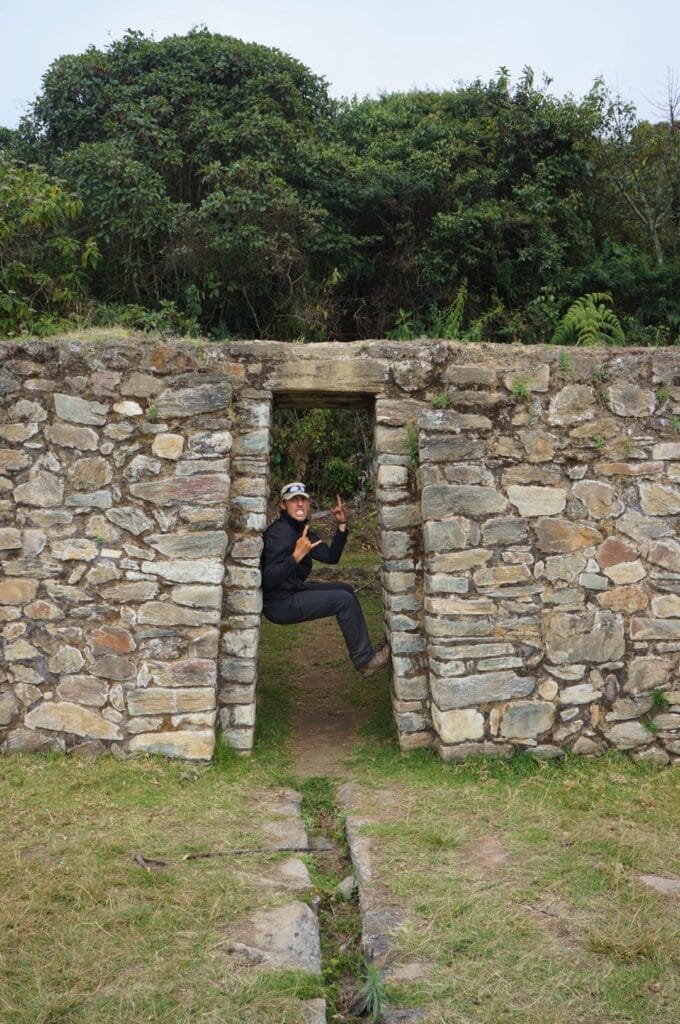
The end of this day is characterized by one final climb to the Choquequirao Pass at 3272 meters above sea level, then by 5 km of descent to the Pinchaunuyoc ruins. Little known, the site resembles a beautiful amphitheater of terraces with a water channel cutting it in two. Note that the canal still works here, and the water joyfully cascades from terrace to terrace, which is not the case at Choquequirao and Machu Picchu.
Day 3 of the trek: from Marampata to Pinchaunuyoc via Choquequirao
- Distance: 15.17 km
- Elevation gain: 1770 m
- Elevation loss: 2351 m
- Duration: about 8 h
- Logistic stop at Pinchaunuyoc: campground
Conclusion and information on the Choquequirao trek in 3, 4, or 5 days
The summary of these 3 days
There you have it, we can say that we’ve done a part of the classic Choquequirao trek. These first 3 days were a good introduction… The trail is still used by about twenty hikers per day and offers opportunities to eat almost everywhere. The rest of the program promises to be a bit wilder! From Choquequirao, we decided not to turn back but to continue on the section kindly nicknamed by the locals el camino de los locos (literally the path of the crazy). The rest of the trek certainly lived up to that name! You probably have to be a little crazy to want to reach Machu Picchu by doing a 9-day trek while carefully avoiding the classic tourist trails!
The classic trek in 3 days
So, if you want to do the Choquequirao trek without going to Machu Picchu, it’s possible to do it in 3 days:
- Day 1: Cachora/Capuliyoc – Santa Rosa/Marampata;
- Day 2: Marampata – visit Choquequirao – Marampata/Santa Rosa;
- Day 3: Marampata/Santa Rosa – Capuliyoc/Cachora.
If you start from the Capuliyoc Mirador, we recommend pushing on to Marampata, 3 km from Santa Rosa, where you’ll find everything you need (campgrounds, guesthouses, restaurants, shops). Since camping in the Choquequirao site is now closed, it’s no longer possible to camp near the ruins. By spending the night in Marampata, you’ll have time to visit Choquequirao the next day, knowing that there are 4 kilometers between the two. In the evening, retrace your steps and camp in Marampata on day 2.
The classic trek in 4 or 5 days
But you can also do it in 4 or 5 days to reduce the effort and enjoy the hike and landscapes more:
- Day 1: Cachora – Chiquisca;
- Day 2: Chiquisca – Marampata;
- Day 3: Marampata – visit Choquequirao – Marampata;
- Day 4: Marampata – Chiquisca/Capuliyoc;
- Day 5: Chiquisca – Capuliyoc/Cachora.
Our tips for doing the classic Choquequirao trek
If you’re comfortable with hiking, we recommend doing the Choquequirao trek classic route independently. Otherwise, some tours offer to do it in 3 or 4 days without you having to worry about logistics or equipment. In this case, you’ll return part of the way by minibus that will take you back to Cusco.
For the day of visiting the archaeological complex, we recommend leaving your bags in your tent. You’ll be more comfortable for the 8 km round trip and enjoy the site at your own pace.
Alternative: from Choquequirao, you can descend to San Ignacio (6.5 km for 1770 m of elevation loss) to camp and then go the next day to Villa Los Loros (9 km for 1350 m of elevation gain). From there, a collective taxi or taxi will take you back to Cusco. It’s an option that can save you a day, but unfortunately, we don’t have more information than that to give you…
Day 4 of the trek: Pinchaunuyoc – Maizal
This fourth “short” day is perfect for recovering from the climbs and descents at Choquequirao! Today, we continue with a small descent to the river and then a steady climb up to Maizal.
Rio Blanco
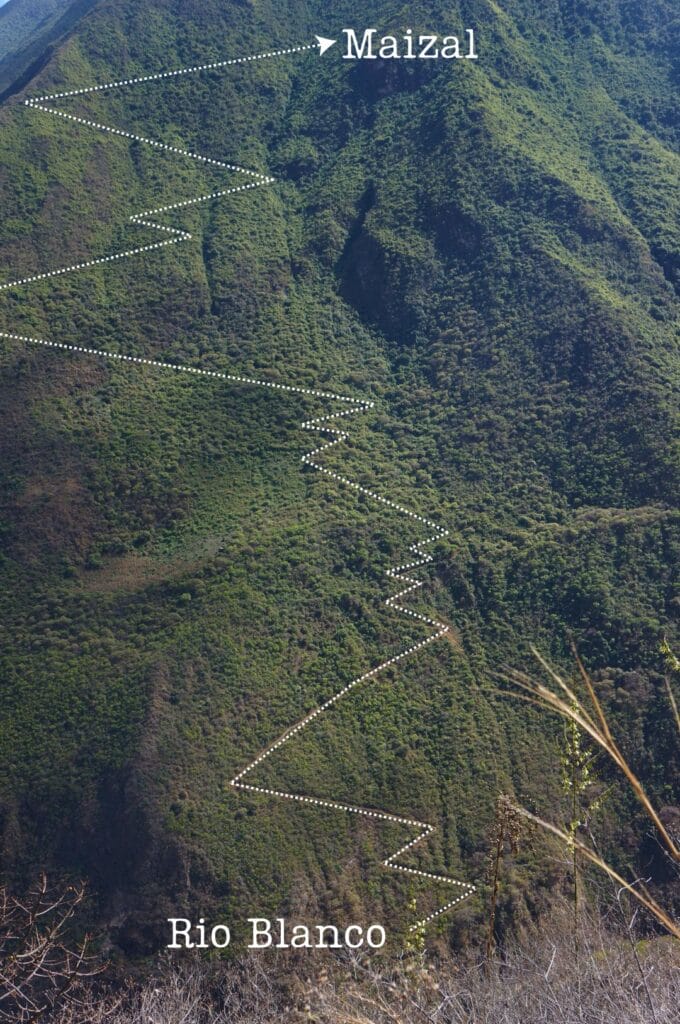
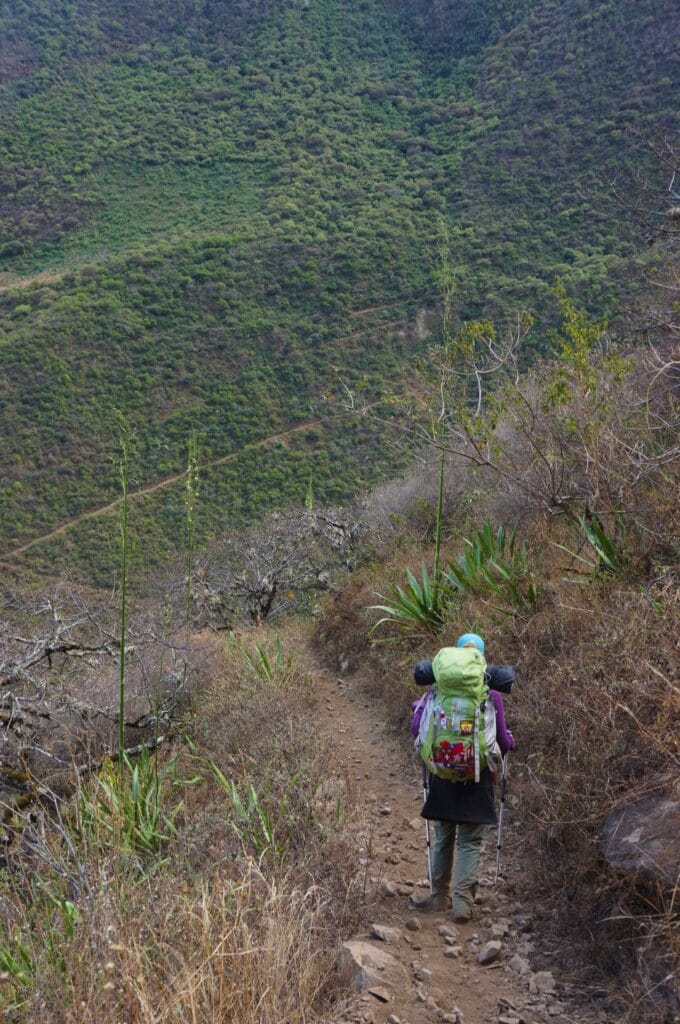
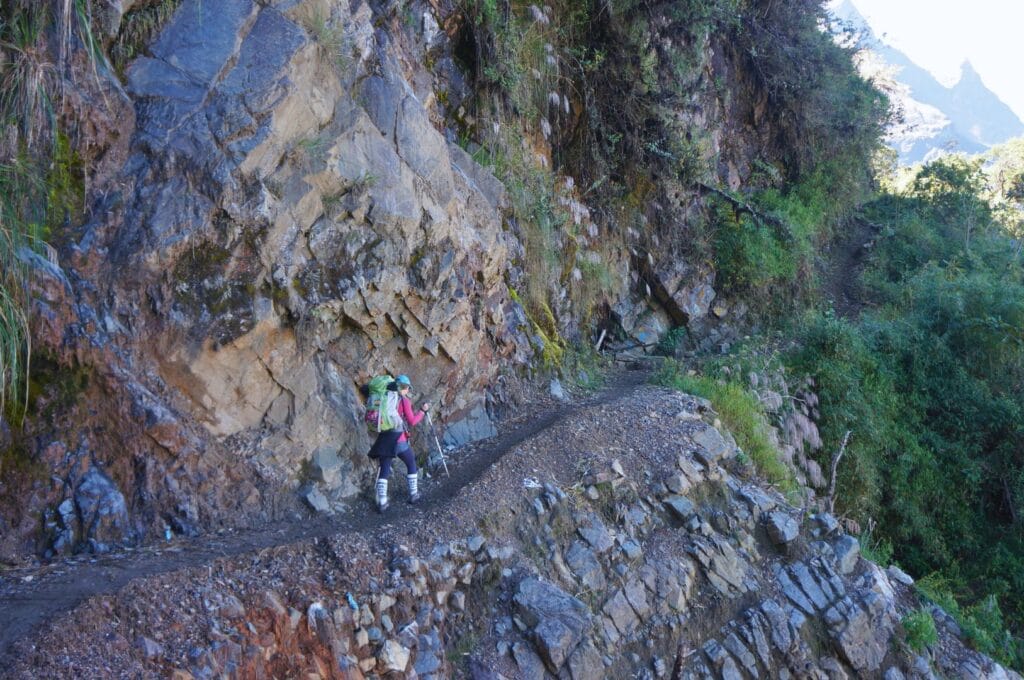
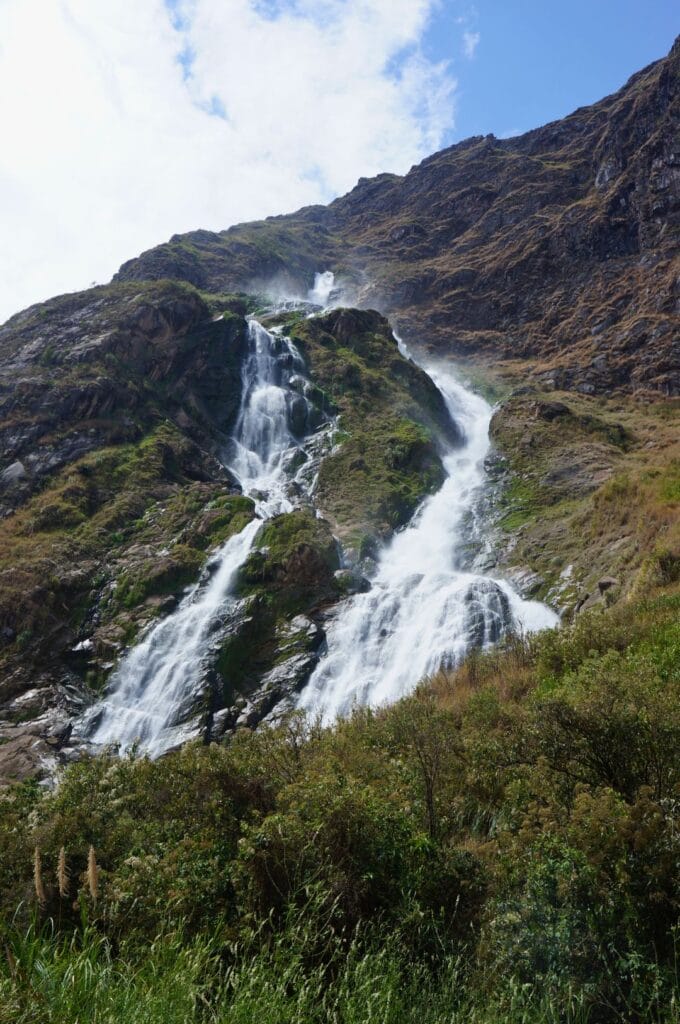
The landscapes leading to Rio Blanco are truly beautiful. We discover trees, plants, and birds that we have never seen before. However, we shudder when we observe the trail ascending on the other side of the valley. It looks like a steep climb ahead, and indeed, we will gain 1100 meters in altitude over 4 kilometers to reach the hamlet of Maizal!
An hour later, we finally reach the bottom of the valley, at the level of Rio Blanco (literally the white river), and the place is teeming with wild orchids. I had never seen so many before! The place would be perfect for a snack break if it weren’t for those darned sandflies spoiling the fun. So, we hurry to eat while literally getting devoured by these pesky creatures. We would have liked a slightly longer break before tackling the climb to Maizal. Here, there’s not much of a transition to warm up… It’s steep right from the start! By the way, don’t forget to fill up on water at Rio Blanco; it’s the last refill point before Maizal.
Arrival at Maizal
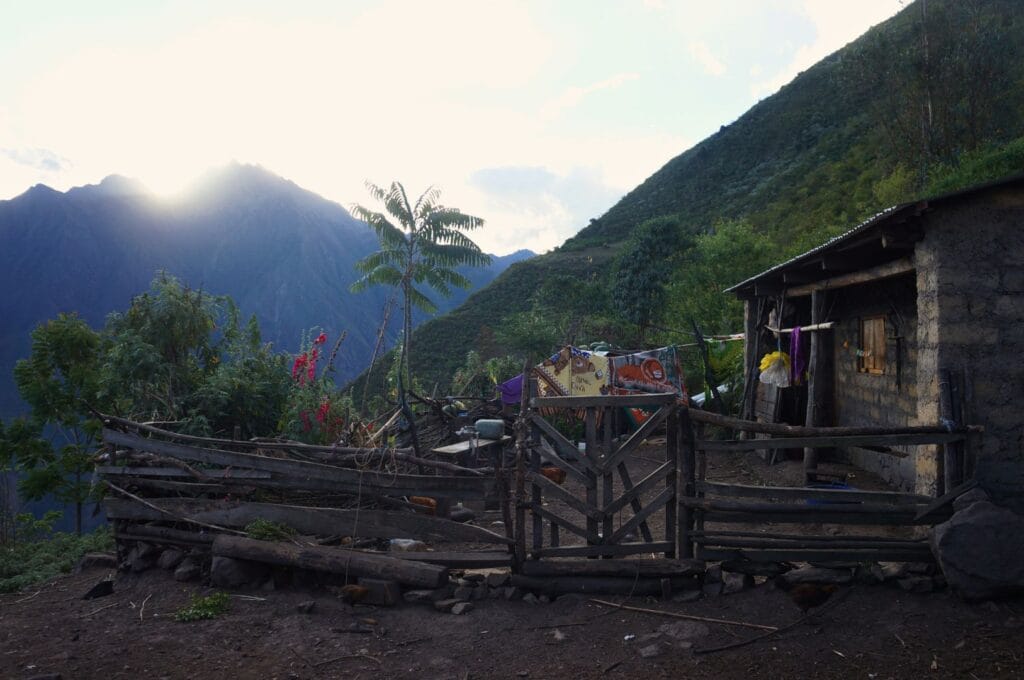
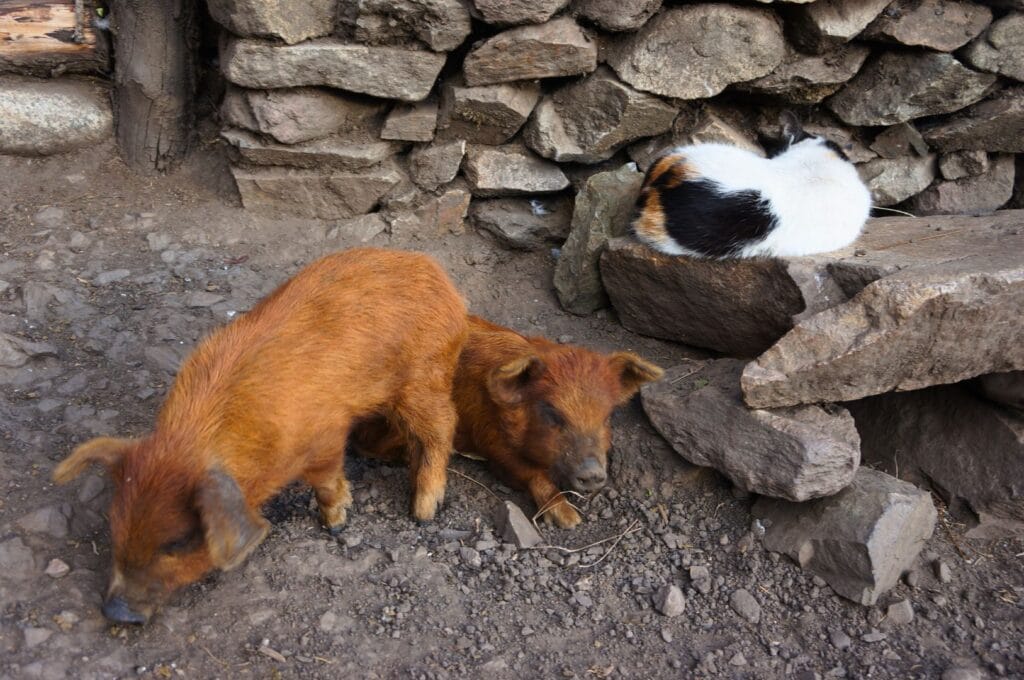
After 3-4 hours of this routine, we spot a sign indicating Camping Señor Valentin, one of the campsites in Maizal. It’s said to be 15 minutes away, but at our pace, it takes us a good half hour to reach it. Let’s just say it’s more like 15 minutes at the locals’ pace! There, we are welcomed by a grandmother who lives alone with her husband on a sort of farm.
They are the last inhabitants of Maizal, as the others have decided to move to Yanama, a slightly larger village, which will be our destination on day 5. She points out the location where we can camp, amidst her chickens, pigs, and goats. The view is worth its weight in gold! After eating a large serving of polenta, we go to bed early, exhausted by this challenging day.
Day 5 of the trek: Maizal – Yanama
- Distance: 7.1 km
- Elevation gain: 695 m
- Elevation loss: 1335 m
- Duration: about 3 h
- Difficulty: this section may be impassable during the rainy season due to the rise of Rio Blanco and landslides
- Logistic stop in Maizal: campground, accommodations, meals, shops. We stayed at Camping Señor Valentin (on the left at the junction) and heard good things about the other camping, Familia Perez, run by Livia (on the right at the intersection). Make sure to bring enough food and water until the following evening; there is no resupply until Yanama.
Day 5 of the trek: Maizal – Yanama
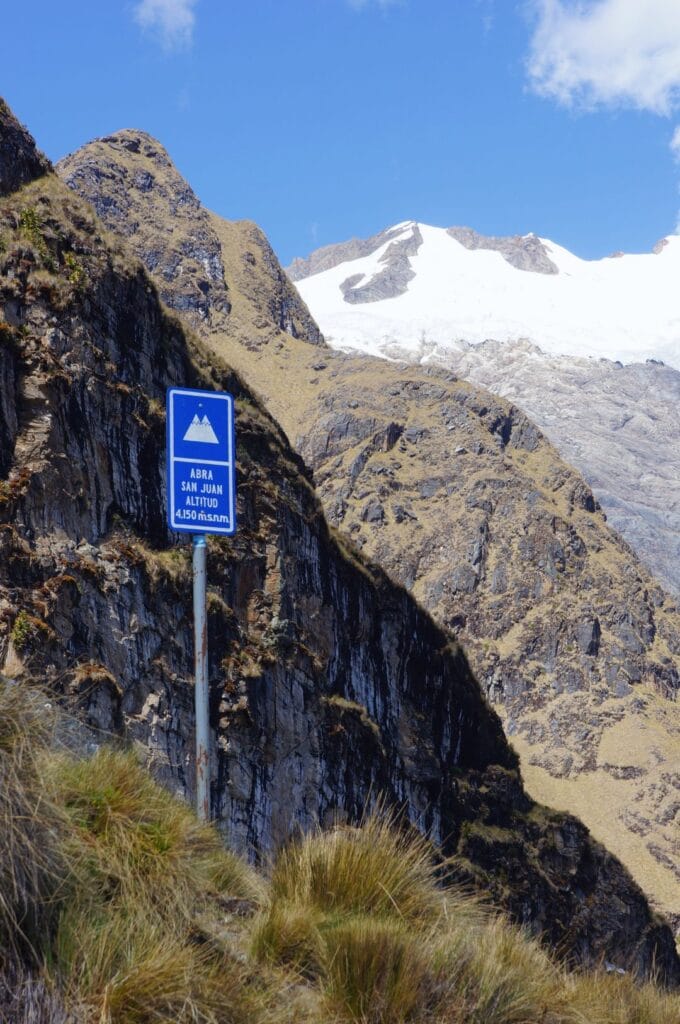
As usual, when camping, we wake up at dawn and heat some water to make a hot cup of coca mate. Well, I must admit that I tend to be woken up at 4 a.m. by those darn insomniac roosters. We sleep relatively well while camping, largely thanks to our warm and comfortable gear. So, we’ve recovered quite well from the long day before, and we’re ready to tackle the climb to the San Juan Pass at 4150 meters above sea level.
Overview of the day’s hike
The day promises to be a bit longer than the previous one, with only 9.5 km of walking. And for once, we start with the ascent, 1100 meters of elevation gain to the San Juan Pass, and we finish leisurely with the descent, 700 meters of elevation loss to Yanama.
It’s much more enjoyable in this direction! According to the grandmother, it’s about dos horitas (2 hours) to the pass. We can imagine that’s how long it takes the locals to run up behind their mules, but we set off rather confidently.
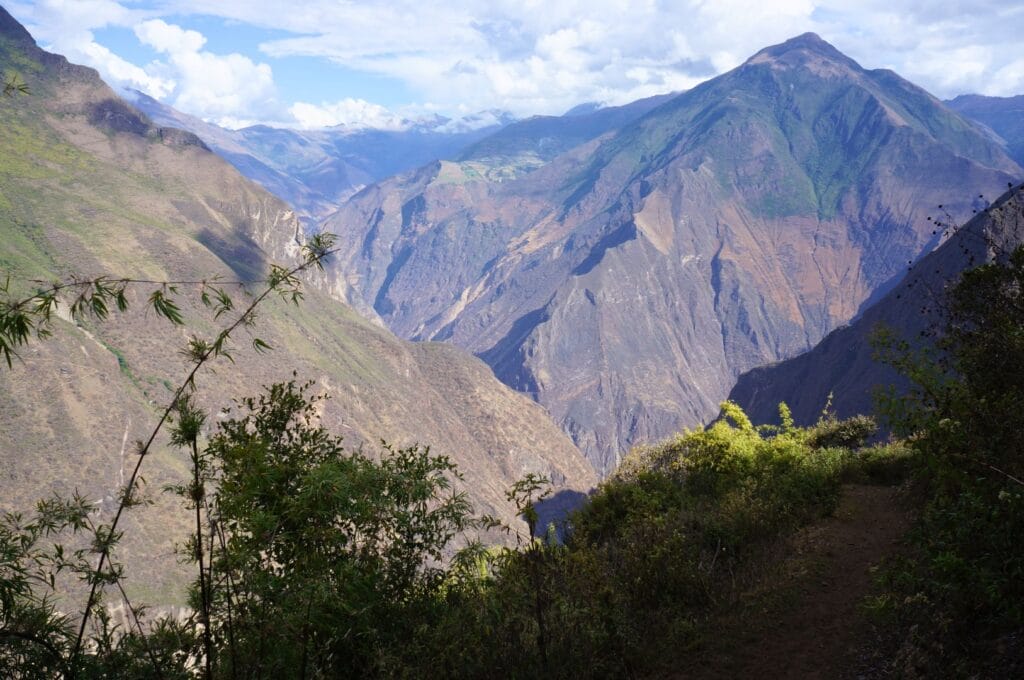
So, we start walking around 8 a.m., enjoying the simply magnificent view. The first part of the ascent is much less steep than the previous day, which we don’t mind at all. On the other side of the valley, in the distance, we can see the Choquequirao pass that we crossed the day before.
On the Inca Trail
In fact, from the ruins of Choquequirao, we progress on the Inca Trail… But what is the Inca Trail, you may ask? It’s simply a trail that was used by the Incas and still has some traces remaining to this day. Generally, this trail is quite easy to recognize: it’s where the staircases start, so it’s steep! (We have painful memories of Mount Emei in China!)
Note: the Inca Trail is also a popular trek to reach Machu Picchu.
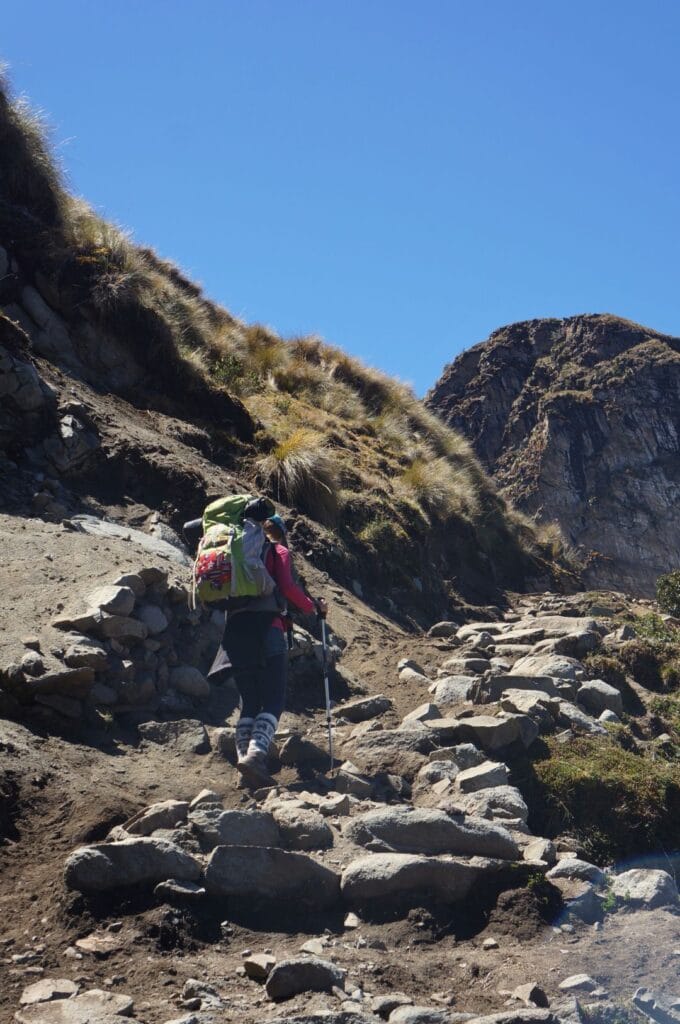
To top it off, the Incas had the annoying habit of making knee-high staircases… Needless to say, our thighs started burning quickly, especially after the efforts of the previous day.
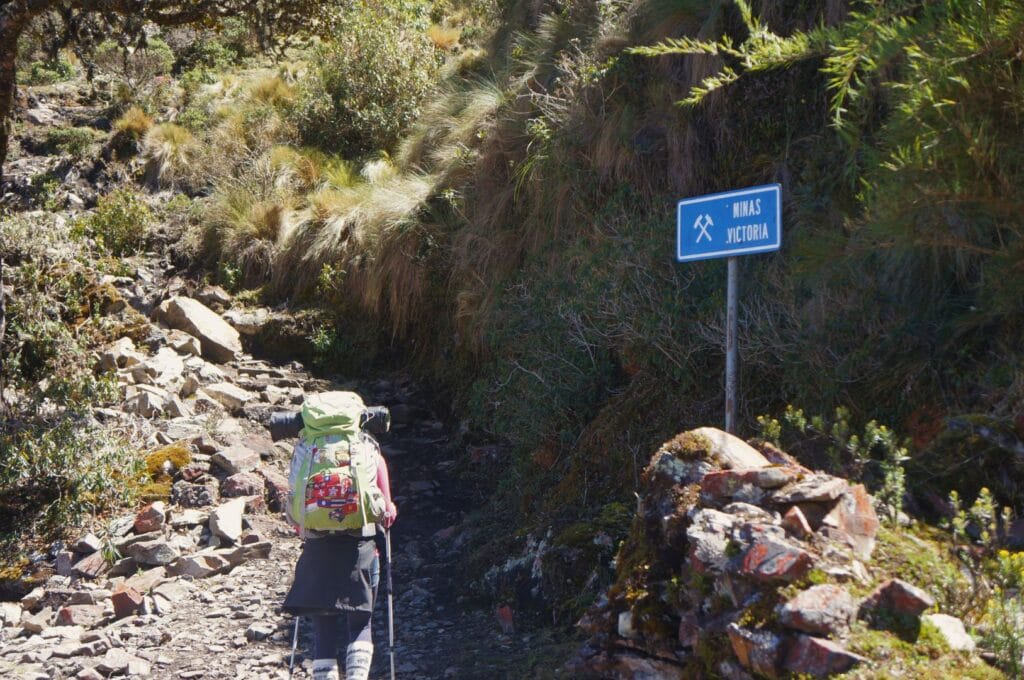
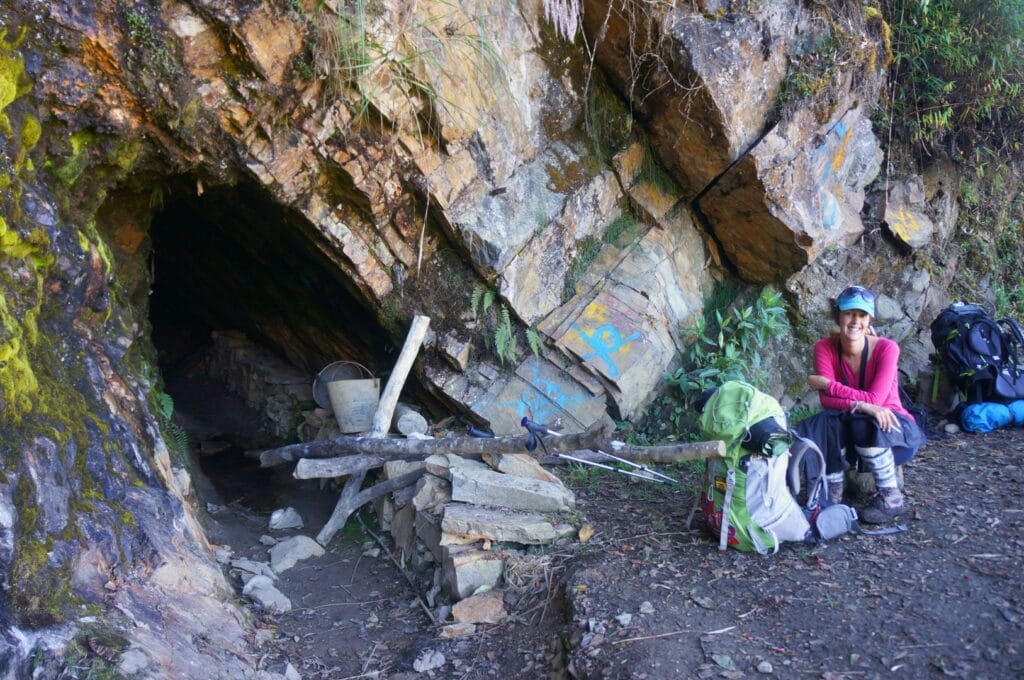
After a good two and a half hours of alternating between stairs and a steep and muddy trail, we reach the Victoria mines, old silver, copper, and lead mines abandoned since the colonial era. However, we think we heard people working inside…
So, we think back to the dos horitas from the grandmother in Maizal, and we figure that to climb to the pass in 2 hours from Maizal, you have to be a machine! We don’t even dare to imagine the grandmother’s husband who makes this trip several times a week with his mules to restock in Yanama.
Arrival at the San Juan Pass and descent to Yanama
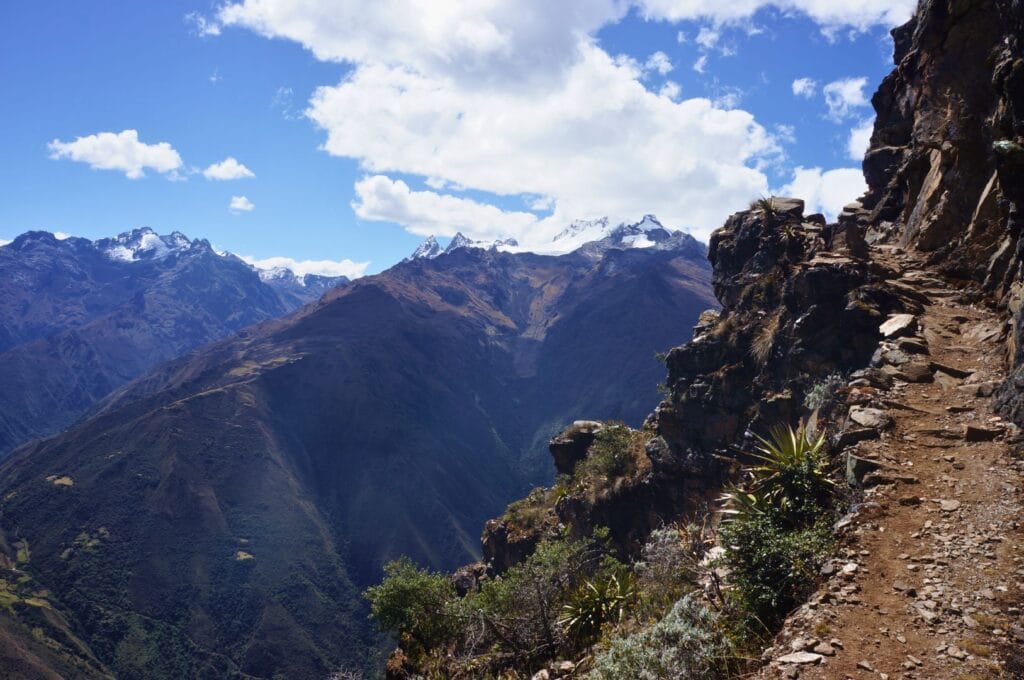
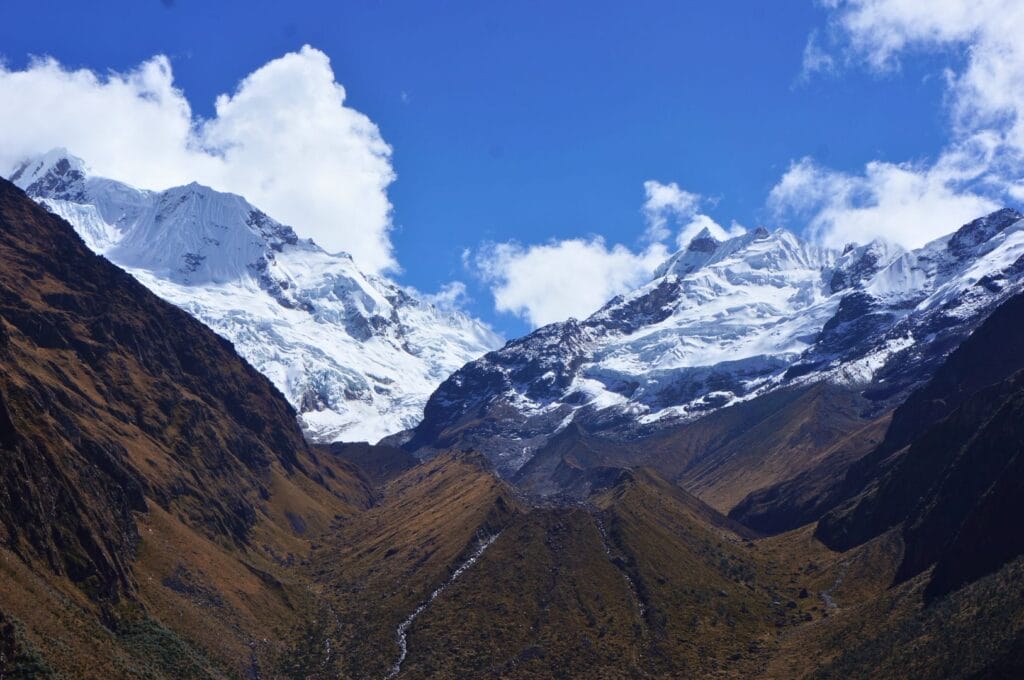
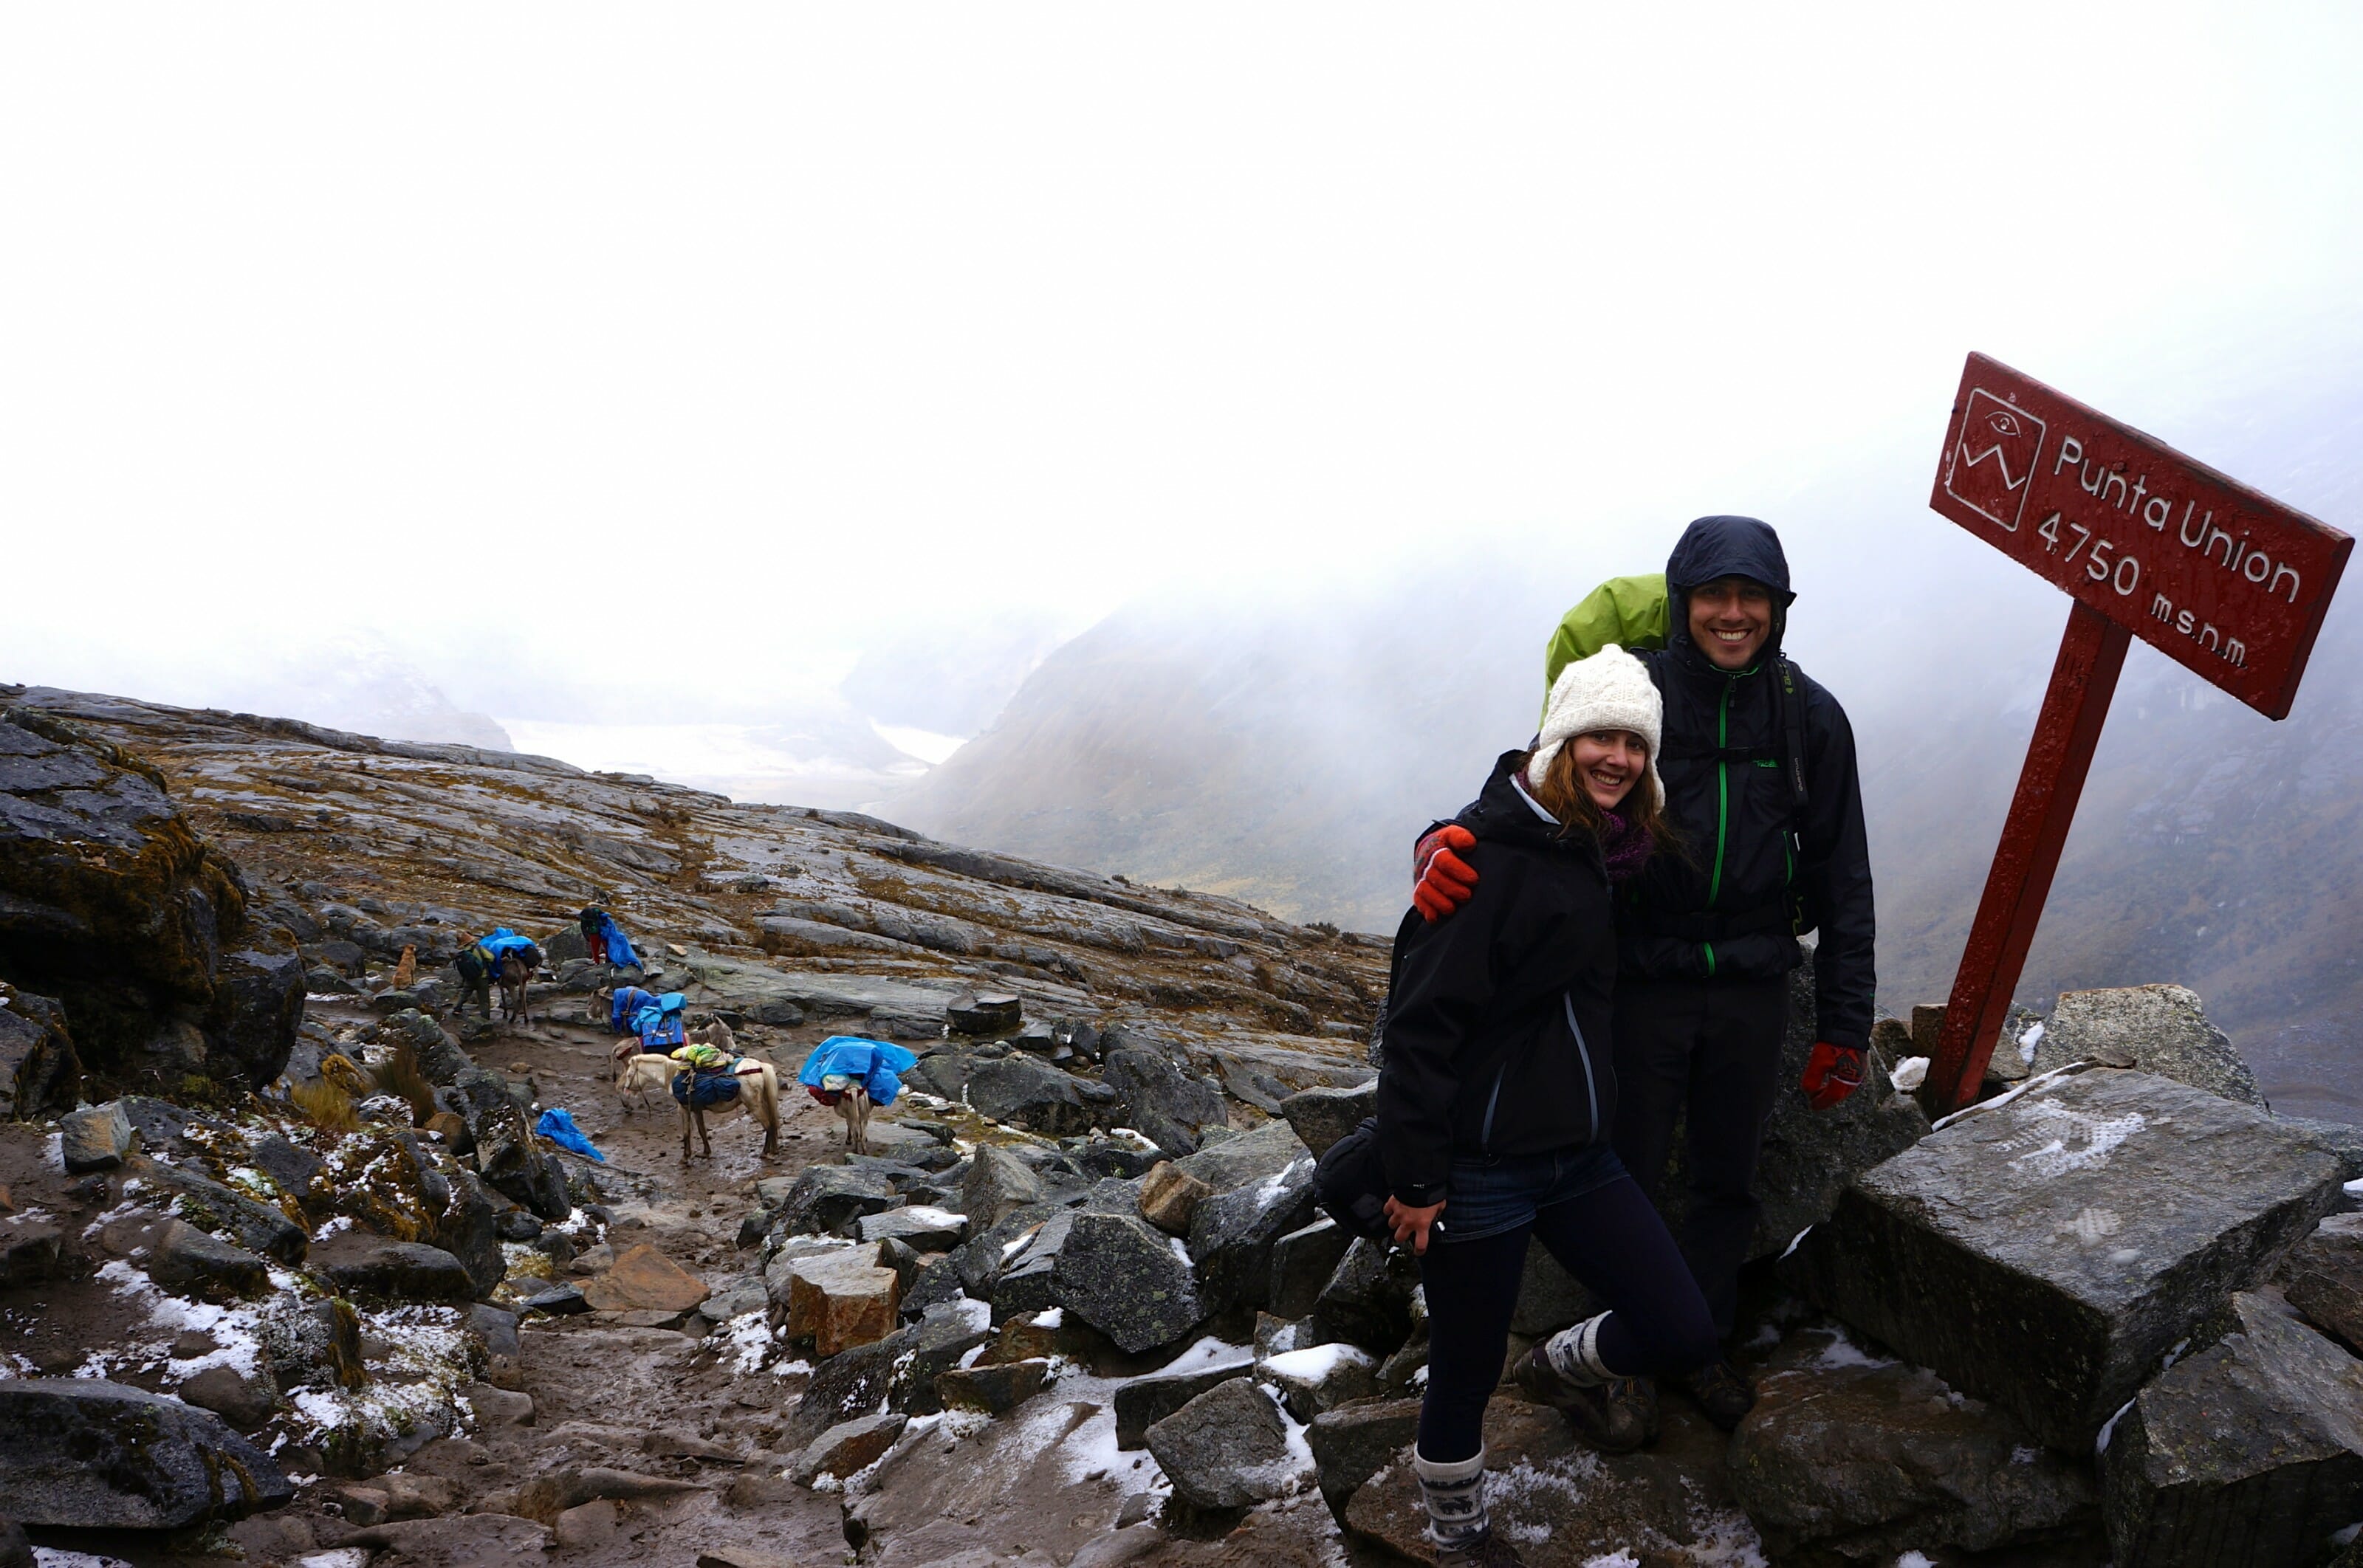
We continue to climb for another good hour before finally reaching the San Juan Pass, at 4150 meters. It hasn’t been easy, but we’re rewarded with a breathtaking view of the surrounding mountains and glaciers.
But after almost 5 days of walking, even a superb viewpoint has a hard time making us forget our general state of fatigue. Fortunately, there’s only a short descent of 1 hour and 30 minutes to the village of Yanama left.
Moreover, we’re pleasantly surprised to be greeted by very friendly locals who immediately offer to cook for us in the evening. We gladly admit that we didn’t have much energy left to cook for ourselves. It turned out to be the best meal of these 9 days. On the menu: rice, a very good piece of meat with tomato sauce, and a sort of guacamole.
Day 5 of the Choquequirao trek: from Maizal to Yanama
- Distance: 8 km
- Elevation gain: 1300 m
- Elevation loss: 800 m
- Duration: approximately 5 h 30
- Logistic stop in Yanama: campgrounds, accommodations, shops, meals. This village is somewhat larger than Maizal, perhaps with around 100 inhabitants, and you can buy cooking supplies at the campsite’s tienda. When we talk about camping, it’s more like camping in people’s backyards! Now, a road reaches the village, allowing supplies to be transported by car rather than just by mules.
- Ensure you have enough food for the following day, at least for lunch, as there are no shops between Yanama and Totora. Regarding water, there’s not much available along the way to refill your water bottles. That said, since we’re at a higher altitude, it’s much cooler, so we sweat less and need a little less water than the first four days.
- Alternative: If you’re tired after the first 5 days and would like to take a collectivo to save some time, it’s possible. However, the collectivo leaves very early from Yanama, between 5:30 and 6:30 a.m., for a fare of 20 soles each. This option saves you 2 days of hiking to Playa and even 3 days to reach Santa Teresa (to enjoy the hot springs) or Hidroelectrica/Intihuatana. Don’t expect to hitchhike during the day, though… On days 6 and 7, we might have seen 2 vehicles on this new road. In short, it’s either the minivan or nothing! Note that during the rainy season, the road may be cut off, and no vehicle can travel between Yanama and Totora.
Day 6 of the trek: Yanama – Totora
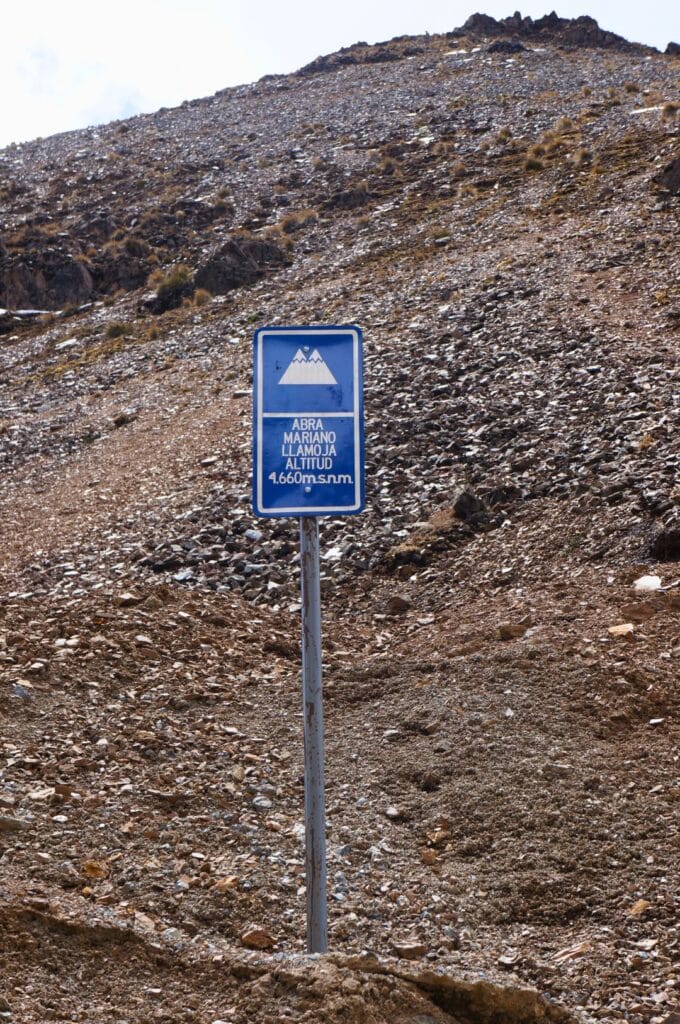
It’s during this day that we’ll pass the highest point of this 9-day trek: the Yanama Pass or Mariano Llamoja, at 4660 meters above sea level. As you’re good at math, you’ll notice it’s the 4th day since the start that we gained more than 1000 meters in elevation!
But fortunately for us (and for the first time since the beginning of this hike), the slope is rather gentle: 1200 meters of positive elevation over 9 km! But not enough for me, who is starting to seriously tire… Ben tries to encourage me as best he can by saying it’s the last big climb of this trek, but after 5 days, not exactly restful, my head and especially my legs aren’t really into it anymore. Ben even gets rather rebuffed!
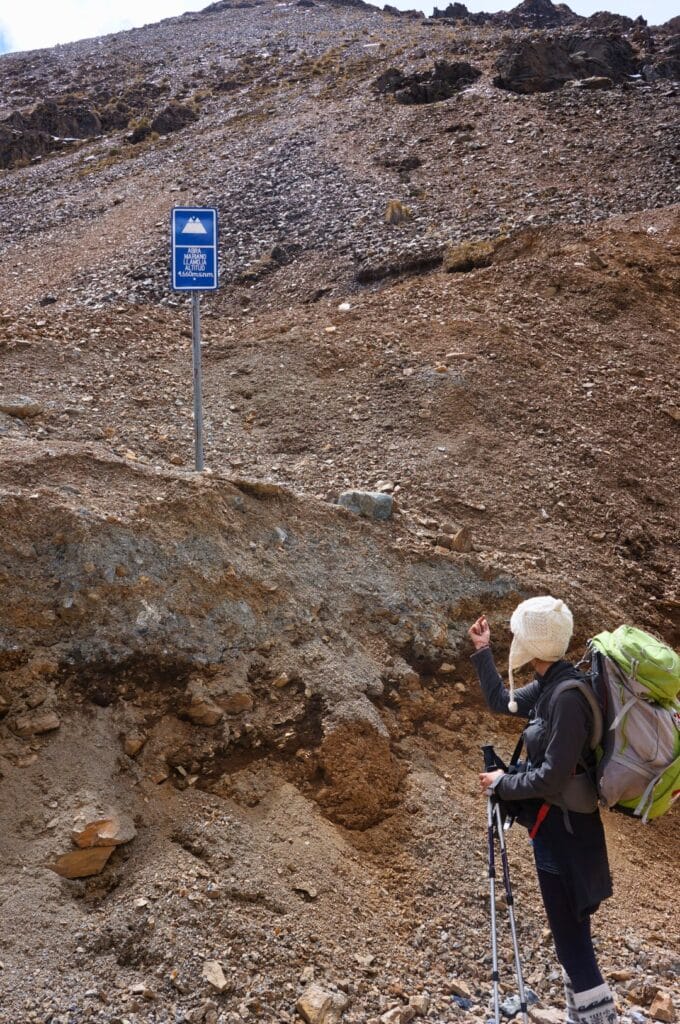
I mentioned earlier that a road now reaches Yanama. So, we scan the horizon while walking, hoping to spot a car that could give us a lift for a few kilometers. Unfortunately, we won’t see any vehicles all day… So, we don’t really have a choice but to walk, and it takes us nearly 5 hours to reach the Mariano Llamoca Pass, a real trial for me as I’m completely exhausted.
Breathtaking landscapes
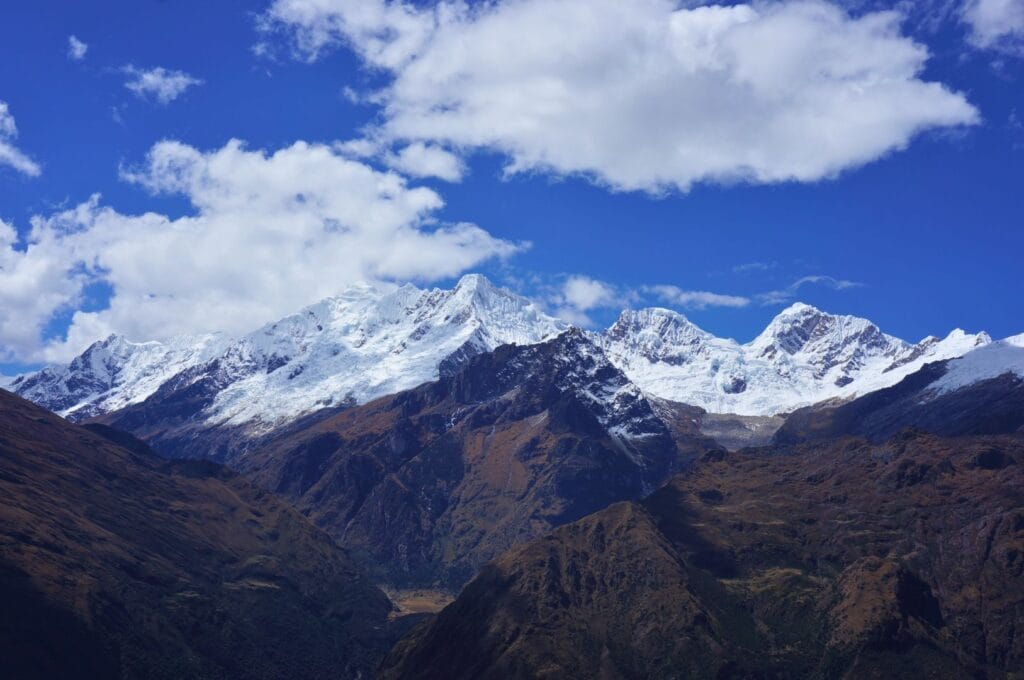
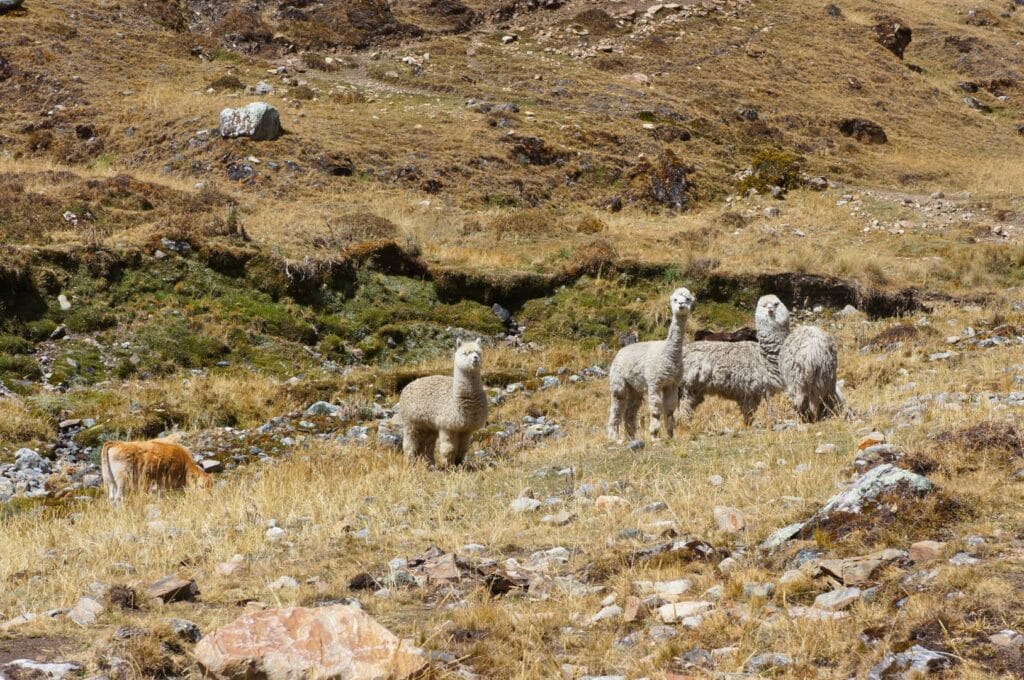
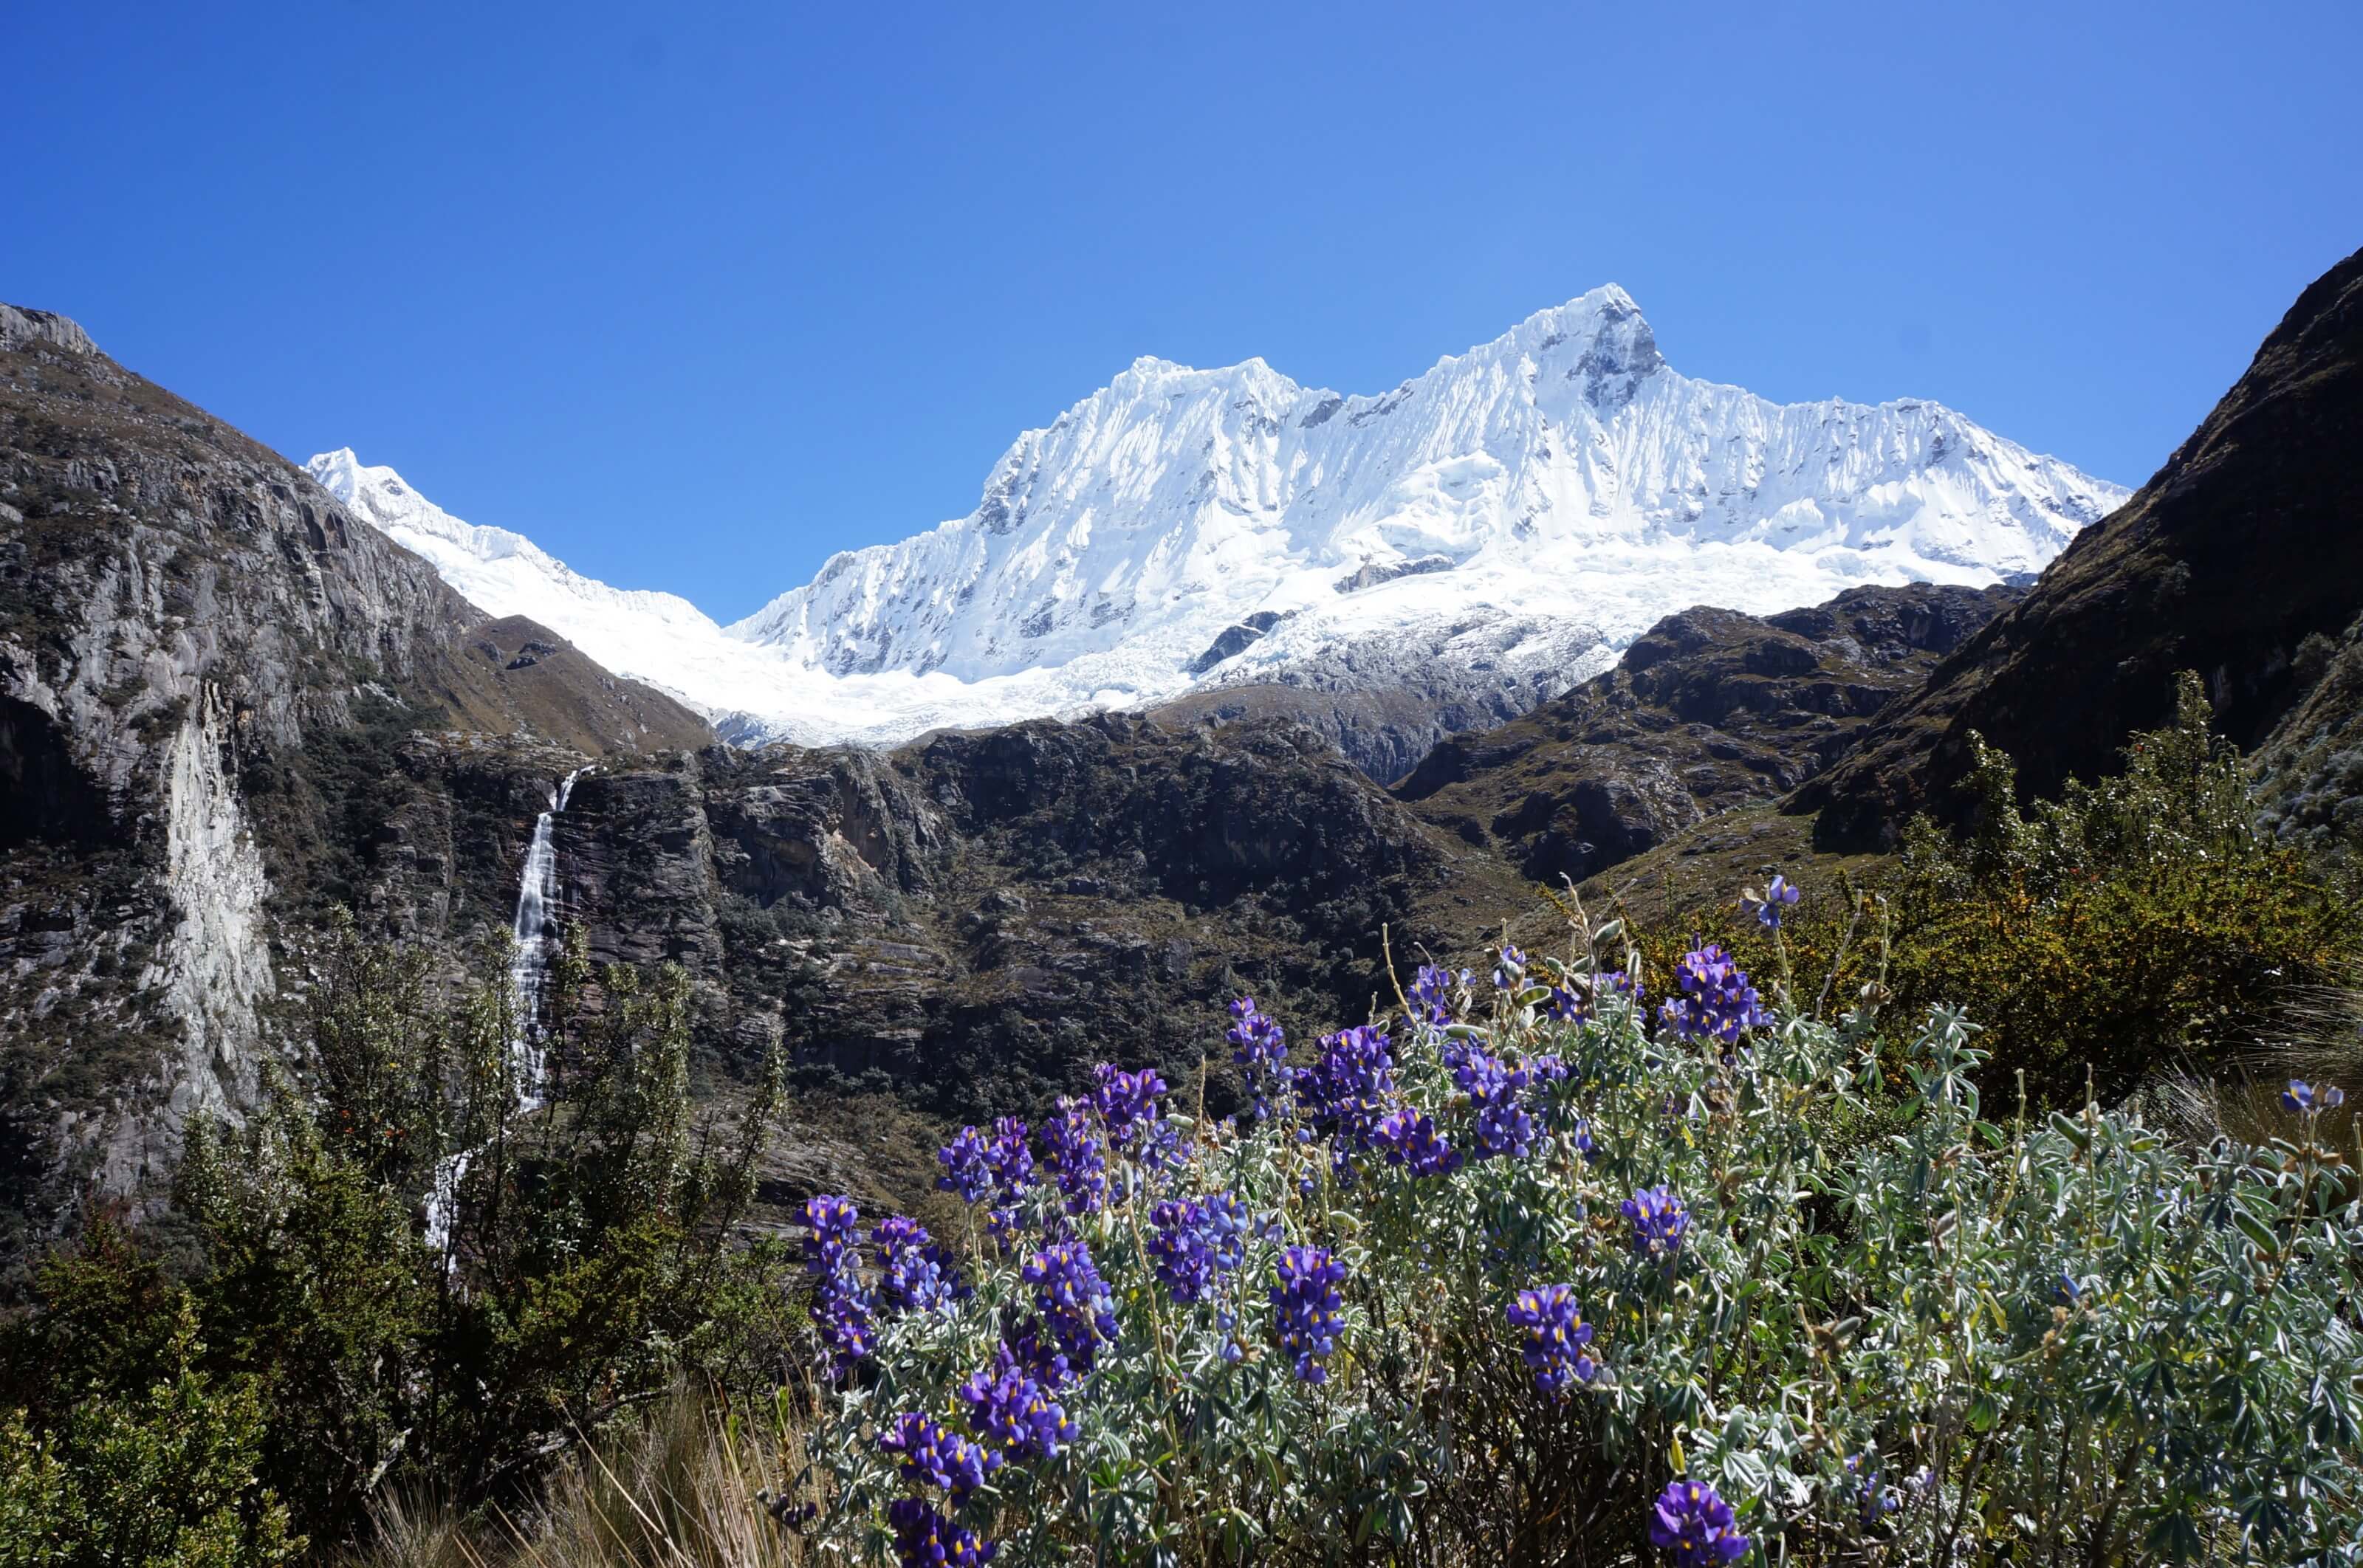
In terms of landscapes, though, there’s not much to complain about, it’s absolutely stunning! I saw myself back in the Cordillera Blanca a week earlier on the Santa Cruz trek… The mountains are all more impressive than the others. To top it off, we encountered wild llamas for the first time! Well, we’ll see plenty more in Bolivia, but it’s always impressive to observe these iconic animals of Peru!

This gives me a bit of energy on this tough day. The only small downside is the new road that somewhat damages this sublime valley. But well, you can still imagine that people have an easier life now that it serves the village.
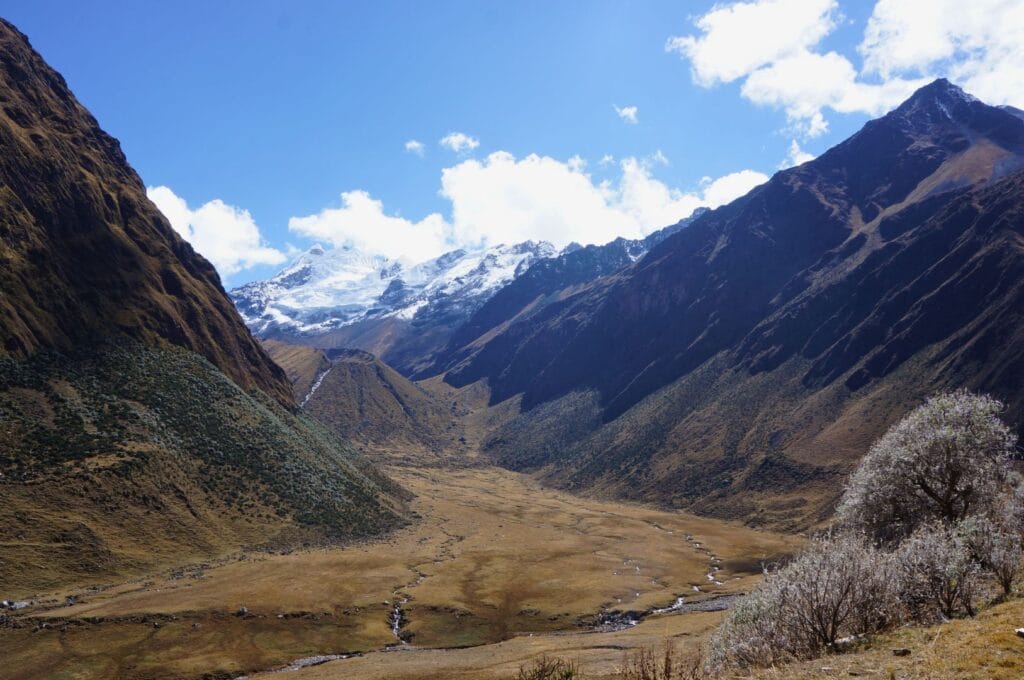
The descent to Totora goes quite well; we lose 1150 meters of elevation over 7 km. We alternate between the road and the trail to spare our knees a bit. In the distance, we can see the Salkantay, the highest mountain in the Vilcabamba mountain range; it’s known for the trek that circumvents it to reach Machu Picchu. It’s a sign that we’re getting closer to our goal but also to the masses of tourists… Goodbye tranquility! After a good 3 hours of descent, we stop at the first house that will let us camp. And after a good pot of polenta, we head to bed. We still have 3 days of hiking until Machu Picchu!
Day 6 of the Choquequirao trek: from Yanama to Totora
- Distance: 17 km
- Elevation gain: 1538 m
- Elevation loss: 1345 m
- Duration: 8 h
- Logistic stop in Totora: campgrounds, shops. A little advice: when you arrive in Totora, don’t stop at the first part of the village where there’s Acampamiento Hornopampa but continue 1 km to the rest of the village. The camping spot is better, and the small shop is much more stocked. Guess who stopped at the first campsite?!
- Here too, if the fatigue becomes too intense, you can take a collectivo (departure at 6 a.m.) to go to Playa or Hidroelectrica. From Totora, the landscapes aren’t amazing, and you’ll walk mostly on the road. Otherwise, you can hitchhike like us, maybe you’ll have better luck with cars?! But don’t count on it too much.
Day 7 of the trek: Totora – Playa
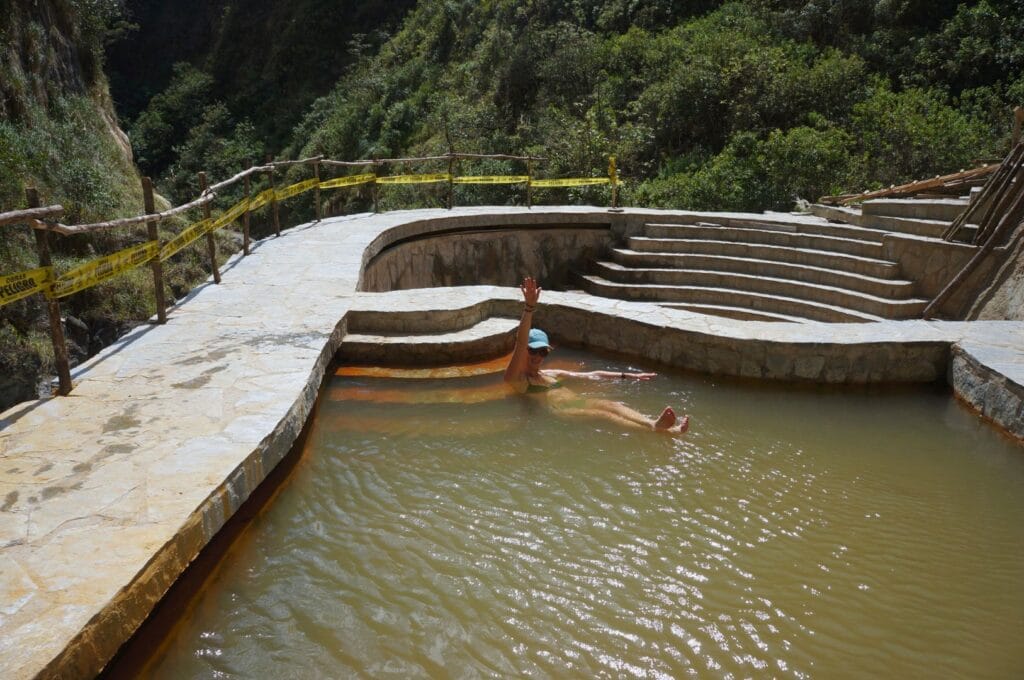
To be honest, we wouldn’t have done this 25 km day of walking (no positive elevation gain and 1500 m of negative elevation gain) if there weren’t hot springs! These springs are located near the village of Collpapampa, about a dozen kilometers below Totora. After Totora, there’s not really a trail but a dirt road and sometimes a shortcut trail in the switchbacks. And as we descend into the valley, we lose the magnificent view we had higher up of the mountains. But well, we muster up our courage and start descending. After 2 hours between road and trail, we finally reach the village of Collpapampa. The hot springs are another 15 minutes further down, at the intersection of the 3 valleys.
Collpapampa
At this junction, we join the route of the very popular Salkantay trek. So, it’s worth noting that the itinerary of this trek isn’t subject to any limitations, unlike the Inca Trail, which has a daily limit of 200 hikers. Consequently, travel agencies in Cusco are happy to send many tourists on these paths. In short, you won’t feel alone.
Generally, people who do the Salkantay trek spend the 2nd night in the village of Collpapampa and bathe in the hot springs in the late afternoon. But since we arrived at the springs around 10 a.m., we were able to enjoy the pool all to ourselves. After 6 and a half days of walking, I can promise you that an hour-long soak in warm water really does wonders (and it cleanses too!). We savor this moment as it should be.
It seems that there are no more hot springs in Collpapampa… We didn’t really find any information online, and the only pool would be the outdoor jacuzzi for Colpa Lodge guests. The ones we splashed around in were located here. If you’re passing by, feel free to leave us a comment to tell us what it’s really like 😉.
Hitchhiking in Peru
Next, we need to reach the village of Playa, where Salkantay trekkers usually spend their 3rd night. To do this, the only solution is to follow the dirt road for about 15-16 km, hoping that a car will pass by, unlike the previous day. In fact, there is a 12 km trail that follows the Rio Santa Teresa River at the bottom of the valley, but landslides have made this path impassable, and even bridges have been torn down… So, we have no choice but to follow the road.
After another 2 hours of walking, still no sign of a car… Damn! We probably have another 6-7 km to go when finally a van deigns to pass by on the road. We signal for it to stop, and the driver agrees to take us in his trailer to Playa for 5 soles. Bingo! It’s about time…
Arrival at Playa
20 minutes later, we arrive at Playa, and there’s a shock! About thirty minivans are waiting for the tourists to finish their lunch, with at least fifty shops scattered around, along with 10-15 campgrounds. In short, it looks like we’re dangerously close to Machu Picchu!
As the road that will take us to Hidroelectrica the next day starts 2-3 km further on, we don’t hesitate to continue until then and get out of this madness! And we did well because right next to where the trail begins, in Lucmabamba, there’s a great camping spot amidst a coffee plantation (there was only one other group there). Perfect! In addition to eating well that evening, we even got some good coffee. Classy, isn’t it? Although a bit surprised by the crowds we found at Playa, we had a great evening/night at the entrance of the trail, from where we’ll catch our first glimpse of Machu Picchu the next day… Finally!
Day 7 of the Choquequirao trek: from Totora to Playa
- Distance: 25 km
- Elevation gain: 1327 m
- Elevation loss: 2500 m
- Duration: 7 h
- Logistic stops:
- Collpapampa: campgrounds, meals, shops
- Playa and further Lucmabamba: campgrounds, accommodations, meals, shops
- No more food and water problems from this point onward. We’re back to civilization, and there are tiendas in all the villages.
- We strongly advise against staying in Playa overnight! As we said, this place has absolutely no charm. We recommend continuing 2-3 km along the dirt road to Lucmabamba, at the beginning of the trail we’ll take on day 8, leading to the Llactapata ruins. Continue on this trail, and here, in the coffee plantation, you’ll find the Qori Café campground, next to the Lucma Lodge, as well as other more intimate accommodations.
- If you feel like treating yourself a bit before tackling the final stretch towards Machu Picchu, we recommend the Refugio de Mery Lucmabamba (one of our readers went there). In addition to delicious and homemade dinner and breakfast, you can visit the coffee plantation and savor the precious nectar on the spot. Another option if you’re motivated to walk a bit further, some accommodations and campgrounds are right next to the Llactapata ruins, from which Machu Picchu is visible. They looked nice for a beautiful view of the ancient Inca city in the early morning!
Review before tackling Machu Picchu
These 4 days constituted the wildest part of the Choquequirao trek to Machu Picchu. It wasn’t easy, especially with our heavy backpacks. But the landscapes, the lost Inca ruins, the great encounters with the locals, and the hot springs were well worth all the efforts! But we’re not unhappy to be just 1 day’s walk from Aguas Calientes, the village at the foot of Machu Picchu.
Day 8 of the trek: Playa – Aguas Calientes
7 a.m. sharp, and we’re ready to climb up to the Llactapata ruins, from where we’ll catch our first glimpse of Machu Picchu! On the trail, we’re accompanied by a few groups making the same journey, but it’s not overwhelming like yesterday in the village of Playa.
From Playa to Llactapata ruins
It should be noted that some of the people who sleep in the village are then directly transported by minibus to Hidroelectrica, where they will take the train to Aguas Calientes. But as for us, there’s no question of missing our first meeting with Machu! And despite the muscle soreness, we know the goal is near: we’re motivated like never before!
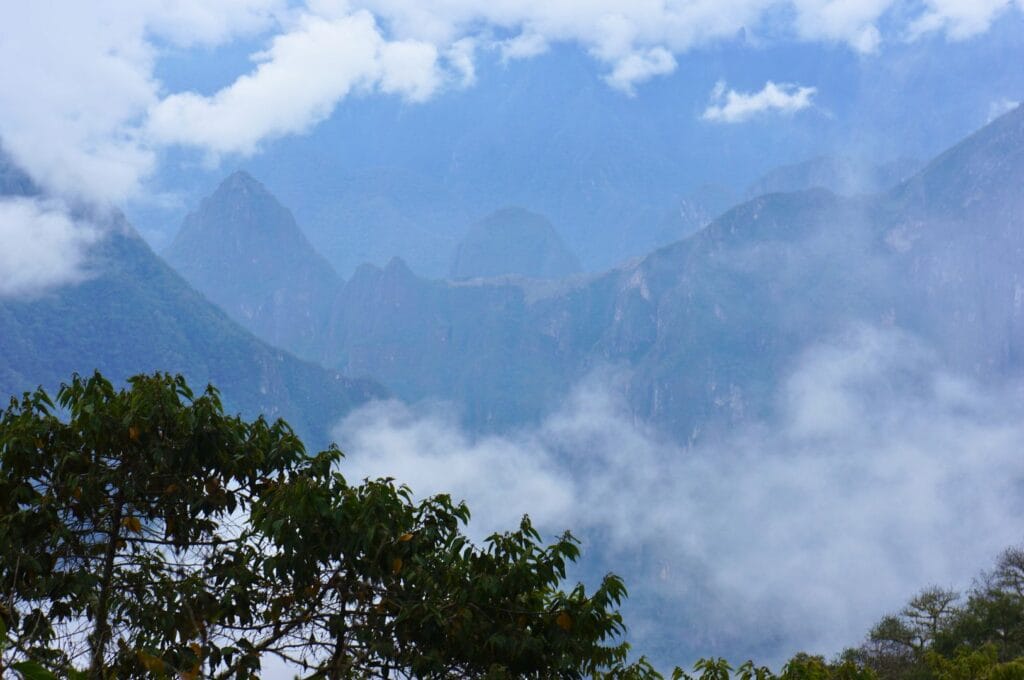
After 2 hours of a rather gentle ascent, we reach the Llactapata ruins. And there, guess who casually emerges from the fog? Our friend, Machu! Well, we won’t lie to you, our first contact is a bit timid. The weather isn’t incredible, so our photos are a bit misty, so to speak. But hey, nothing to demotivate us!
We’re sure that tomorrow the weather will be sunny for visiting Machu. We take a good half hour to enjoy the view and take silly photos in the ruins before starting the descent towards Hidroelectrica.
Arrival at Hidroelectrica
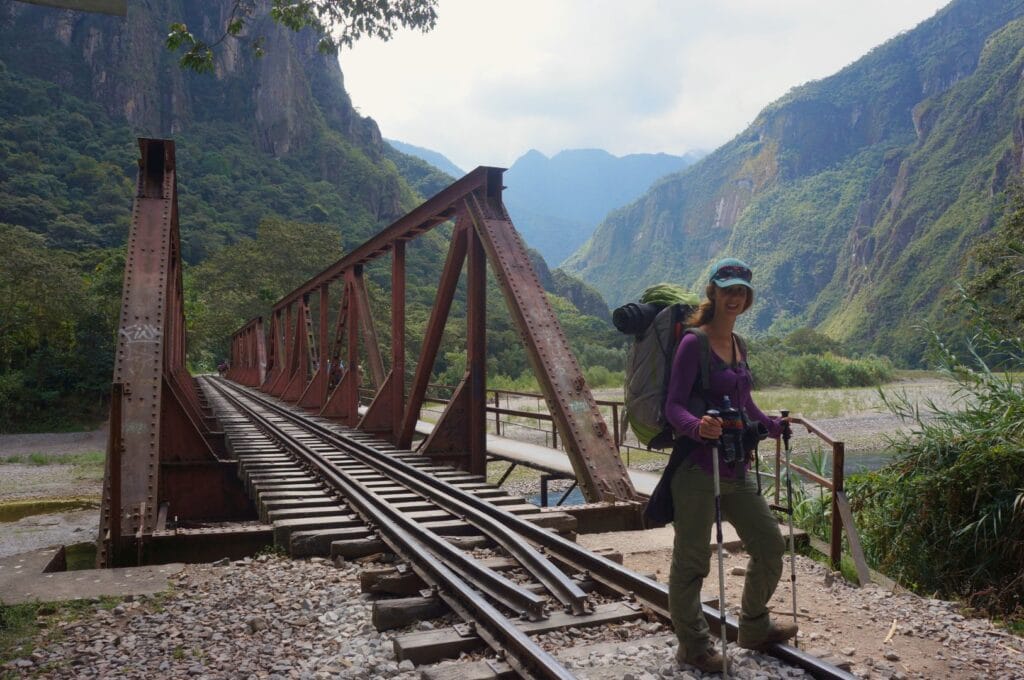
It will take us another 2 hours to reach Intihuatana, where the famous Machu Picchu hydroelectric station is located. By the way, you’ll often hear Hidroelectrica rather than Intihuatana. It’s safe to say that the place lacks any charm! In addition to the people working there, there’s a kind of parade of minibusses dropping off tourists at the beginning of the railroad tracks leading to Aguas Calientes! Along these tracks, you’ll find the inevitable shops and restaurants taking advantage of this tourist influx.
Here, you have two options to get to Aguas Calientes. Either you pay about 37 dollars to take a 10 km train ride (which is significantly more expensive than in Switzerland), or you walk the 10 km along the rails. At that price, we don’t think twice. We set off along the railroad tracks, alongside the 300 other people who made the same decision!
Follow the train tracks to Aguas Calientes
So, we won’t lie, these aren’t the most interesting 10 kilometers of the trek! We walk half of the time on the rocky rails (not very pleasant), and since there are quite a few people, it’s impossible to walk at our own pace! But hey, it’s almost 75 dollars saved… As a consolation, we still catch a glimpse of our friend Machu Picchu by looking up.
It takes between 2 and 3 hours to reach Aguas Calientes on foot. These 8 days of trekking are felt, and we arrive in the village a bit exhausted! We hurry to take the first hotel to grab a quick meal and go to bed without lingering. We had planned to get up at 4 a.m. to climb the famous stairs to Machu Picchu. Our batteries should be recharged after a good night’s sleep, right?
Our opinion on Aguas Calientes
We admit it, we didn’t particularly like Aguas Calientes. In fact, we downright hated it! It’s a bit like the Zermatt of Peru. Zermatt, for those who don’t know, is the village below the Matterhorn that combines all the clichés of Switzerland in one place!
The center of Aguas Calientes is ultra-kitschy, with 5 souvenir shops per square meter, and all the restaurants have absolutely the same menu, combining pizzas, pasta, Mexican food, burgers, llama steaks, and so on…
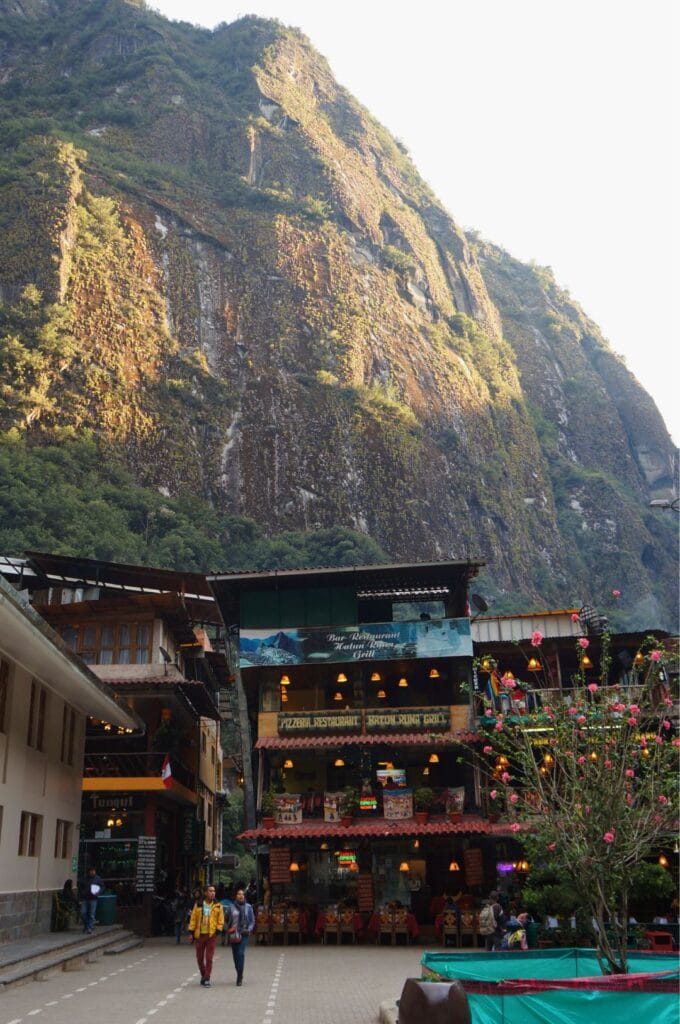
Everything is very expensive: we even had to negotiate the price of our meal at the restaurant, something that hadn’t happened since Indonesia. A good tip is to eat upstairs at the central market; you’ll avoid the tourist traps there. Also, people are not particularly friendly compared to the rest of Peru.
The only positive point we found in Aguas Calientes is that there is hot water, as the name suggests! After 8 days of trekking, you can imagine that a hot shower is quite pleasant. But hey, nothing to linger about! We had initially planned to stay for 2 nights to rest, but we ultimately decided to return directly to Hidroelectrica/Intihuatana after our visit to Machu Picchu.
Day 8 of the Choquequirao trek: from Playa to Aguas Calientes
- Distance: 20.6 km
- Elevation gain: 1700 m
- Elevation loss: 1760 m
- Duration: about 7 h
- Logistic stops:
- Llactapata: campground, accommodations, meals
- Hidroelectrica: campgrounds, accommodations, shops, restaurants
- Aguas Calientes: campgrounds, accommodations, shops, restaurants
- Accommodations in Aguas Calientes: since the day was long, we weren’t finicky and took the first hotel we found… It wasn’t great, so we wouldn’t necessarily recommend it. Find all hotels in Aguas Calientes here (we detail some accommodations at the best prices for Machu Picchu here). For this stop, we had the recommendation of Mandor Camp, recommended by several readers, and you’ll be 30 minutes from the entrance to Machu Picchu. In addition to hot water and wifi, this campground has a small park with plants, pineapples, a river with a waterfall… A nice setting! However, one reader (thanks again Nolwenn for the advice) does not recommend Wayna Picchu, a campground closer to the entrance…

Day 9 of the trek: Aguas Calientes – Machu Picchu – Hidroelectrica
Note: we are writing a complete article on how to plan your visit to Machu Picchu. We explain the different circuits, the mandatory reservations, the guides…
Rriiinnngggg! The alarm goes off at 4 a.m. It’s harder to get out of bed than out of the sleeping bag… But we motivate ourselves: today is the day we finally visit the Inca citadel of Machu Picchu after all the efforts made to get here! Our legs are heavy, especially at the thought of climbing the stairs for 400-500 meters to the entrance. We try not to dwell on it too much, but since we don’t have our backpacks, we already feel lighter. We head with our headlamps towards the bridge that crosses the river where the famous stairs begin. We’re not the only ones and have no difficulty finding the way.
At 4:20 a.m., we’re almost the first ones at the bridge, but here comes the first disappointment: the bridge is closed until 5 a.m.! Obviously, no one had informed us, and when you think about it, it’s not very fair. The thing is, the gates of Machu Picchu open at 6 a.m., and the first buses arrive at the top at 5:45-6 a.m.!
Arrival at the entrance to Machu Picchu
Knowing that it takes at least 40 minutes to climb the stairs almost running to reach the entrance, it’s very difficult to get to the top before the first bus. But we don’t let ourselves be discouraged, and as soon as the bridge opens, we climb up as fast as possible with the energy we have left. A few flights of stairs without a backpack aren’t going to scare us! 42 minutes and 45 seconds later, we reach the entrance sweating profusely and just before the first bus. Well, in truth, we arrived at the same time as it, but by the time people got off the bus, we were already in front of the gates.
We did it! And I’m even the first girl to reach the top of the stairs as if the 8 days of training had paid off! But we feel a bit sad for the people who climbed up like us and who will arrive 5-10 minutes later, behind the first 5 buses full of tourists… A bit frustrating, you know!
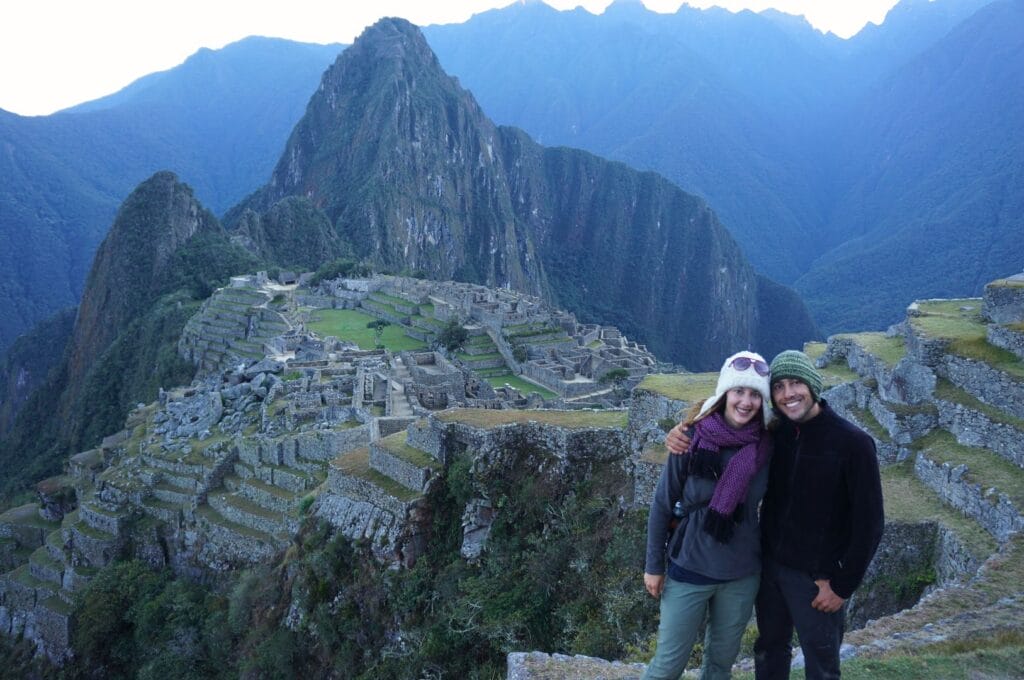
Machu Picchu visit
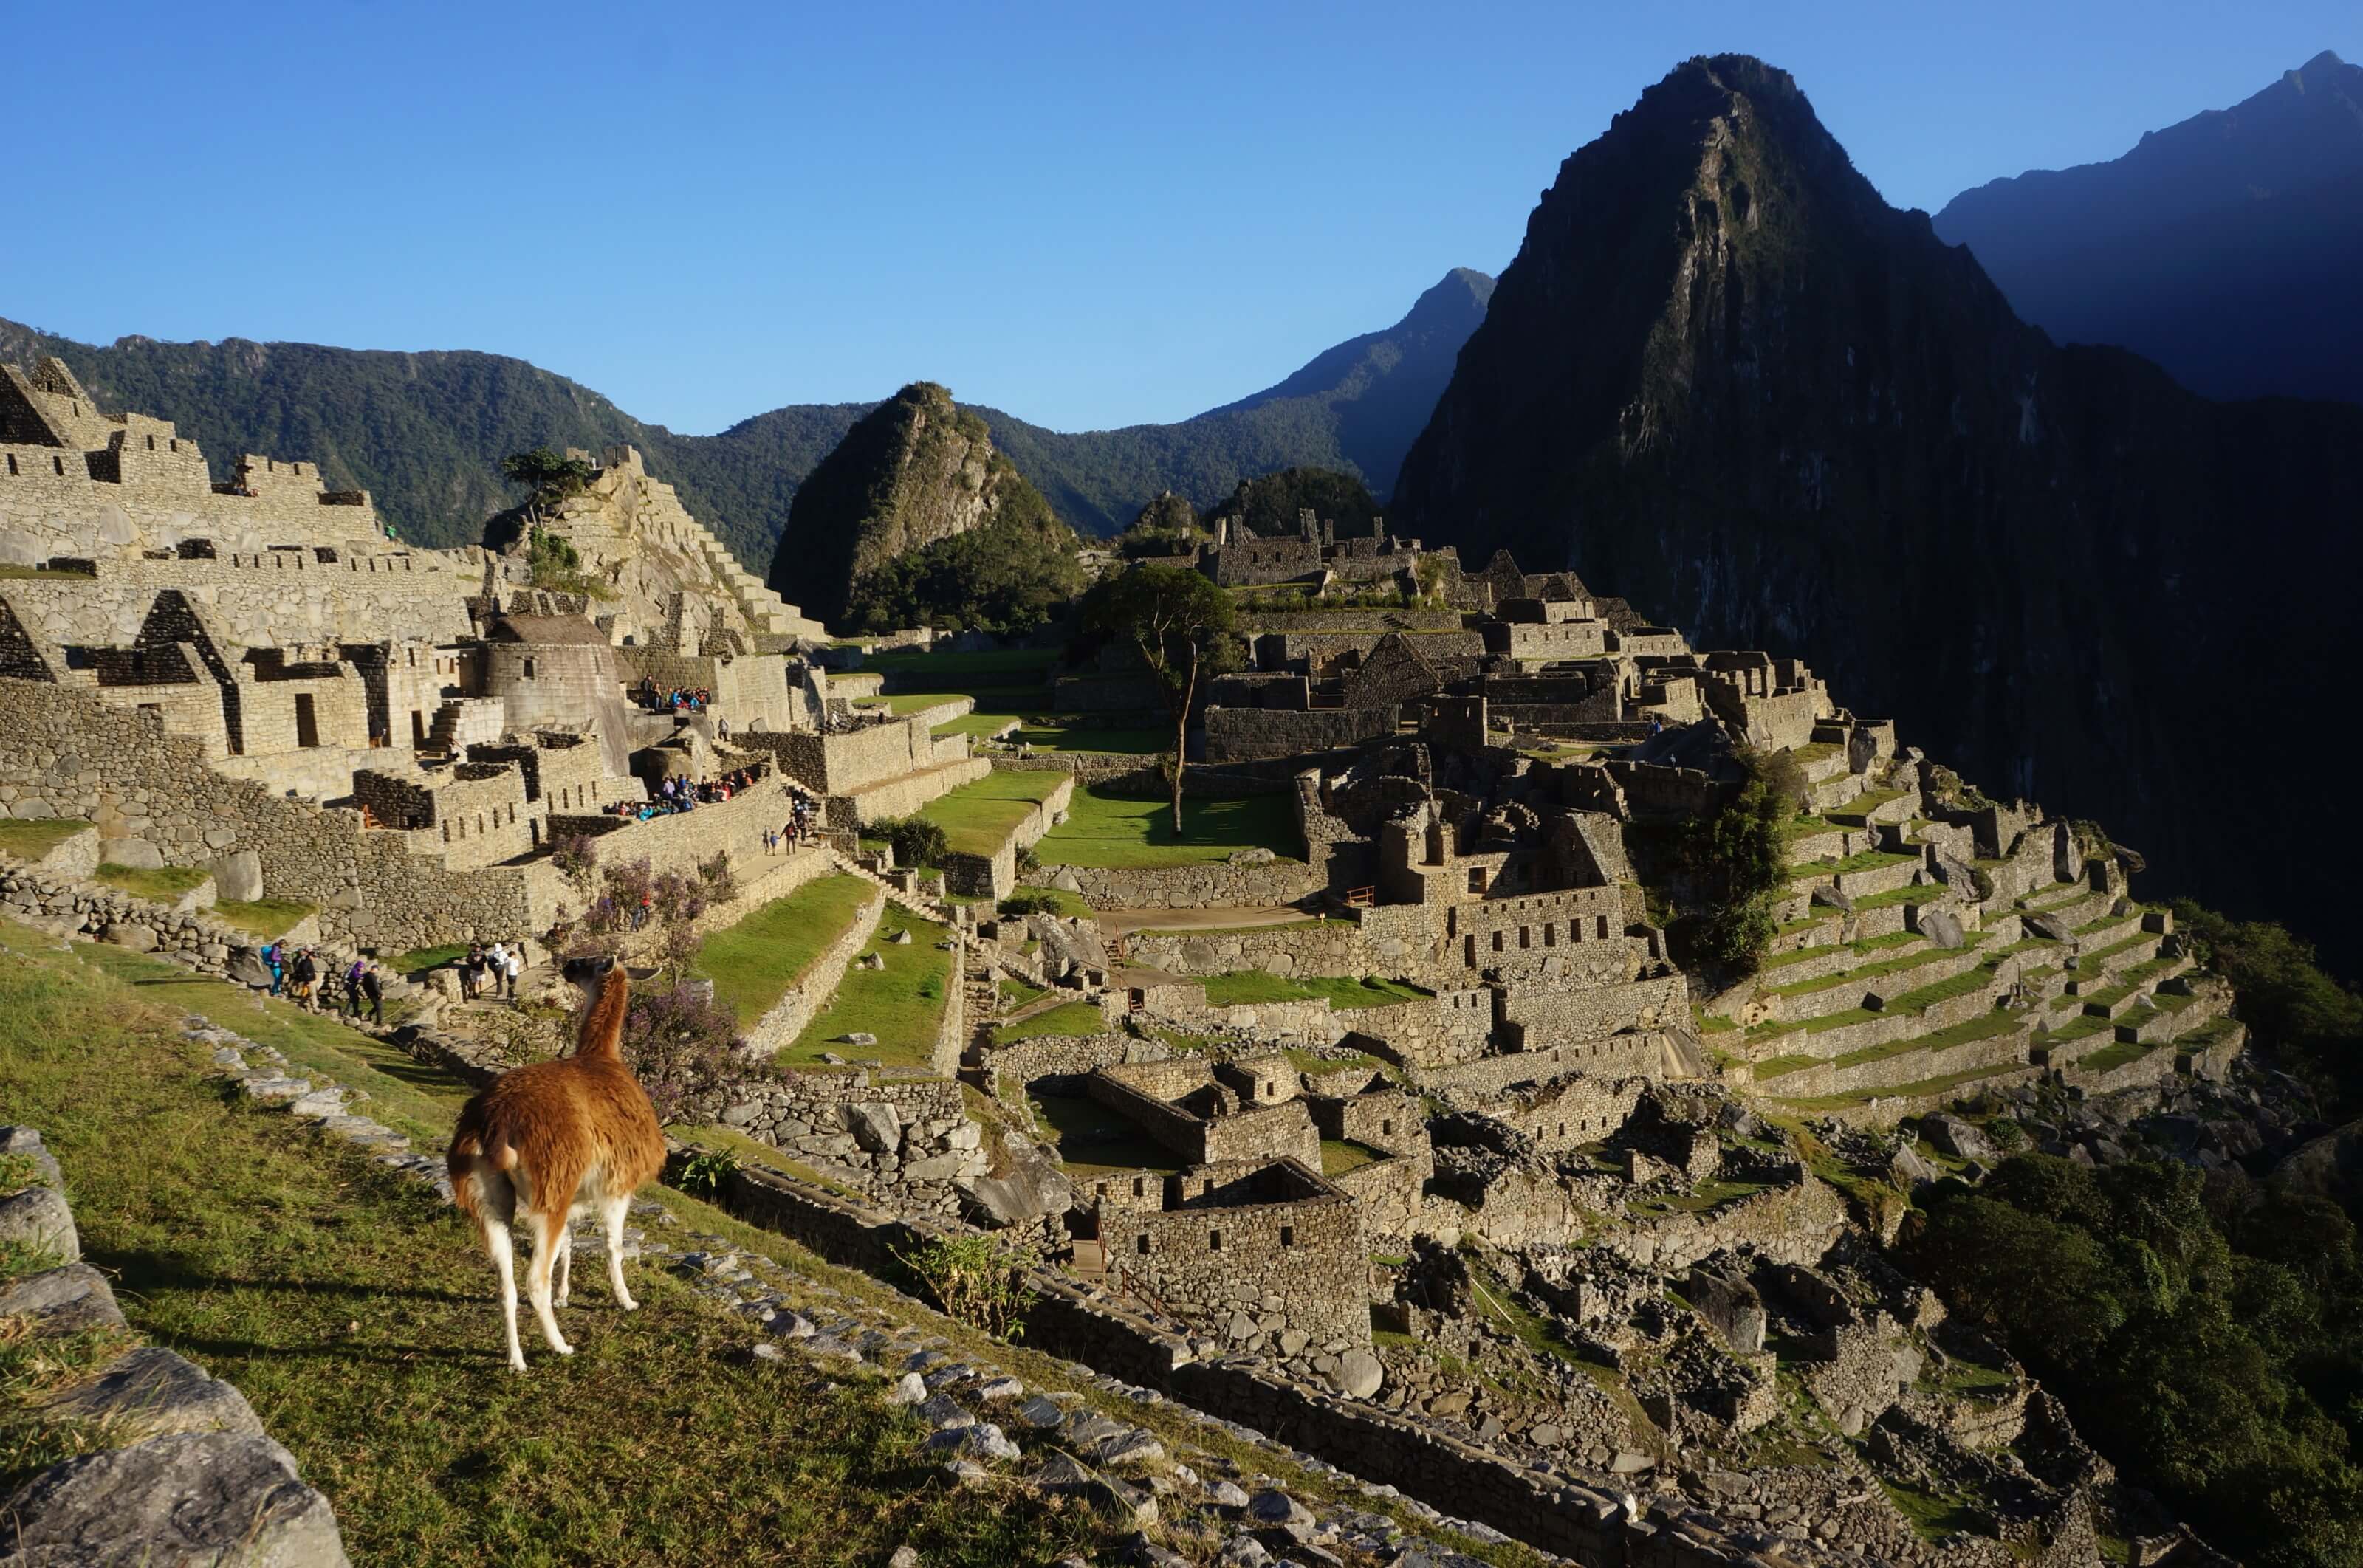
As soon as the gates open, we hurry to climb the last stairs that separate us from our goal. And there, bam! It’s a visual slap in the face! We have Machu Picchu almost all to ourselves in the light of the early morning. We simply enjoy these moments that we’ve been waiting for for 9 days! As a bonus, the weather is perfect! It couldn’t be otherwise.
The first hour of walking in the Machu Picchu citadel is extremely pleasant. The site is quite large, and we can still enjoy this spectacle in complete tranquility. We obviously take numerous photos of the ruins. Fabienne, on the other hand, enjoys capturing pictures of the llamas freely roaming the site for some nice souvenir shots.
When more people are around, we slowly head back towards the entrance to find a guide who can explain the stories behind these centuries-old stones. After 2 minutes of negotiation, we embark on a 2-hour private tour. It would be a shame to have come all the way to Machu Picchu on foot in 9 days and not take advantage of a guided tour.
Note: the guide is not mandatory to enter Machu Picchu, but since there are no explanations on-site, it can be worth it! Recently, booking tickets in advance has become mandatory to enter the lost city.
End of the visit and return to Cuzco
It’s around 10 a.m. when our guided tour ends. We’ve had enough of Inca ruins for the day! So, we decide to descend to Aguas Calientes by the same path we took in the morning. Since the prospect of spending the afternoon and another night in the extremely kitschy village of Machu Picchu doesn’t appeal to us, we decide to use the little energy we have left to return along the tracks to Hidroelectrica. At 1:30 p.m., we hop on a minibus bound for Cuzco. We’ll arrive there in the early evening, completely exhausted but happy and proud of ourselves! It’s certain, we won’t forget this adventure to Machu Picchu anytime soon!
Day 9 of the Choquequirao trek: visit Machu Picchu and return to Hidroelectrica
- Distance: 20 – 25 km depending on the circuit
- Elevation gain: 500 m
- Elevation loss: 600 m
- Duration: 7 h
Conclusion of the Choquequirao trek
So, that’s the end of the account of this Choquequirao trek to Machu Picchu in 9 days. It was the first time we embarked on such a long trek independently. And it’s probably not the last time we’ll try this experience. Now that we’ve seen that we’re capable of it, we’d be foolish to deprive ourselves. At the end of an adventure like this, we just feel happy, proud, and satisfied. It’s extremely rewarding as a way to travel! Memories for life, you know!
We’ll see you for the ultimate article that breaks down our summary and budget for a trip to Peru. See you soon!
Pin it
Thanks for sharing! Are you sure the Choquequirao campsite is now closed? I can’t find this cited anywhere? thx