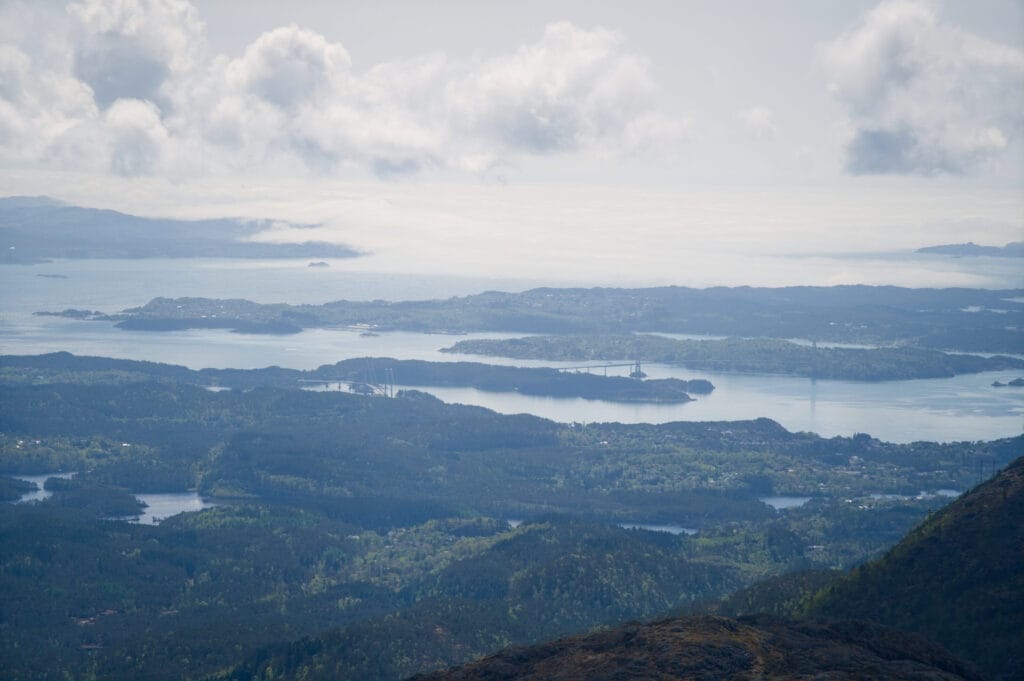
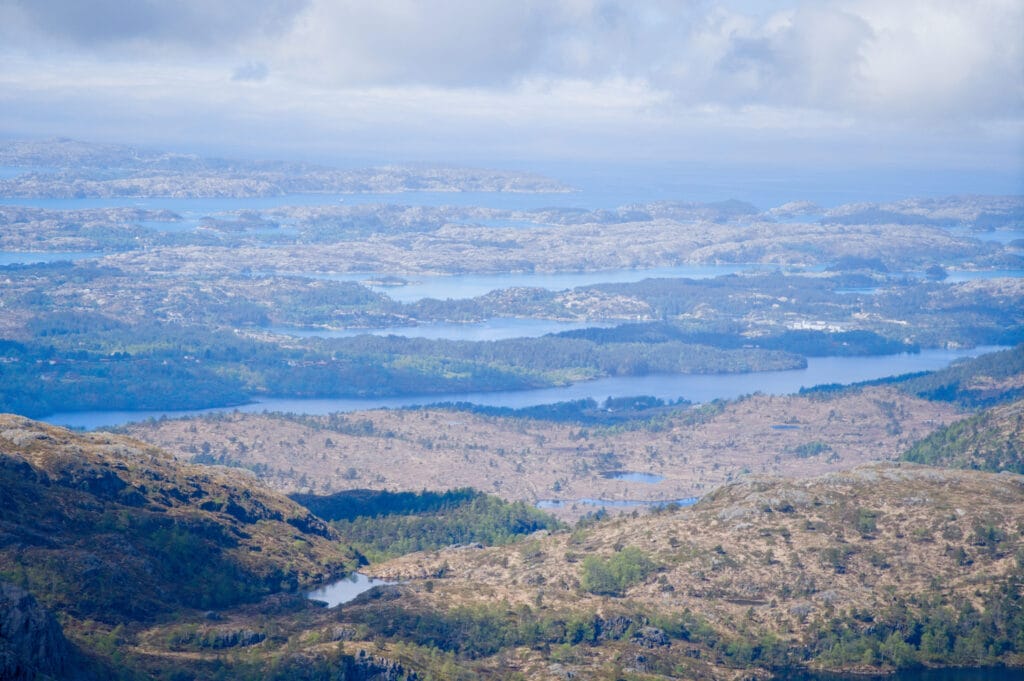
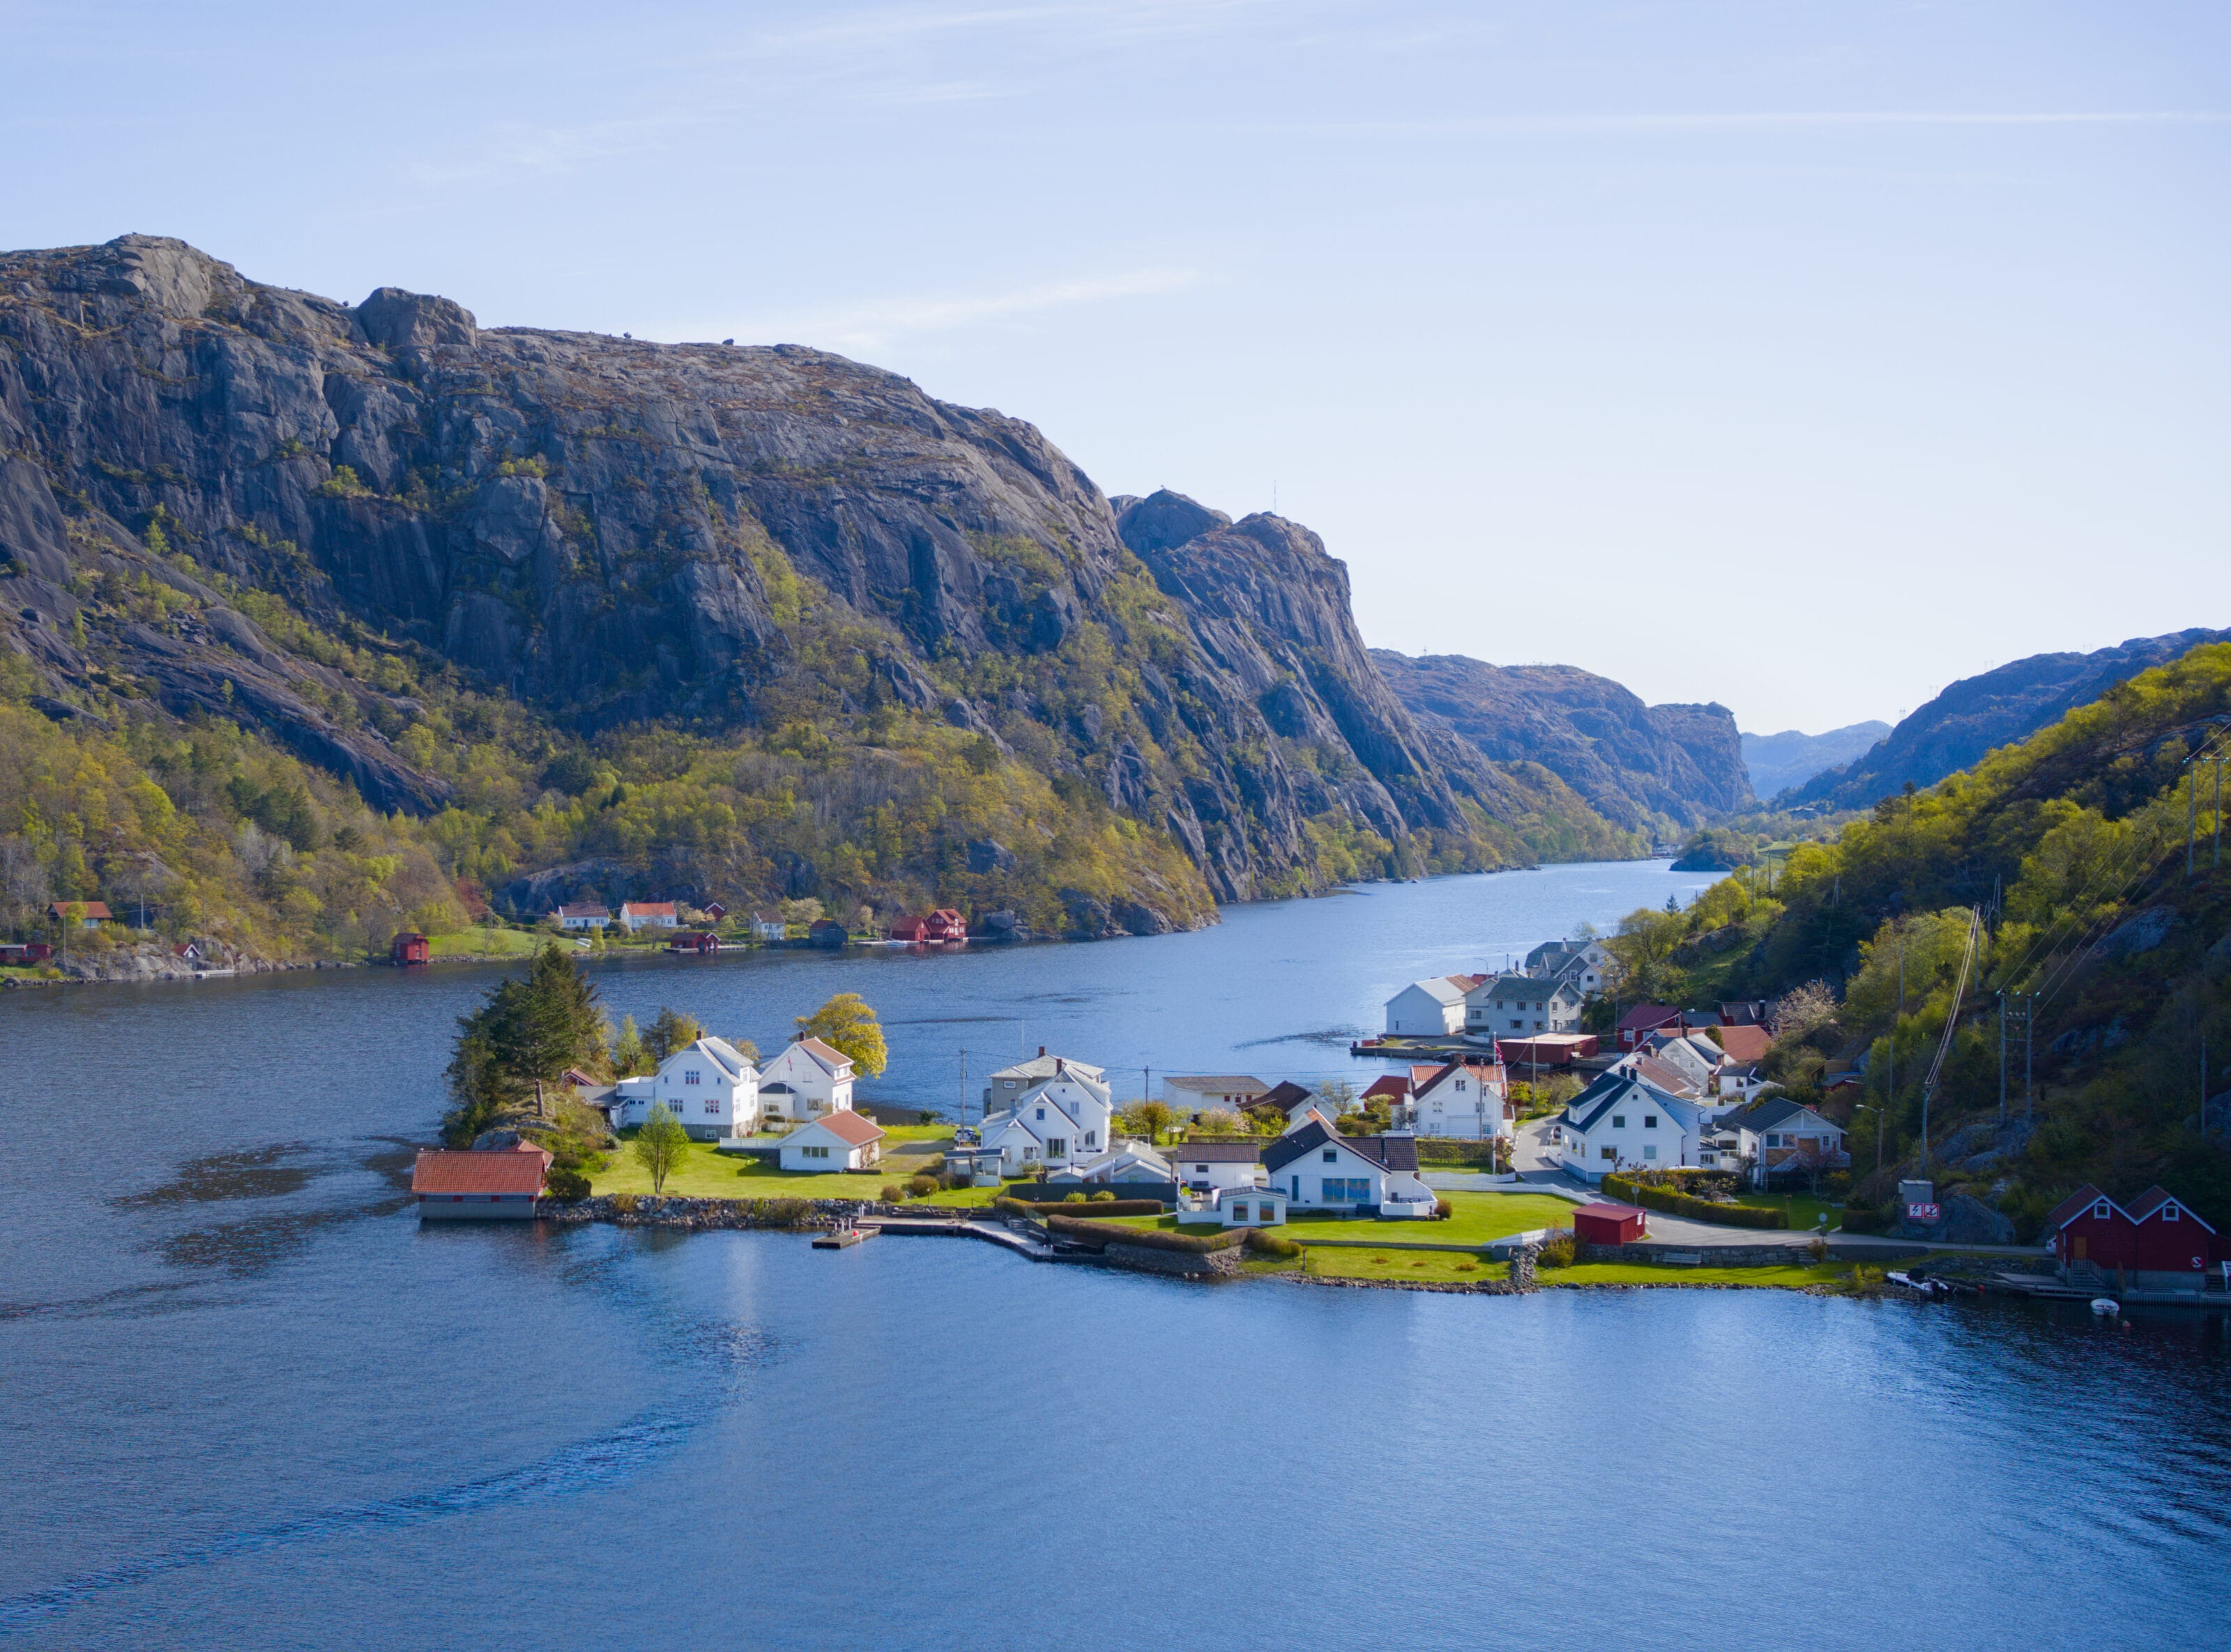
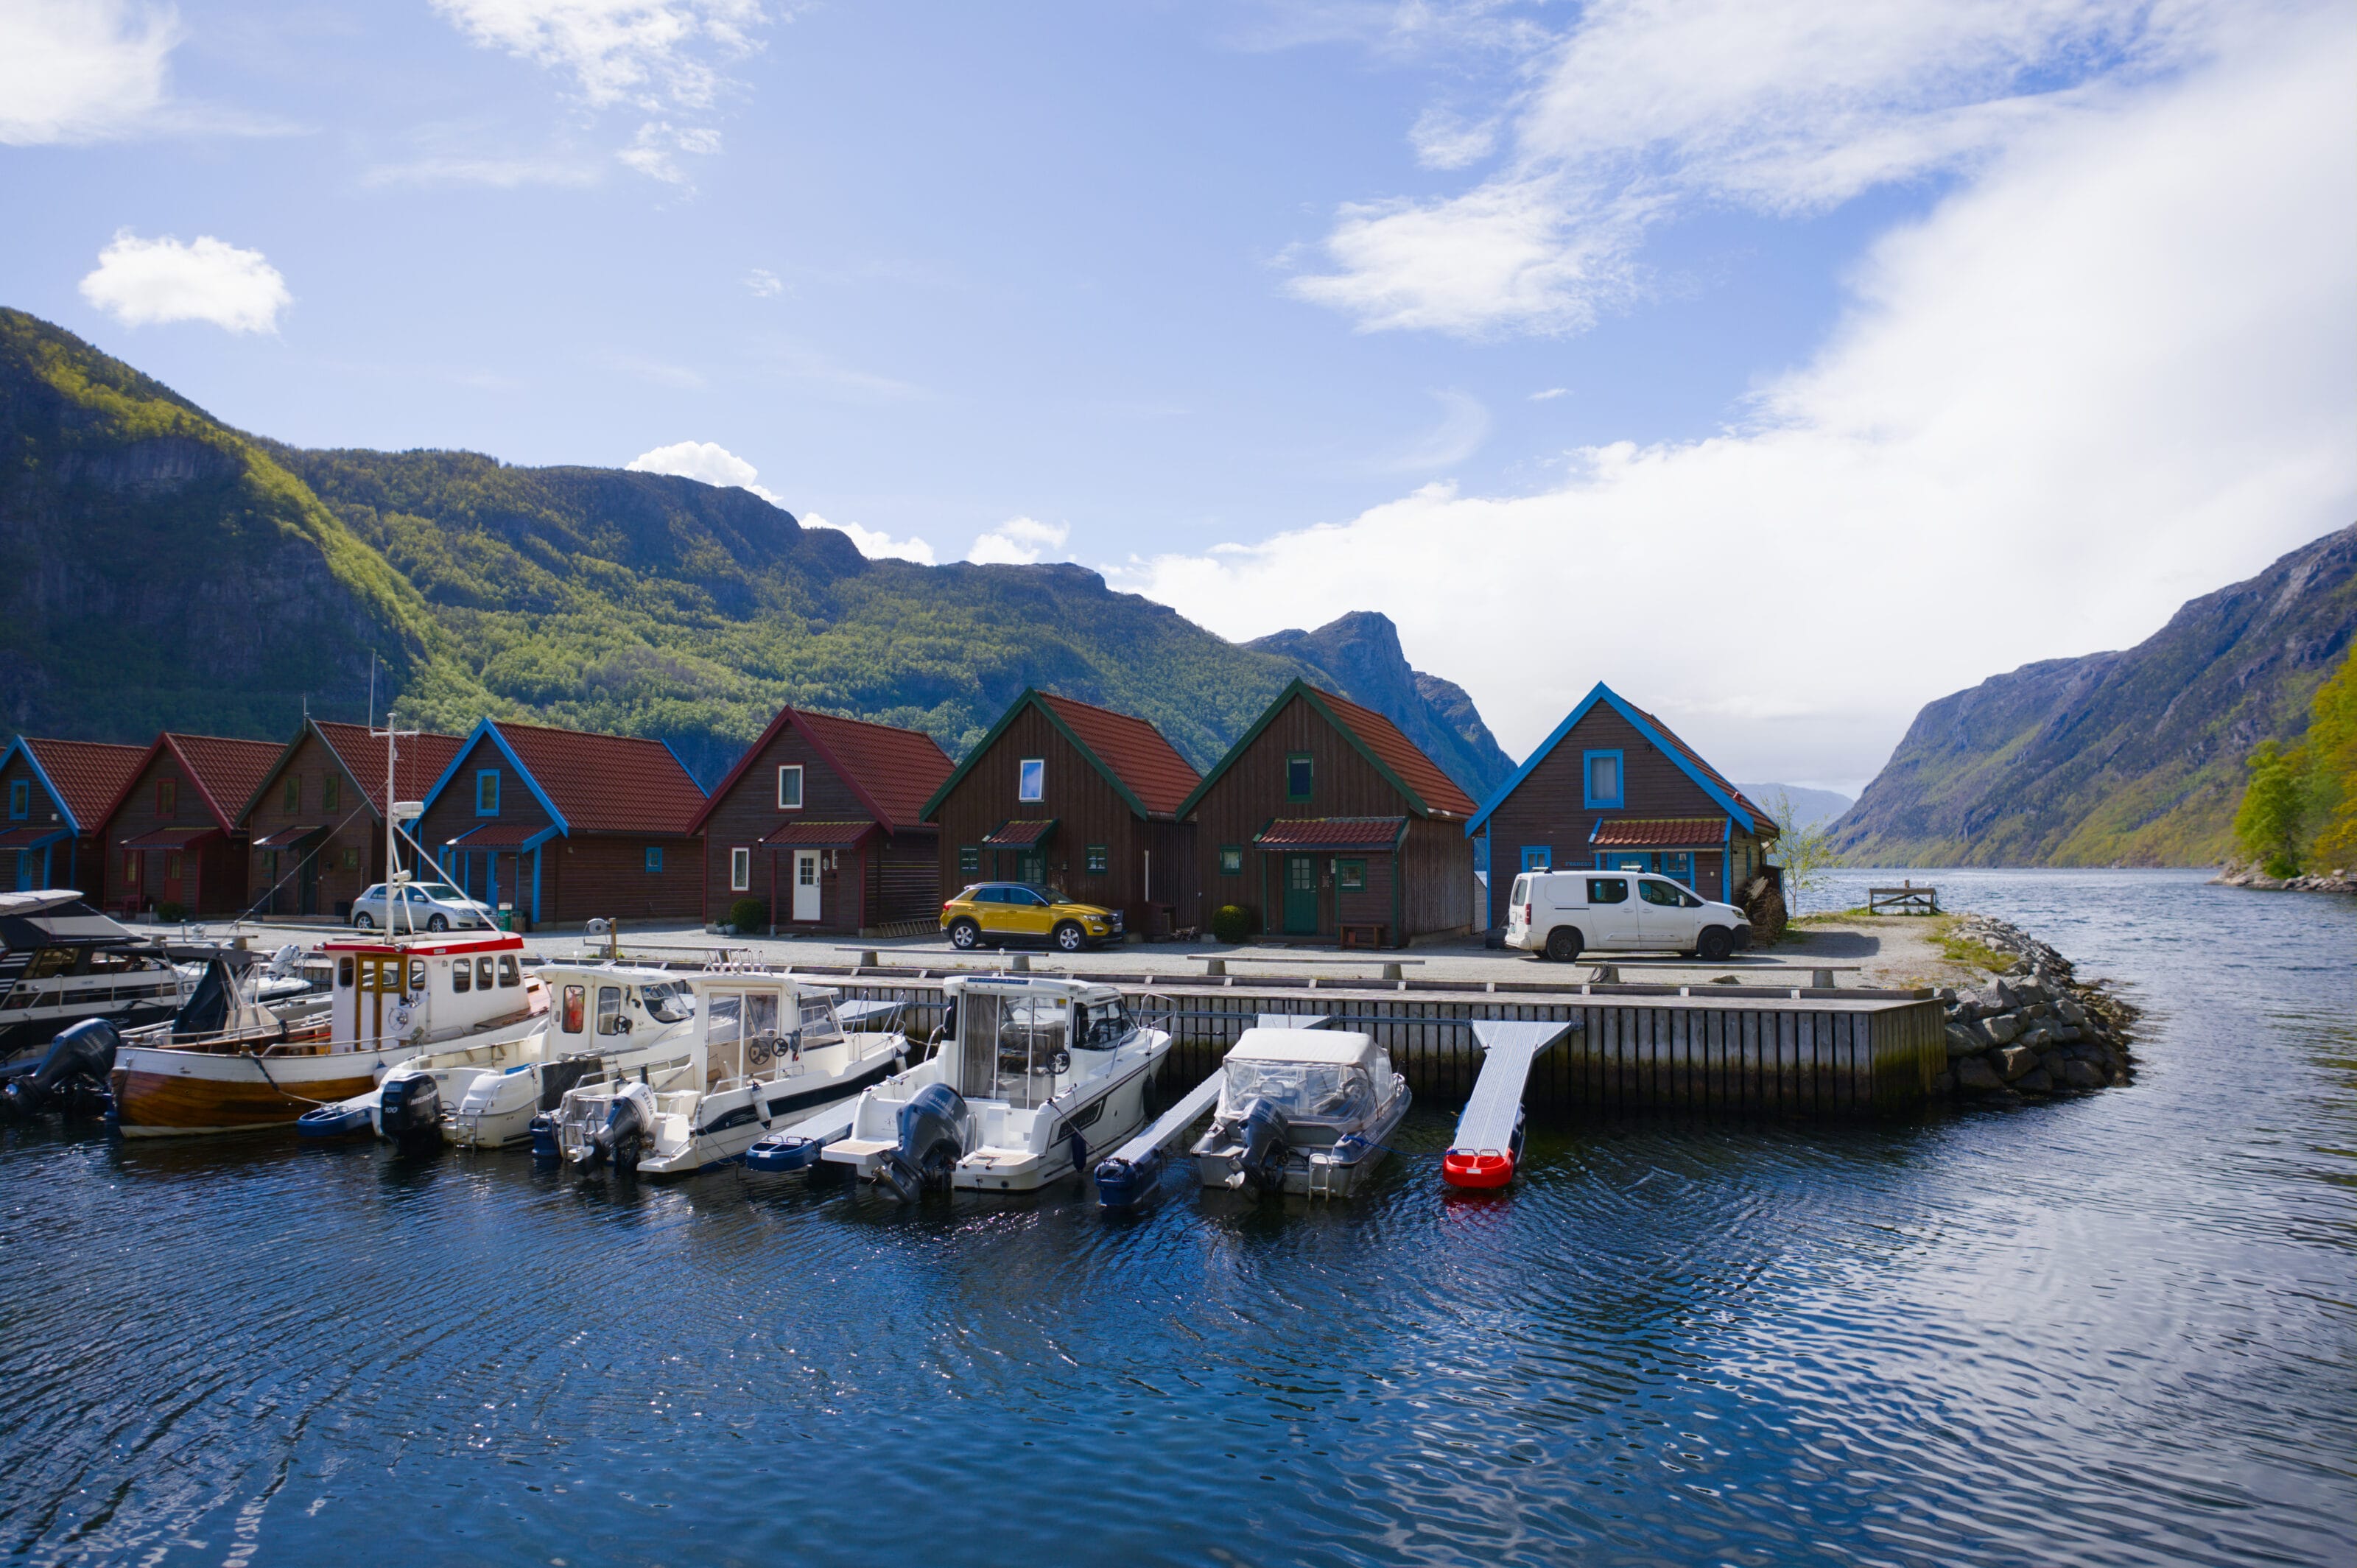
In this new article on hiking in Norway, we’re taking you to the Sunnhordland region, located just south of Bergen. Here, the peaks don’t plunge directly into large, spectacular fjords as they do in other parts of Vestland. The landscape is more fragmented, with a multitude of islands connected by bridges, inlets stretching as far as the eye can see, and mountains rising from the middle of the ocean.
When you take a closer look, you’ll discover an extensive network of hiking trails and mountain huts that allow you to explore the wilder terrain of the interior.
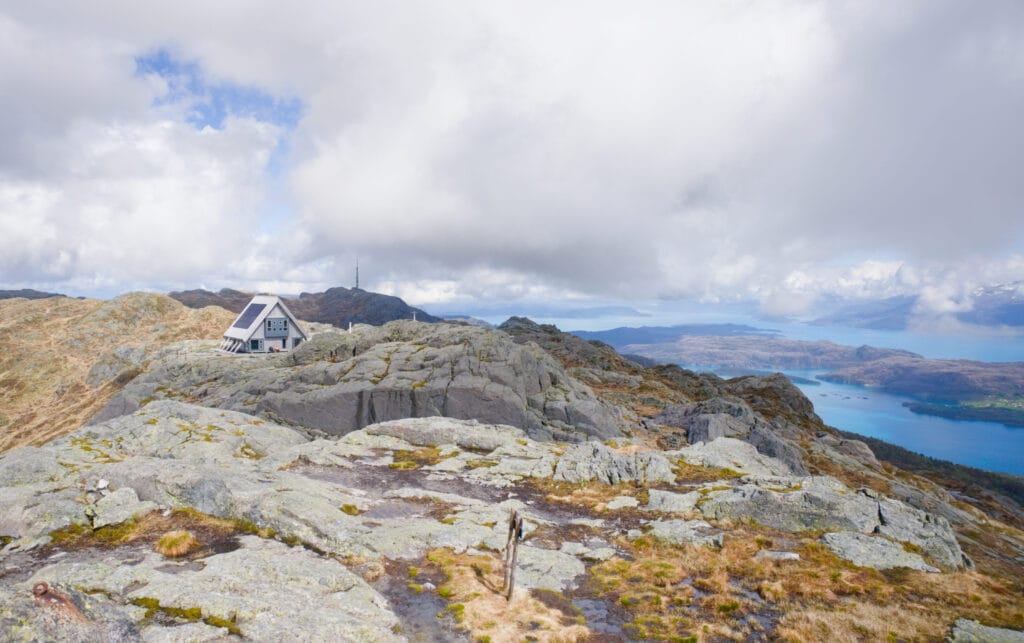
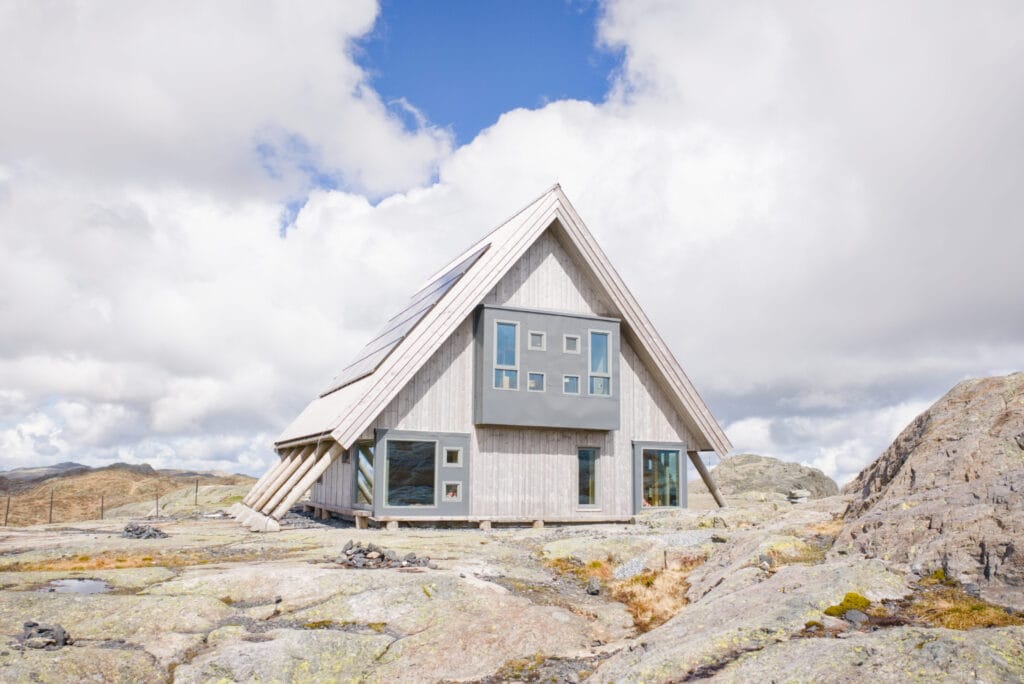
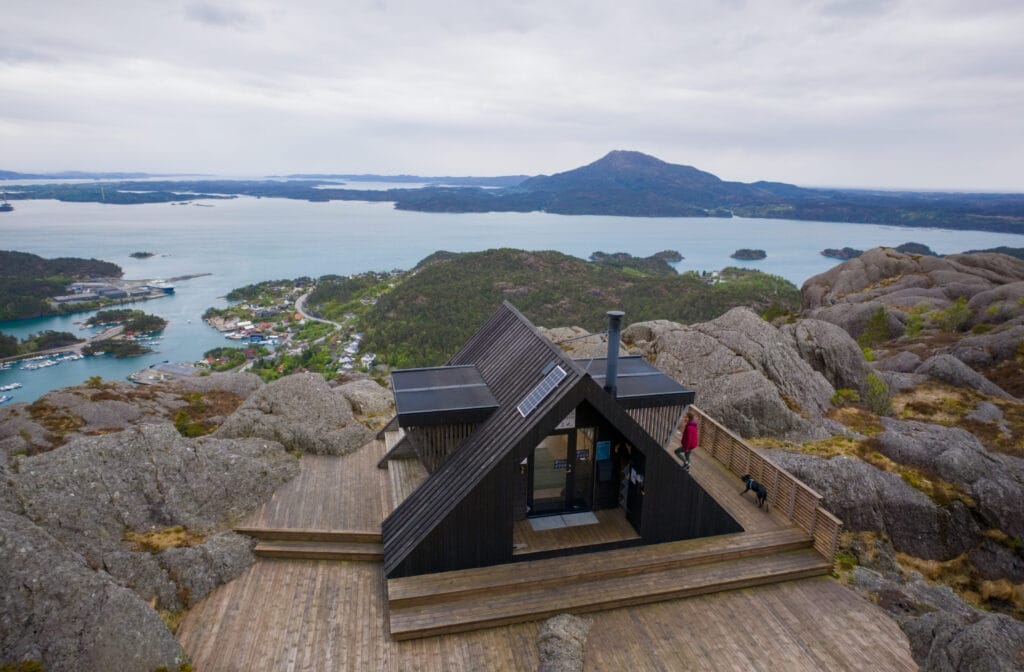
The DNT Stovegolvet mountain hut is located on the island of Stord, one of the largest in the region. Perched in the mountains overlooking the island, it offers a wonderful opportunity to discover a lesser-known side of Norway.
The hike starts at Stovegolvet
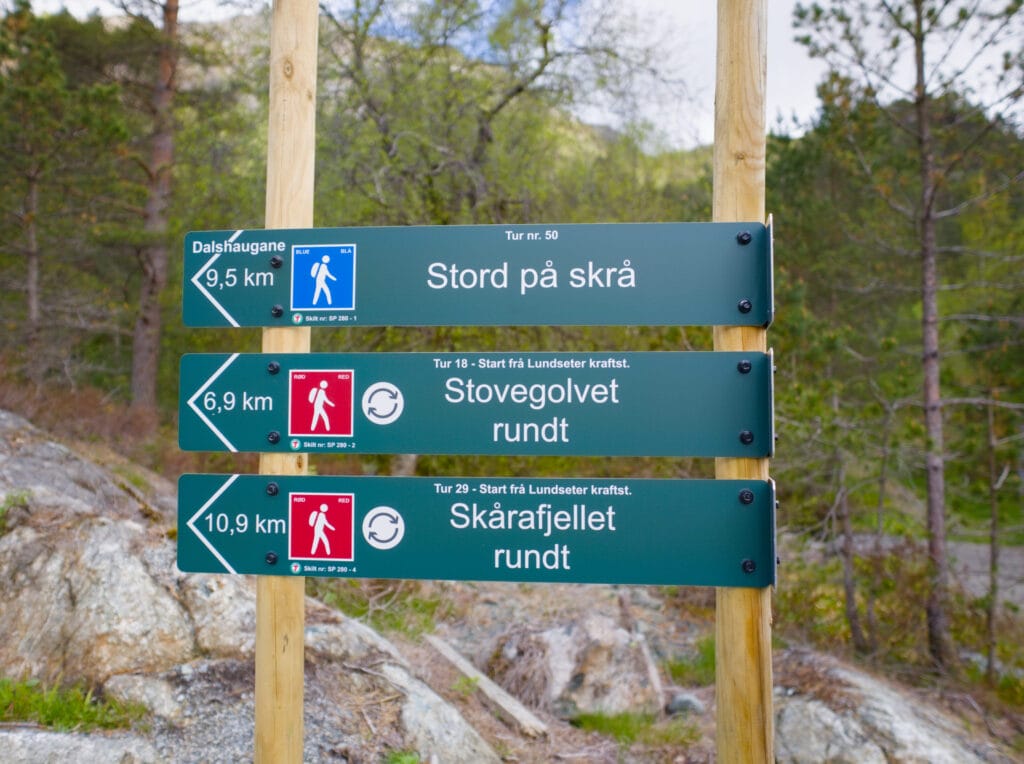
Our hike today starts at the parking lot of the Lundsseter hydroelectric power station, a large free parking lot on the island of Stord. Right at the parking lot, you’ll find signs marking the loop trail, so you can start either to the left or to the right. We opt for the ascent on the left. This path is steeper and more direct (2.5 km compared to 4 km on the right).
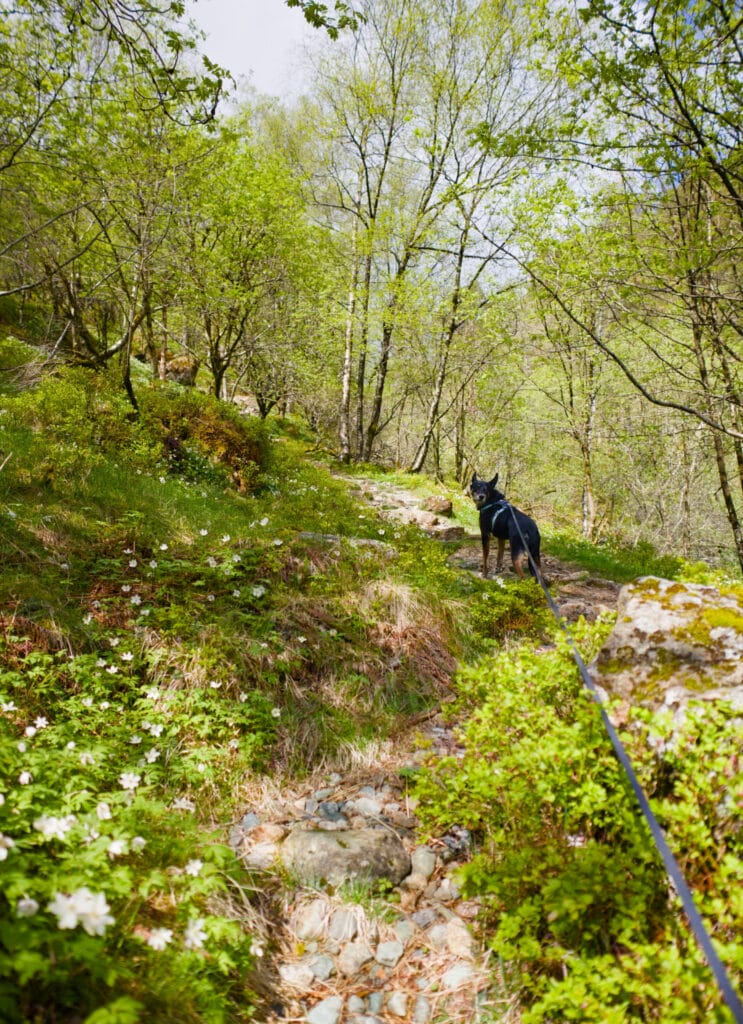
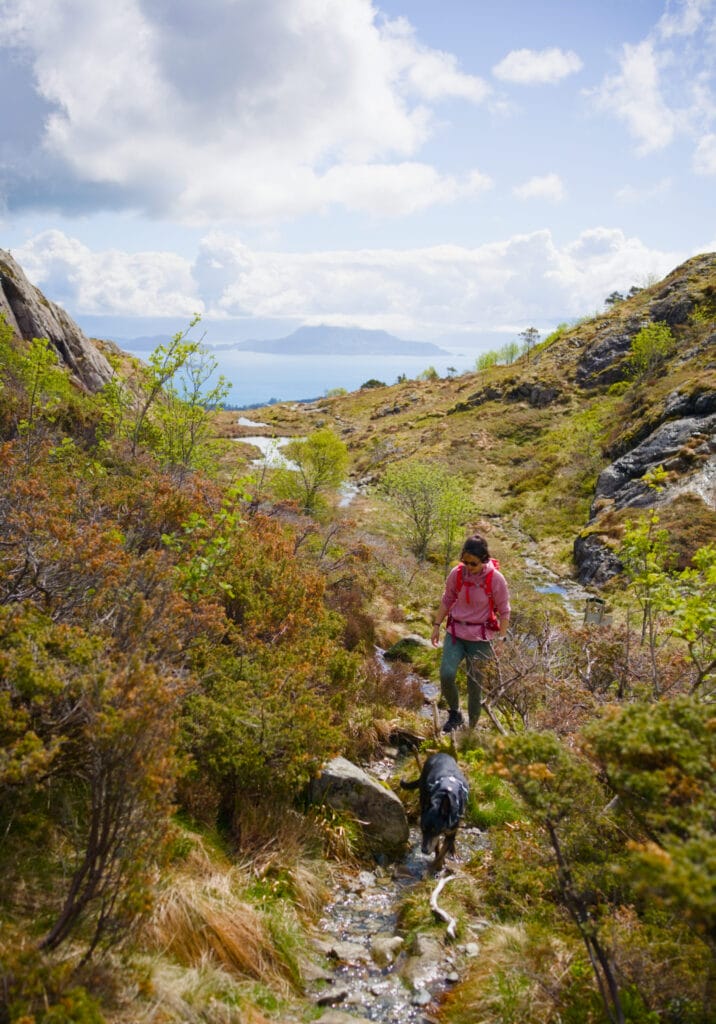
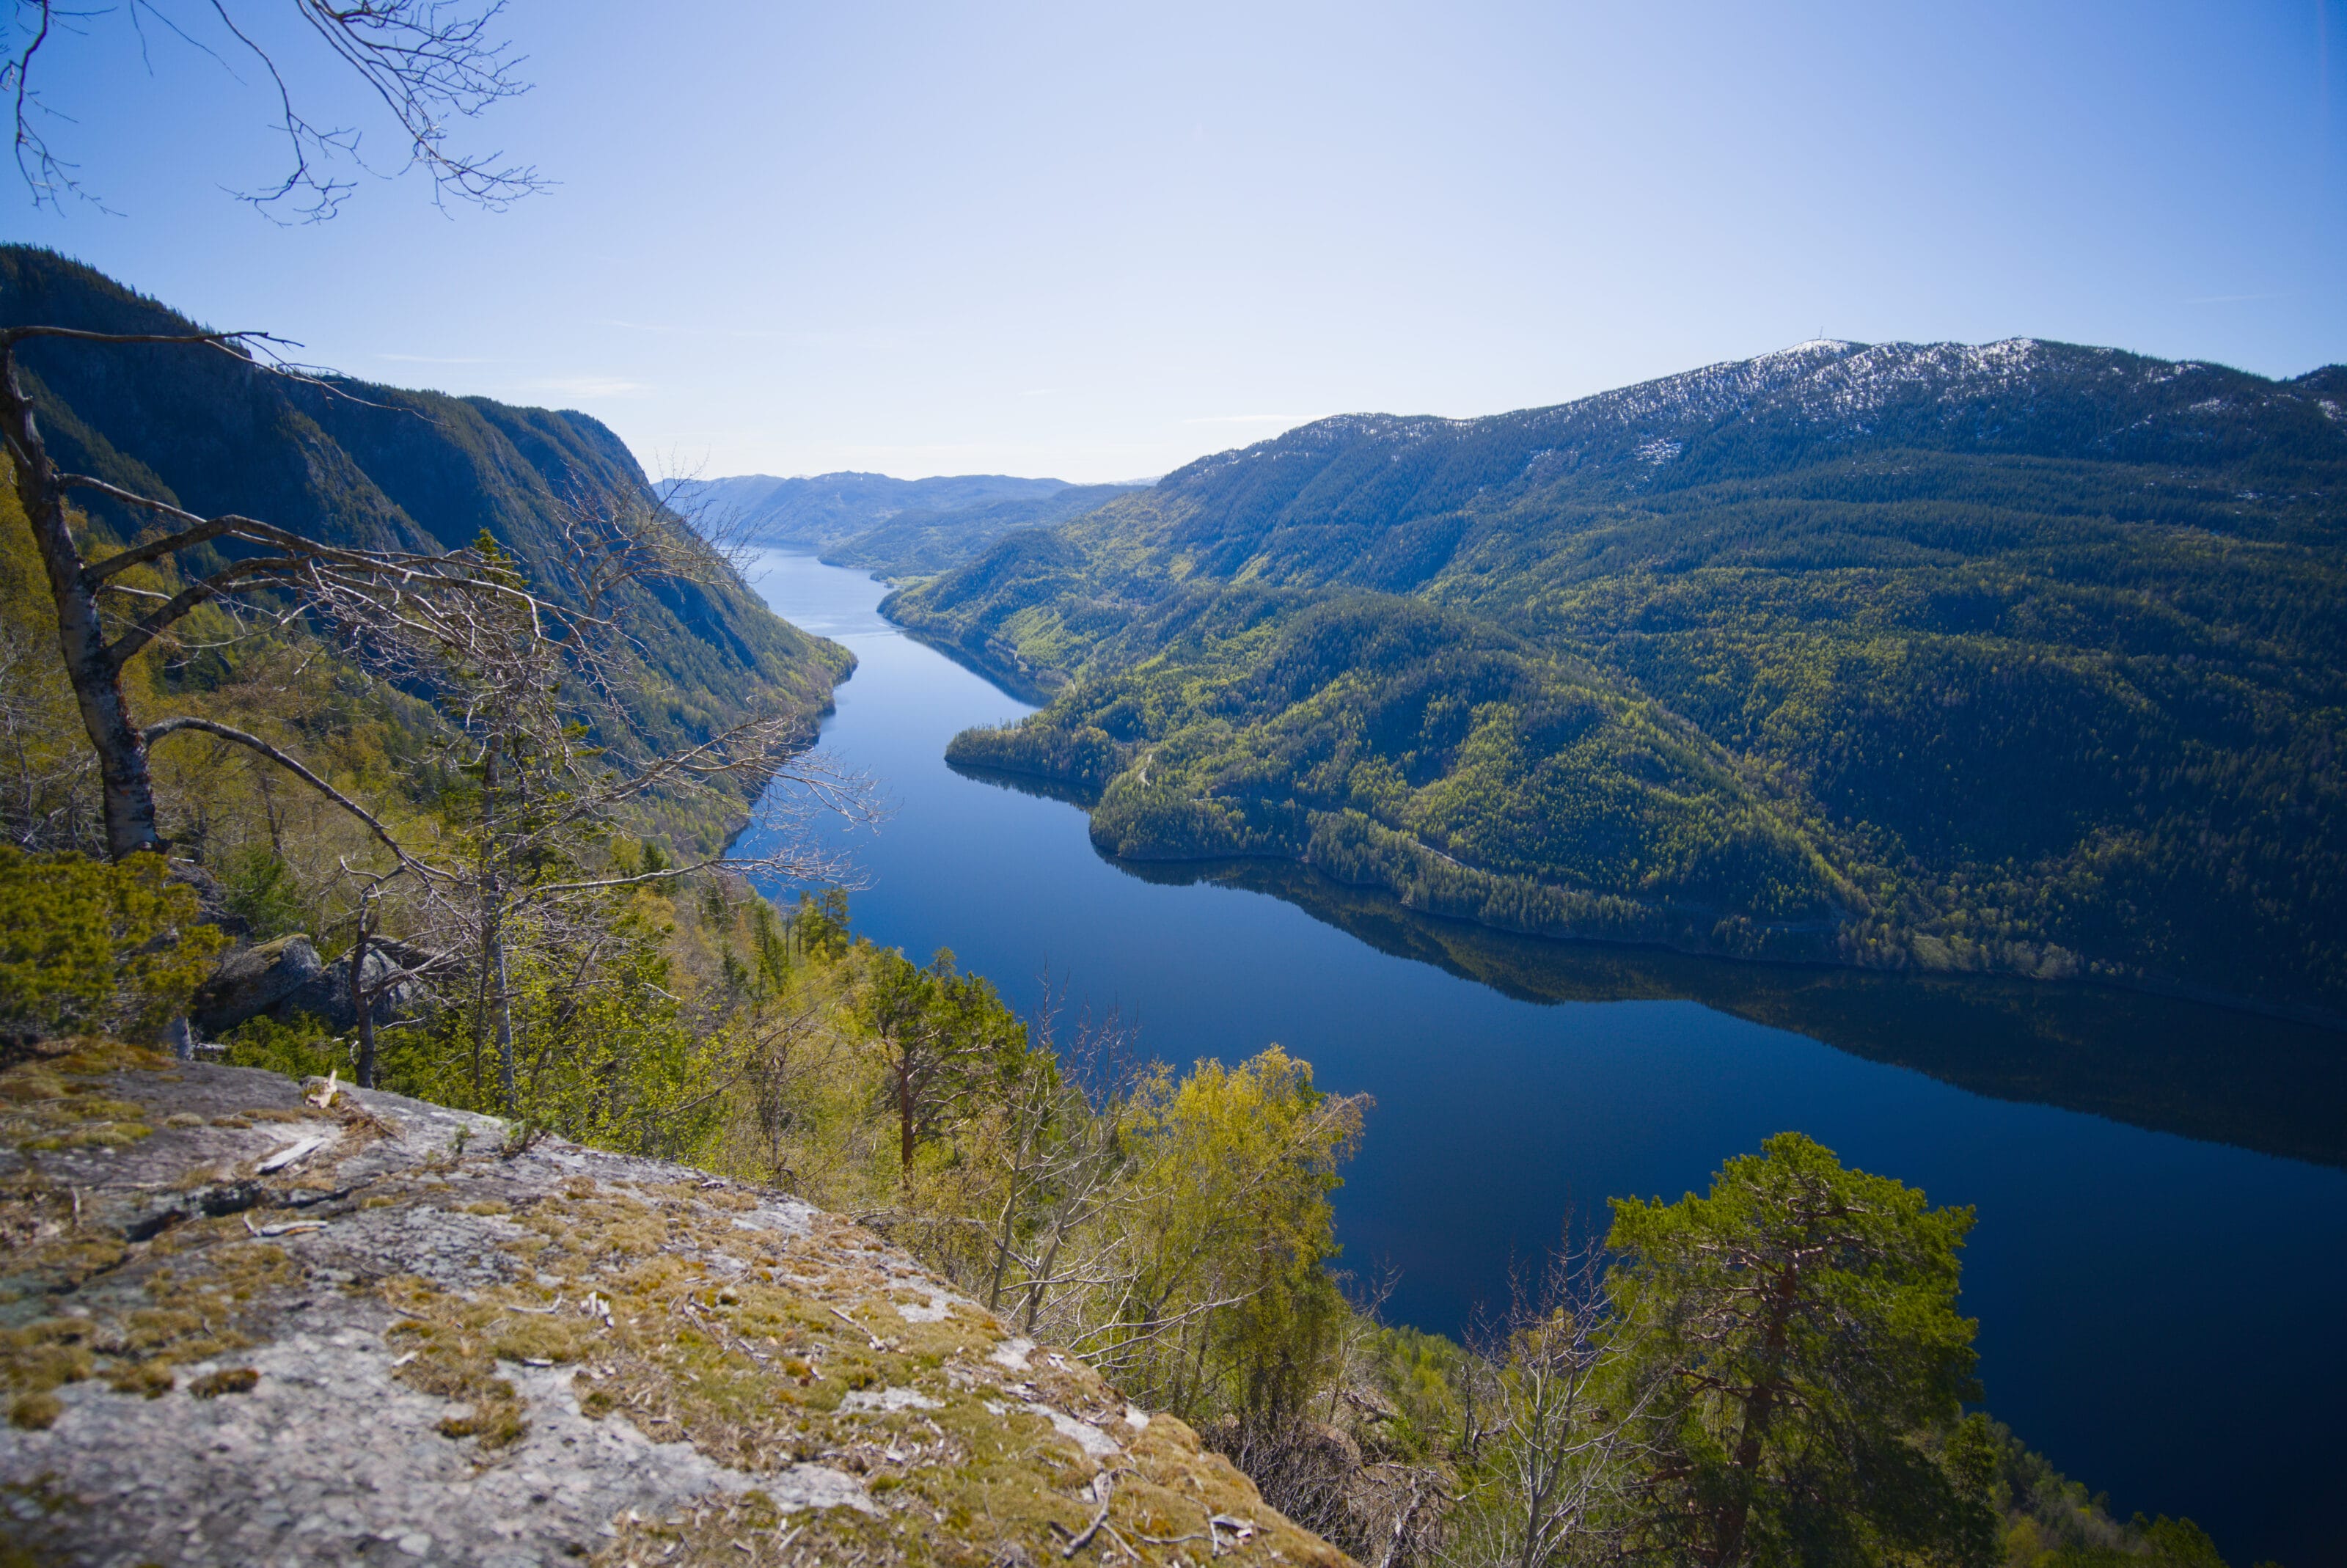
No sooner had we left the parking lot than we immediately realized this trail would be “easy.” Don’t get me wrong, the 540-meter elevation gain is definitely there, but unlike other Norwegian trails that are more like obstacle courses, this one is really well marked and signposted. The first part through the forest is a bit muddy, but it’s nothing like what we’ve encountered before. 😉 Pretty soon, we emerge from the forest and arrive at a sort of plateau dotted with lakes and rivers. At this point, the trail runs right through the middle of a small stream, but since there are plenty of rocks, it’s relatively easy to keep your feet dry.
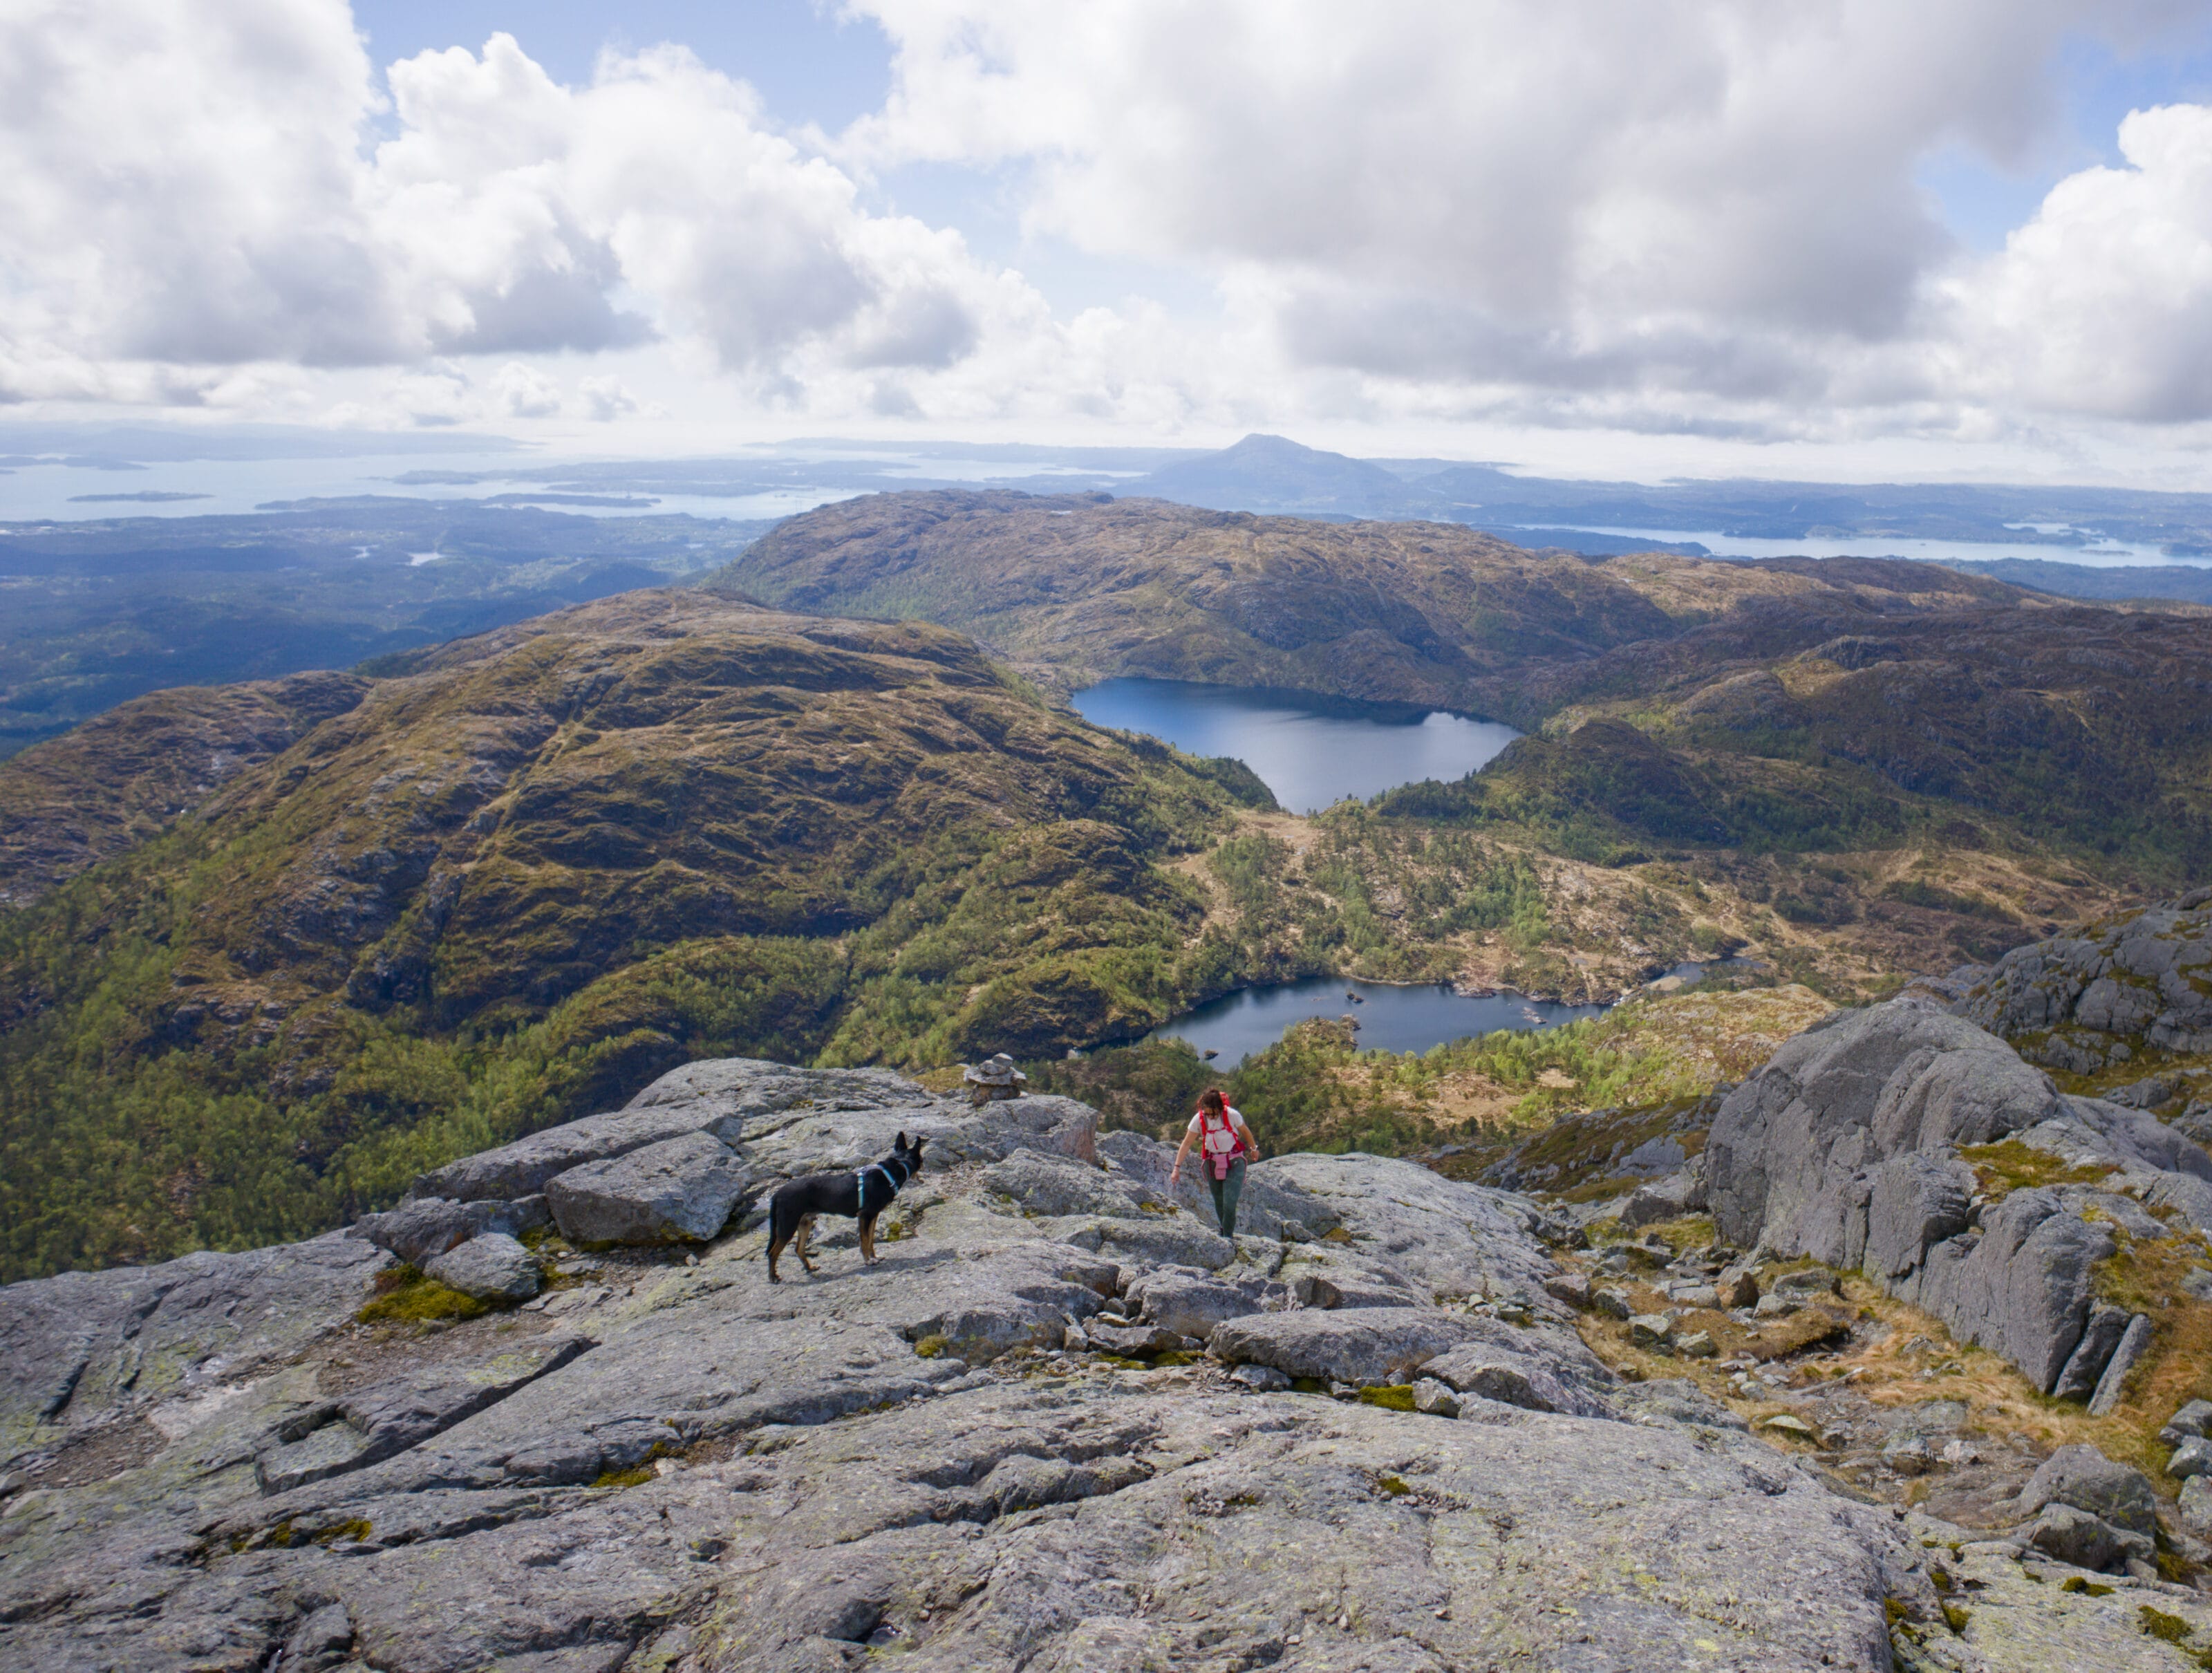
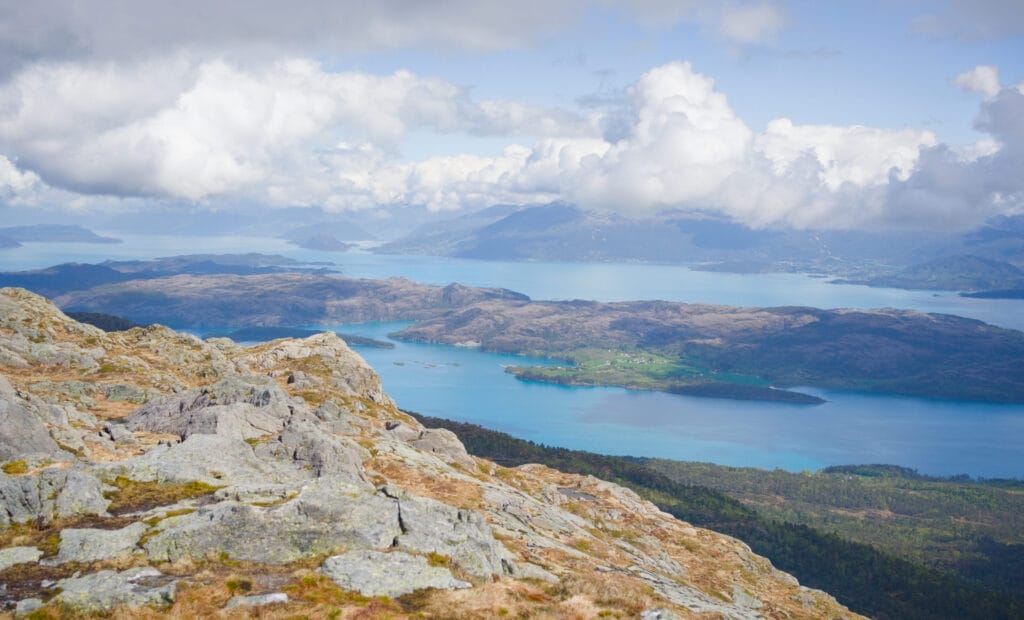
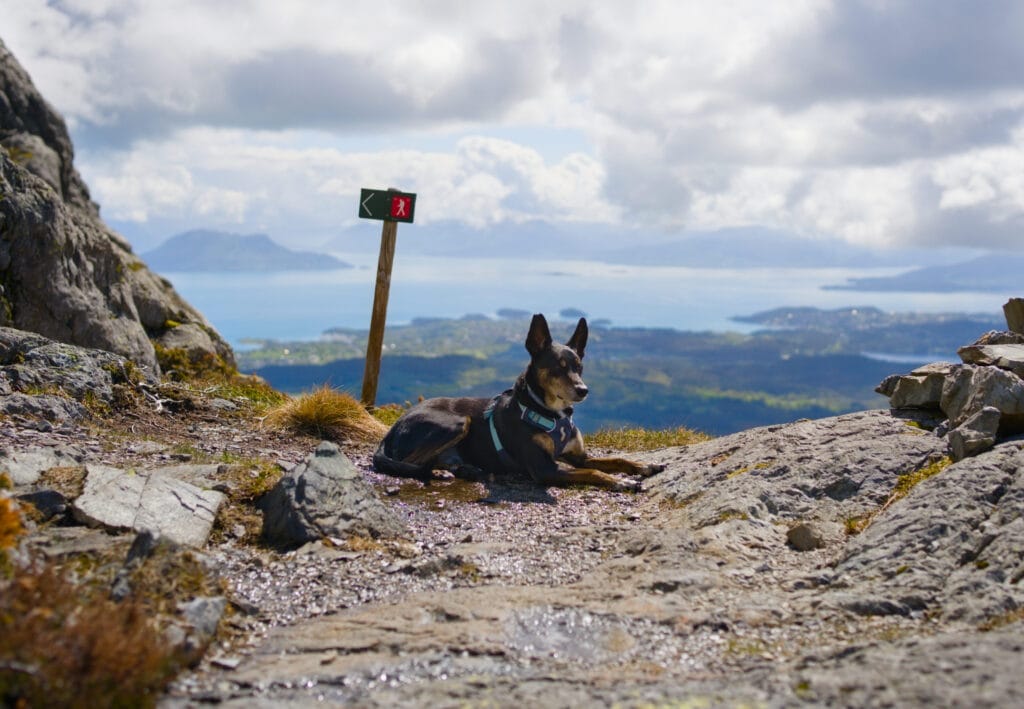
The summit of Stovegolvet
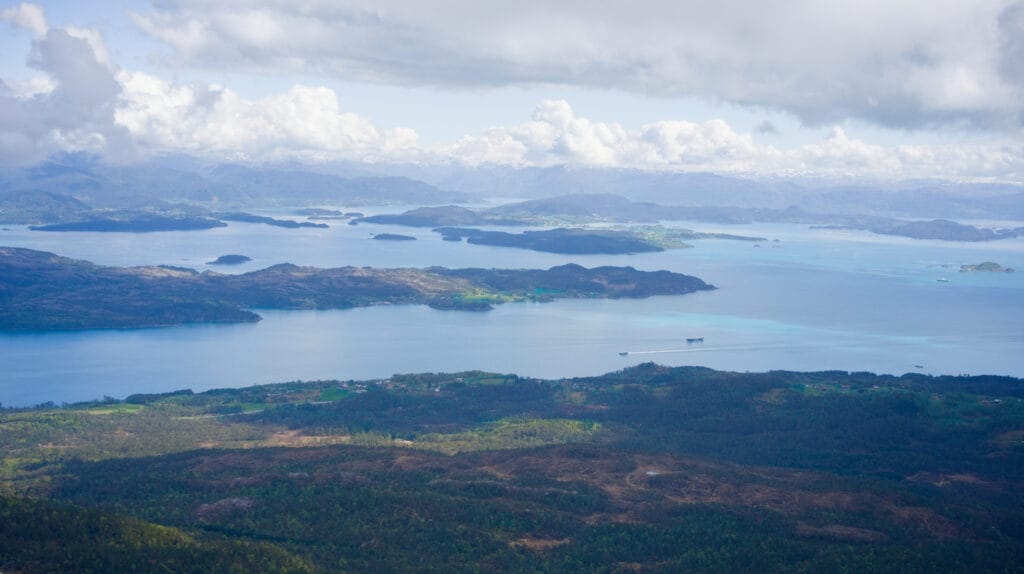
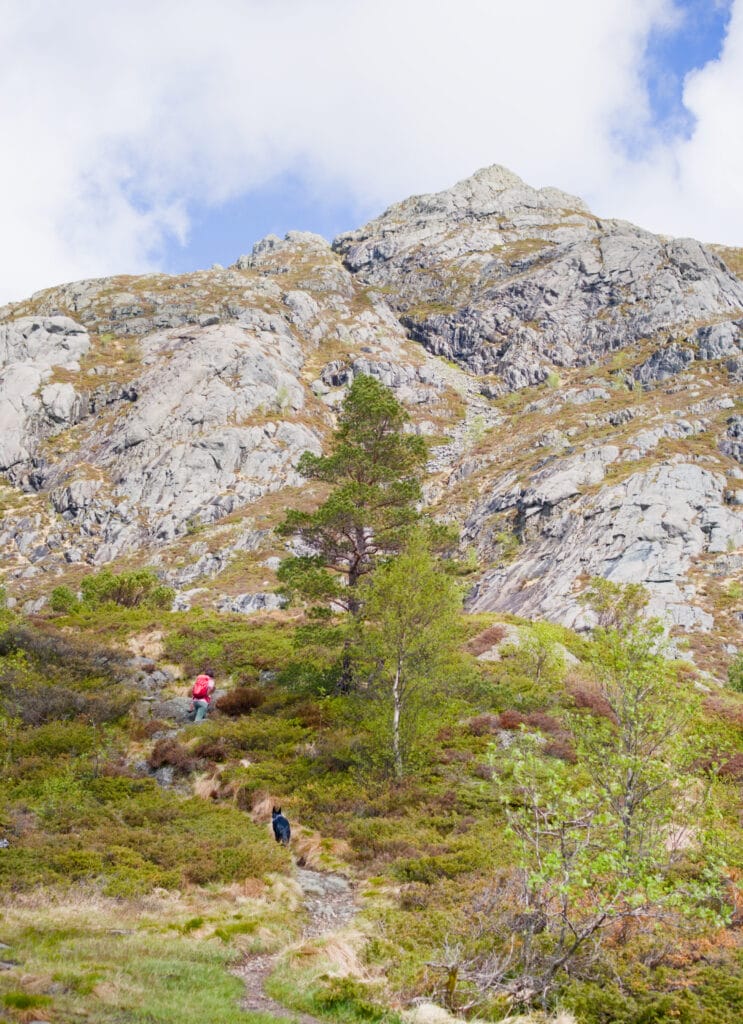
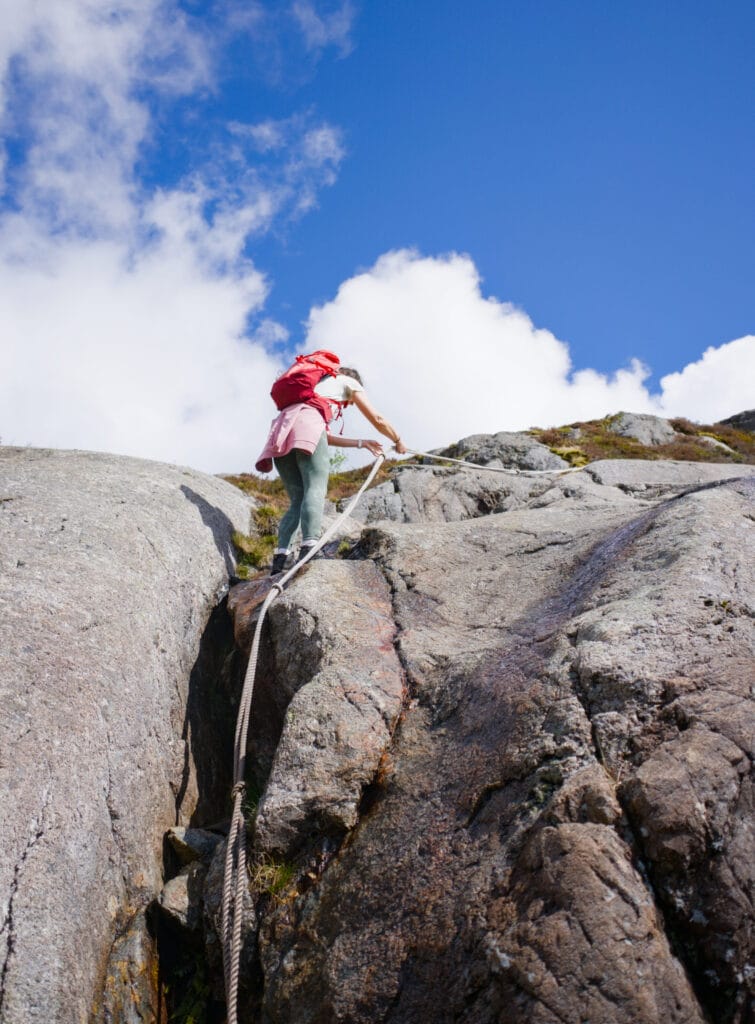
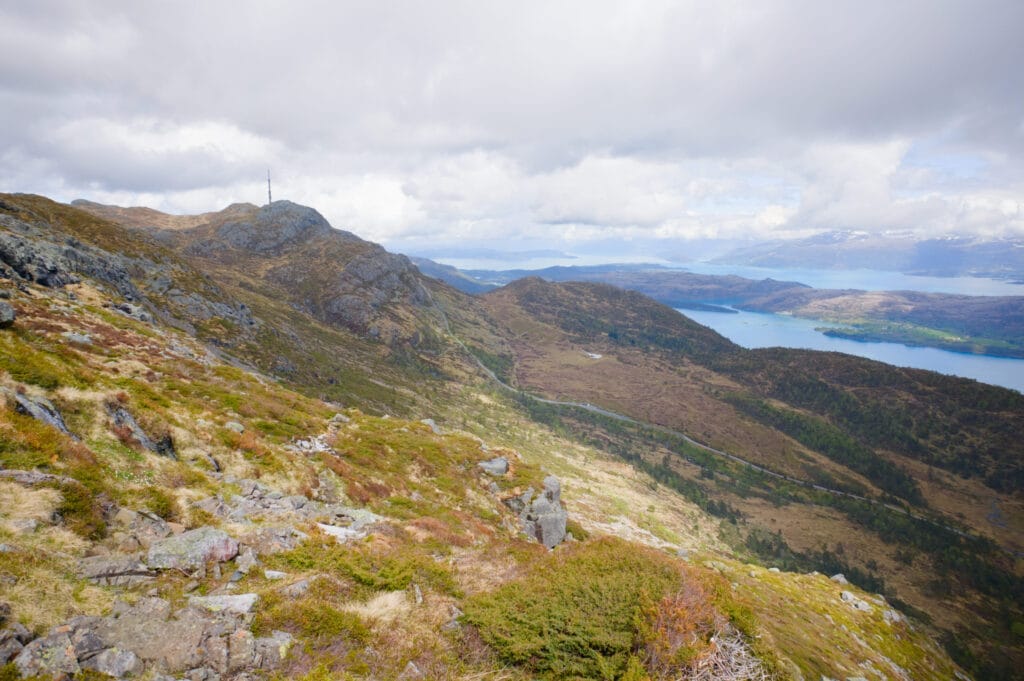
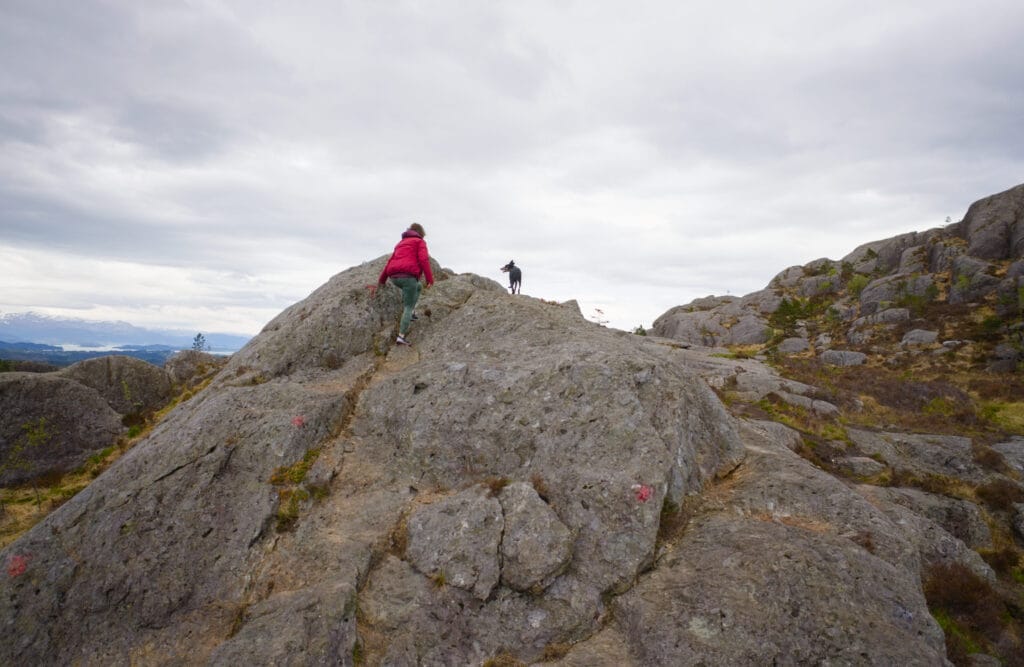
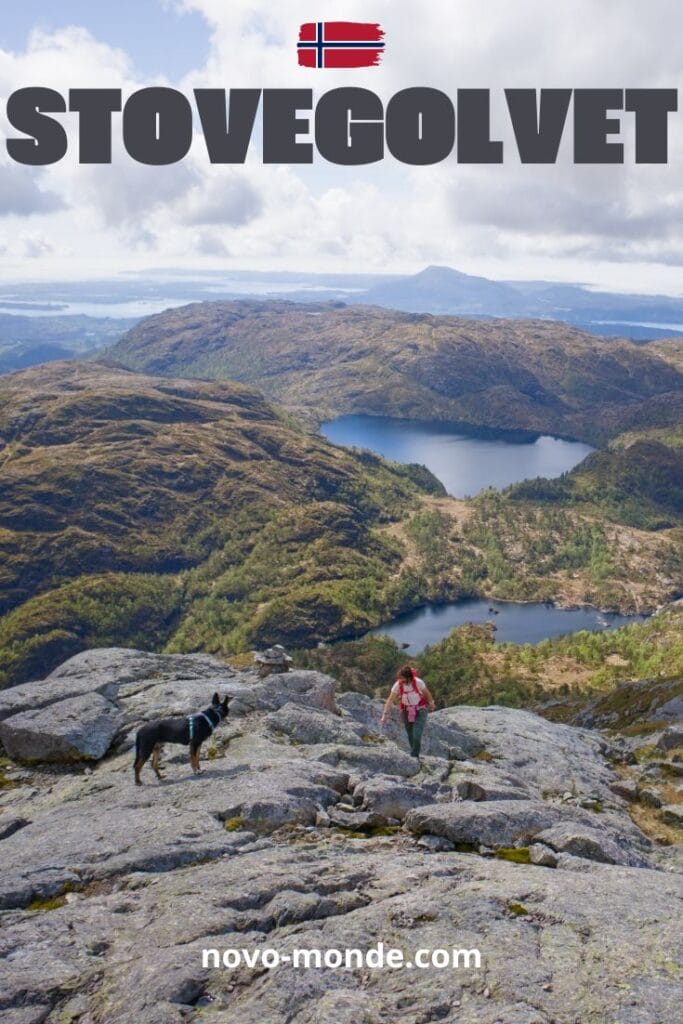
From here, we also have the summit in our sights and can clearly see how much climbing we have left. You don’t need to be an expert at reading topographic maps to realize that the steepest part is still ahead. 😉 But since the trail is well-maintained, all the sections that require a bit of hand-assisted climbing are equipped with ropes and small rock steps. While it’s a tough workout for the heart, this section remains relatively easy from a technical standpoint. And well… As we make our way up, the view of the lakes and the Norwegian coast opens up, and it’s simply magnificent! Stopping to catch your breath while being left breathless by the scenery at the same time. 😉

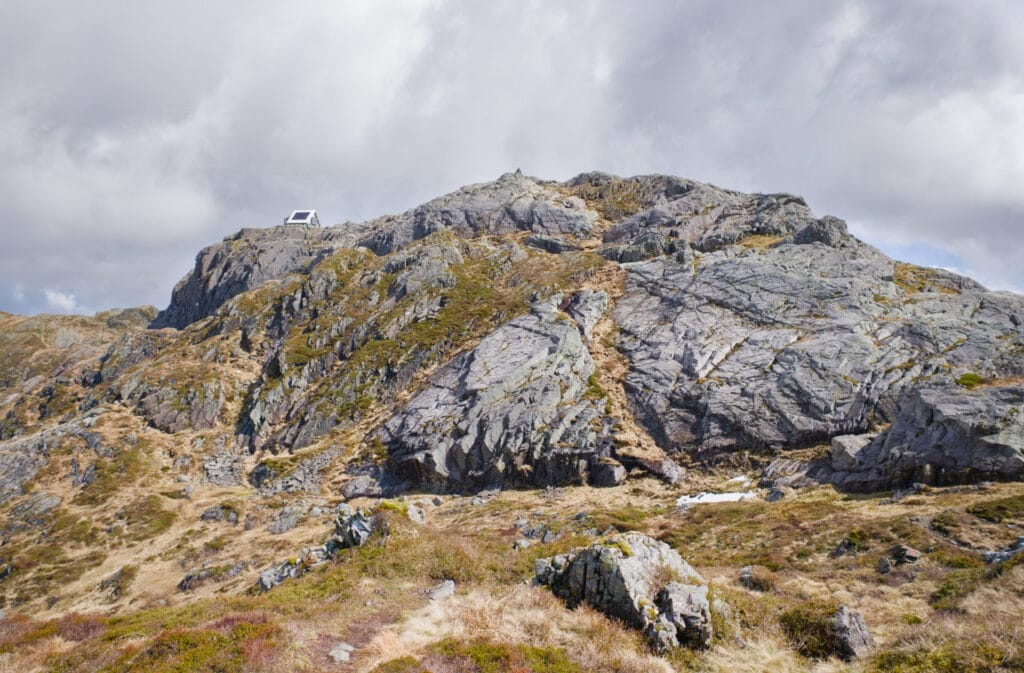
We reach the summit after about an hour and a half of hiking, and although we can see the cabin ahead of us, we decide to stop on a rock at the edge of the large plateau at the summit to eat our picnic, still enjoying the breathtaking view.
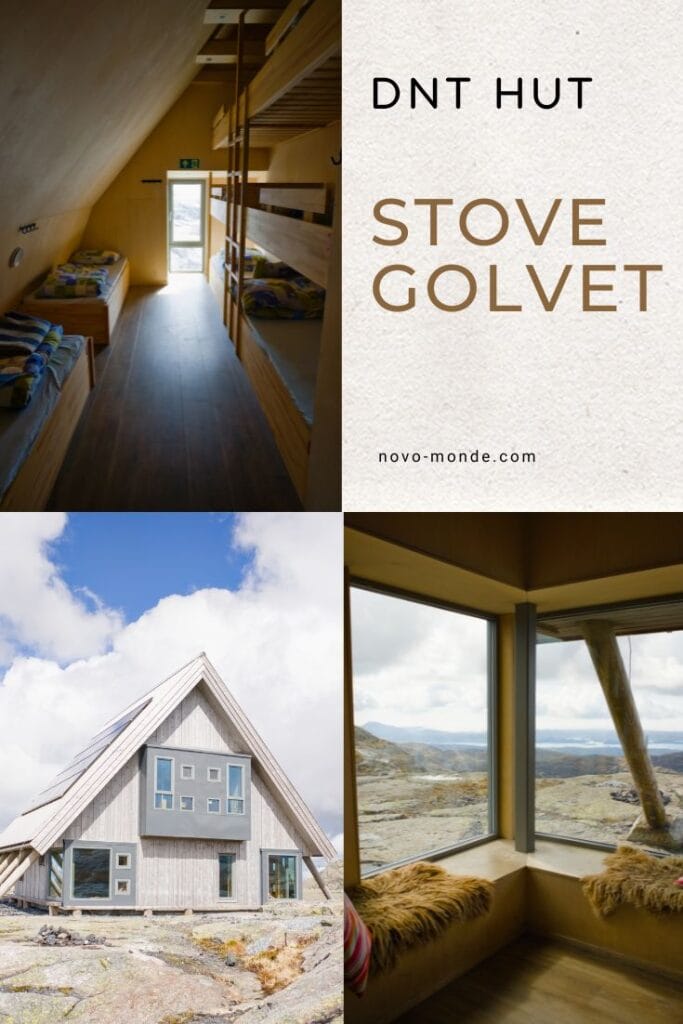
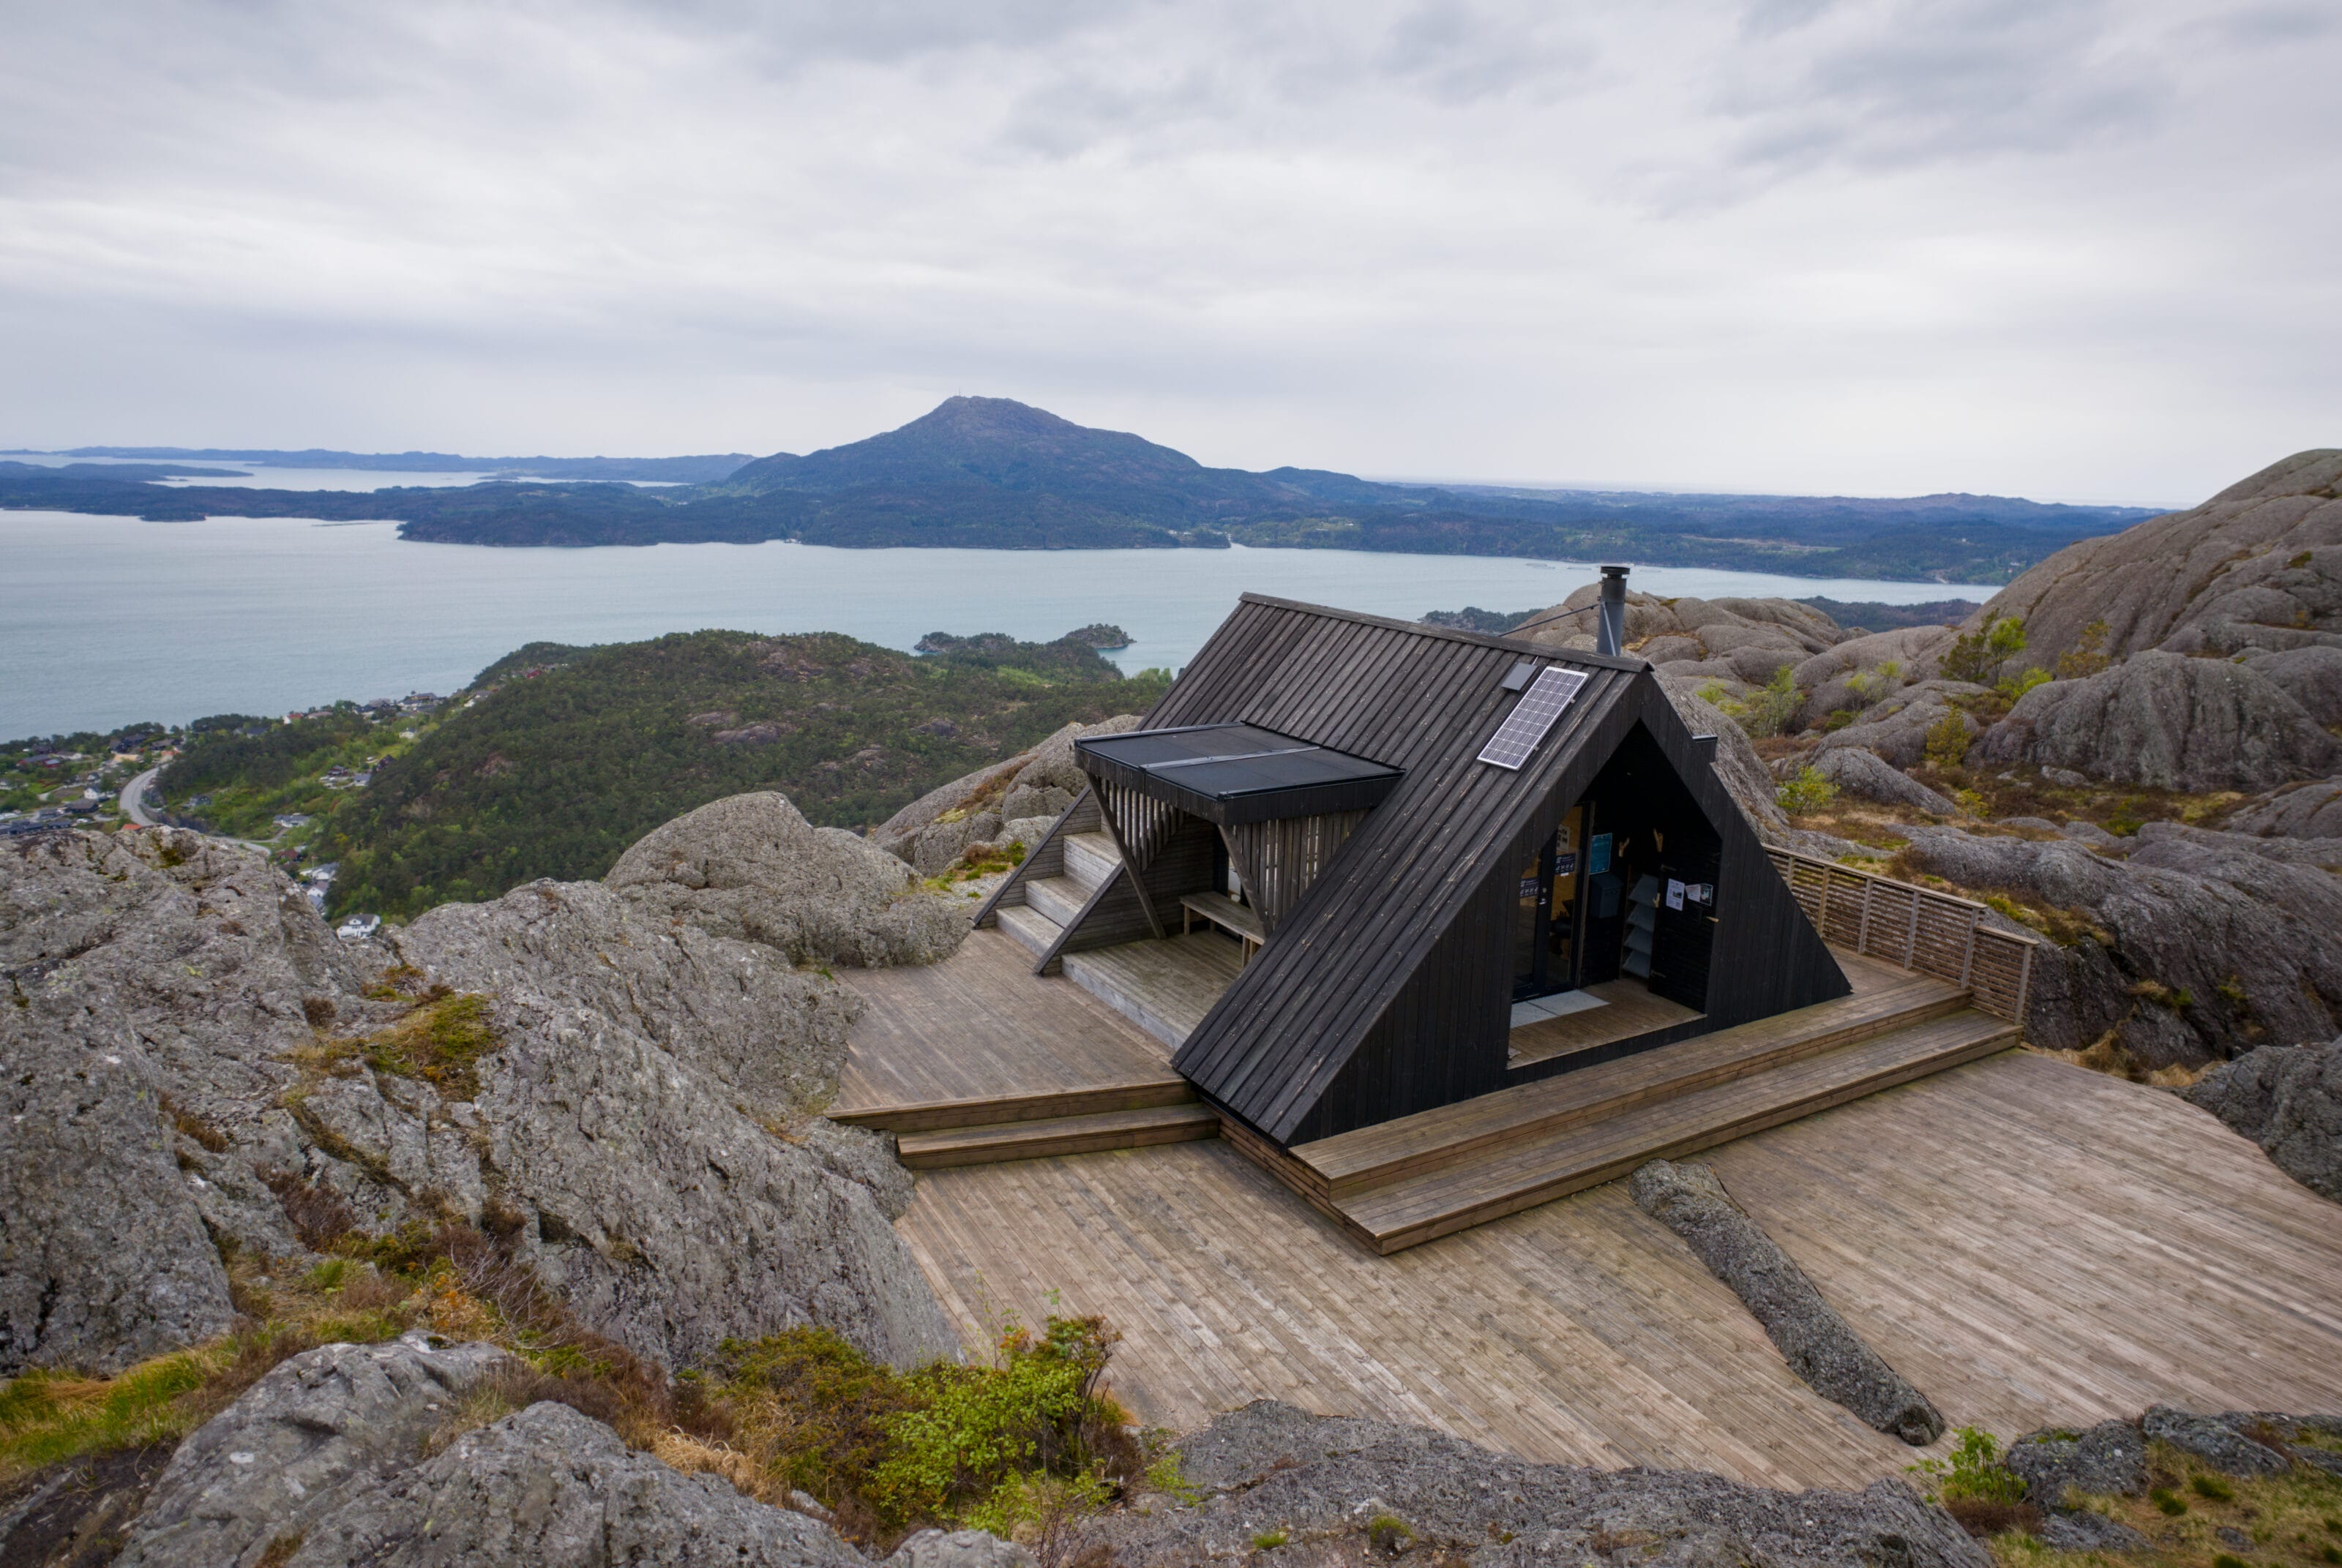
The DNT Stovegolvet Cabin
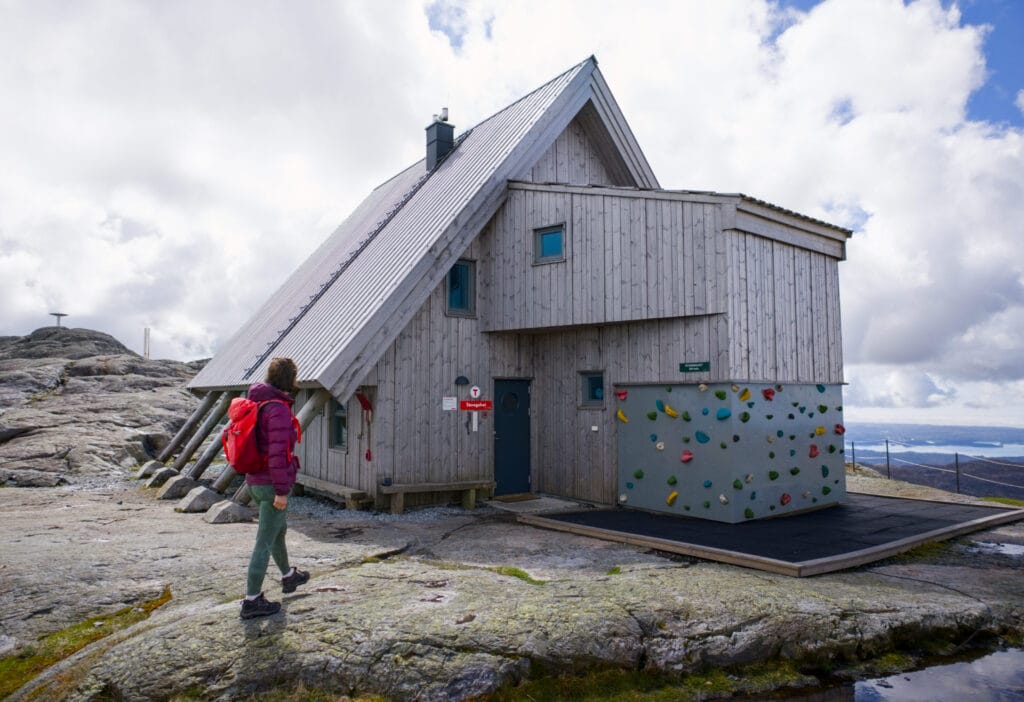
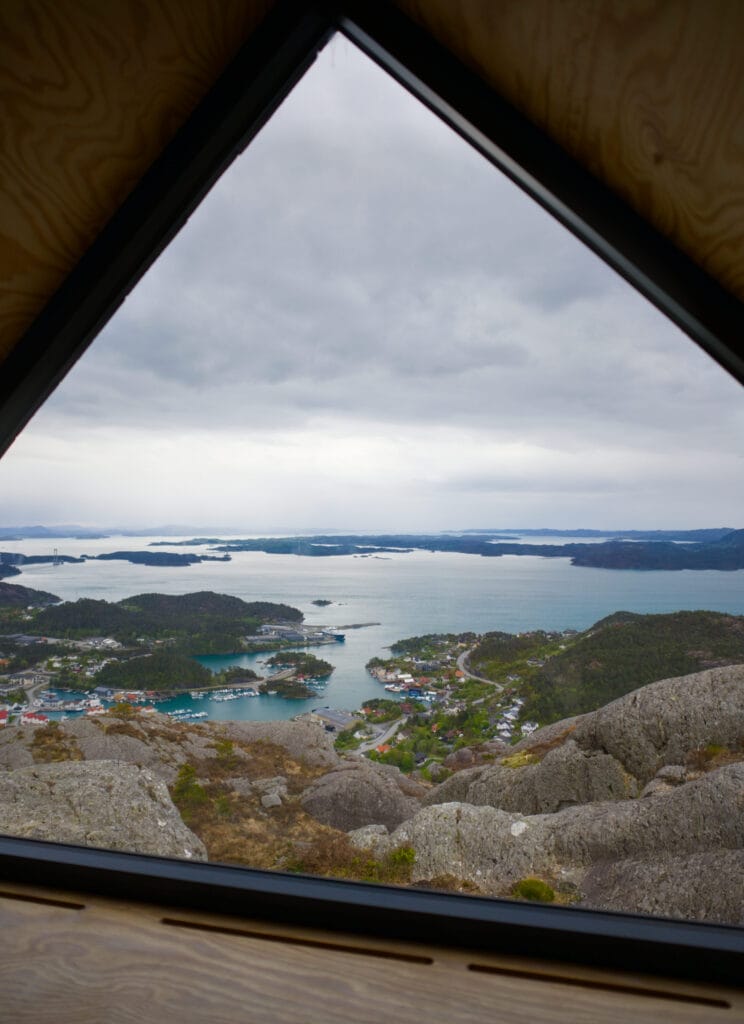
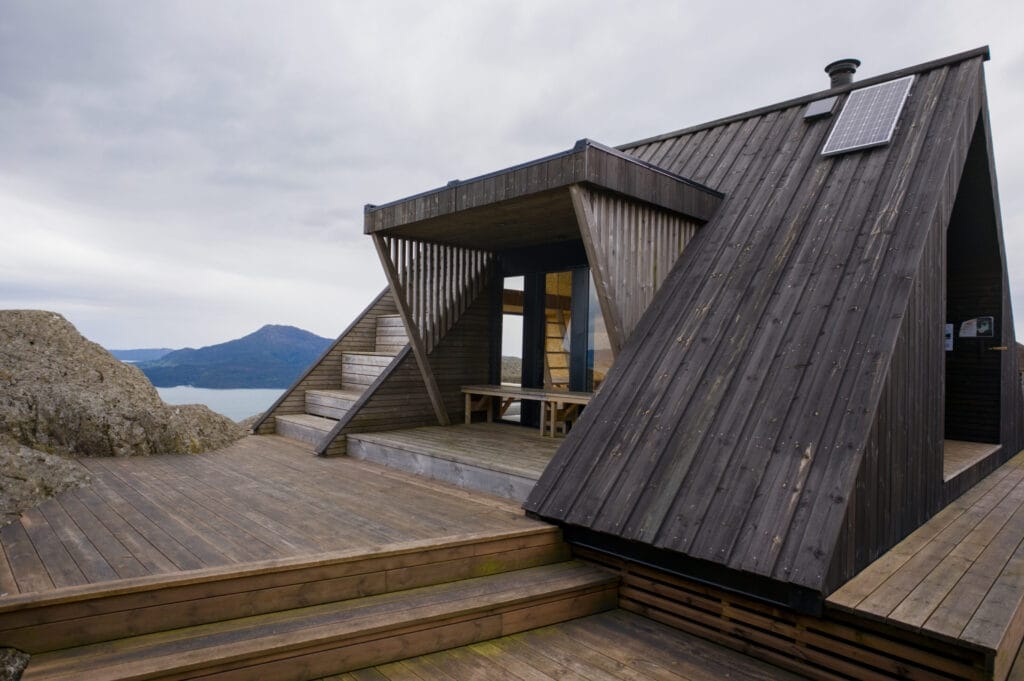
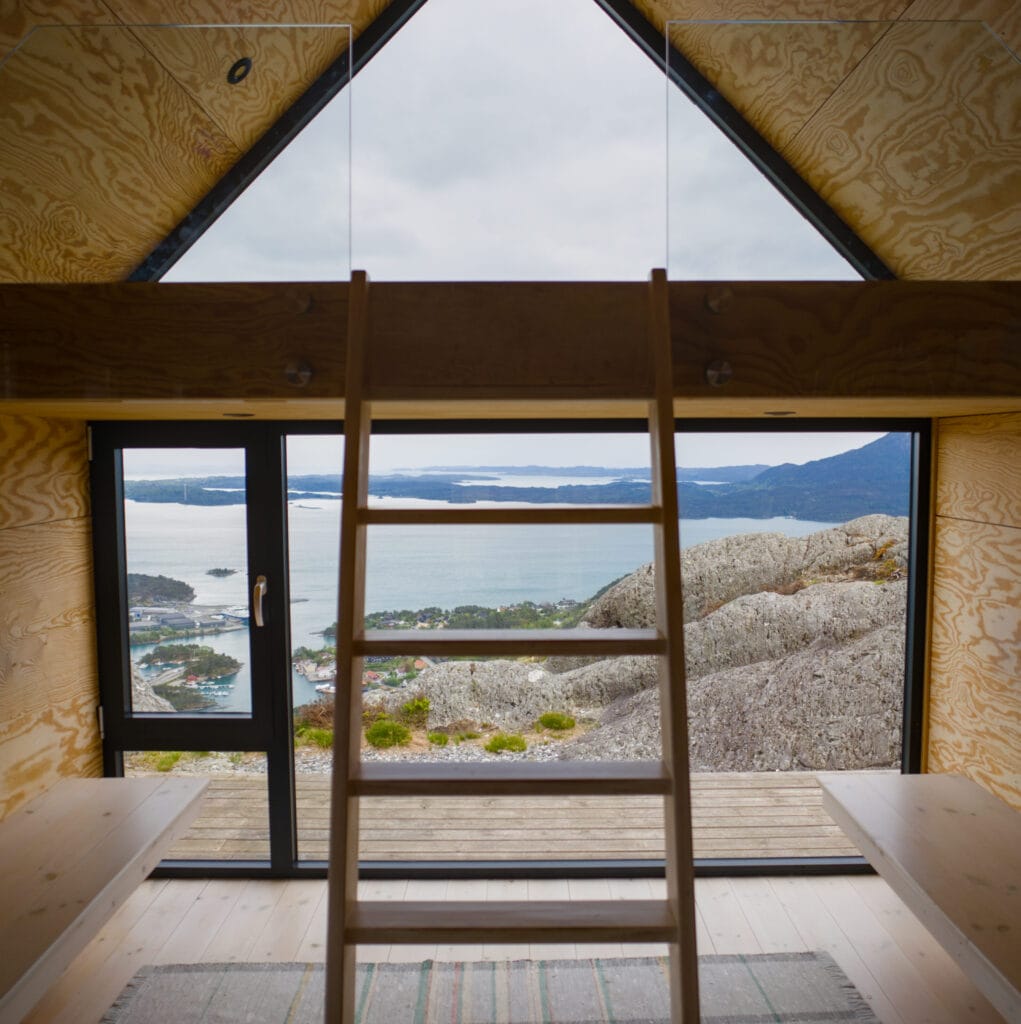
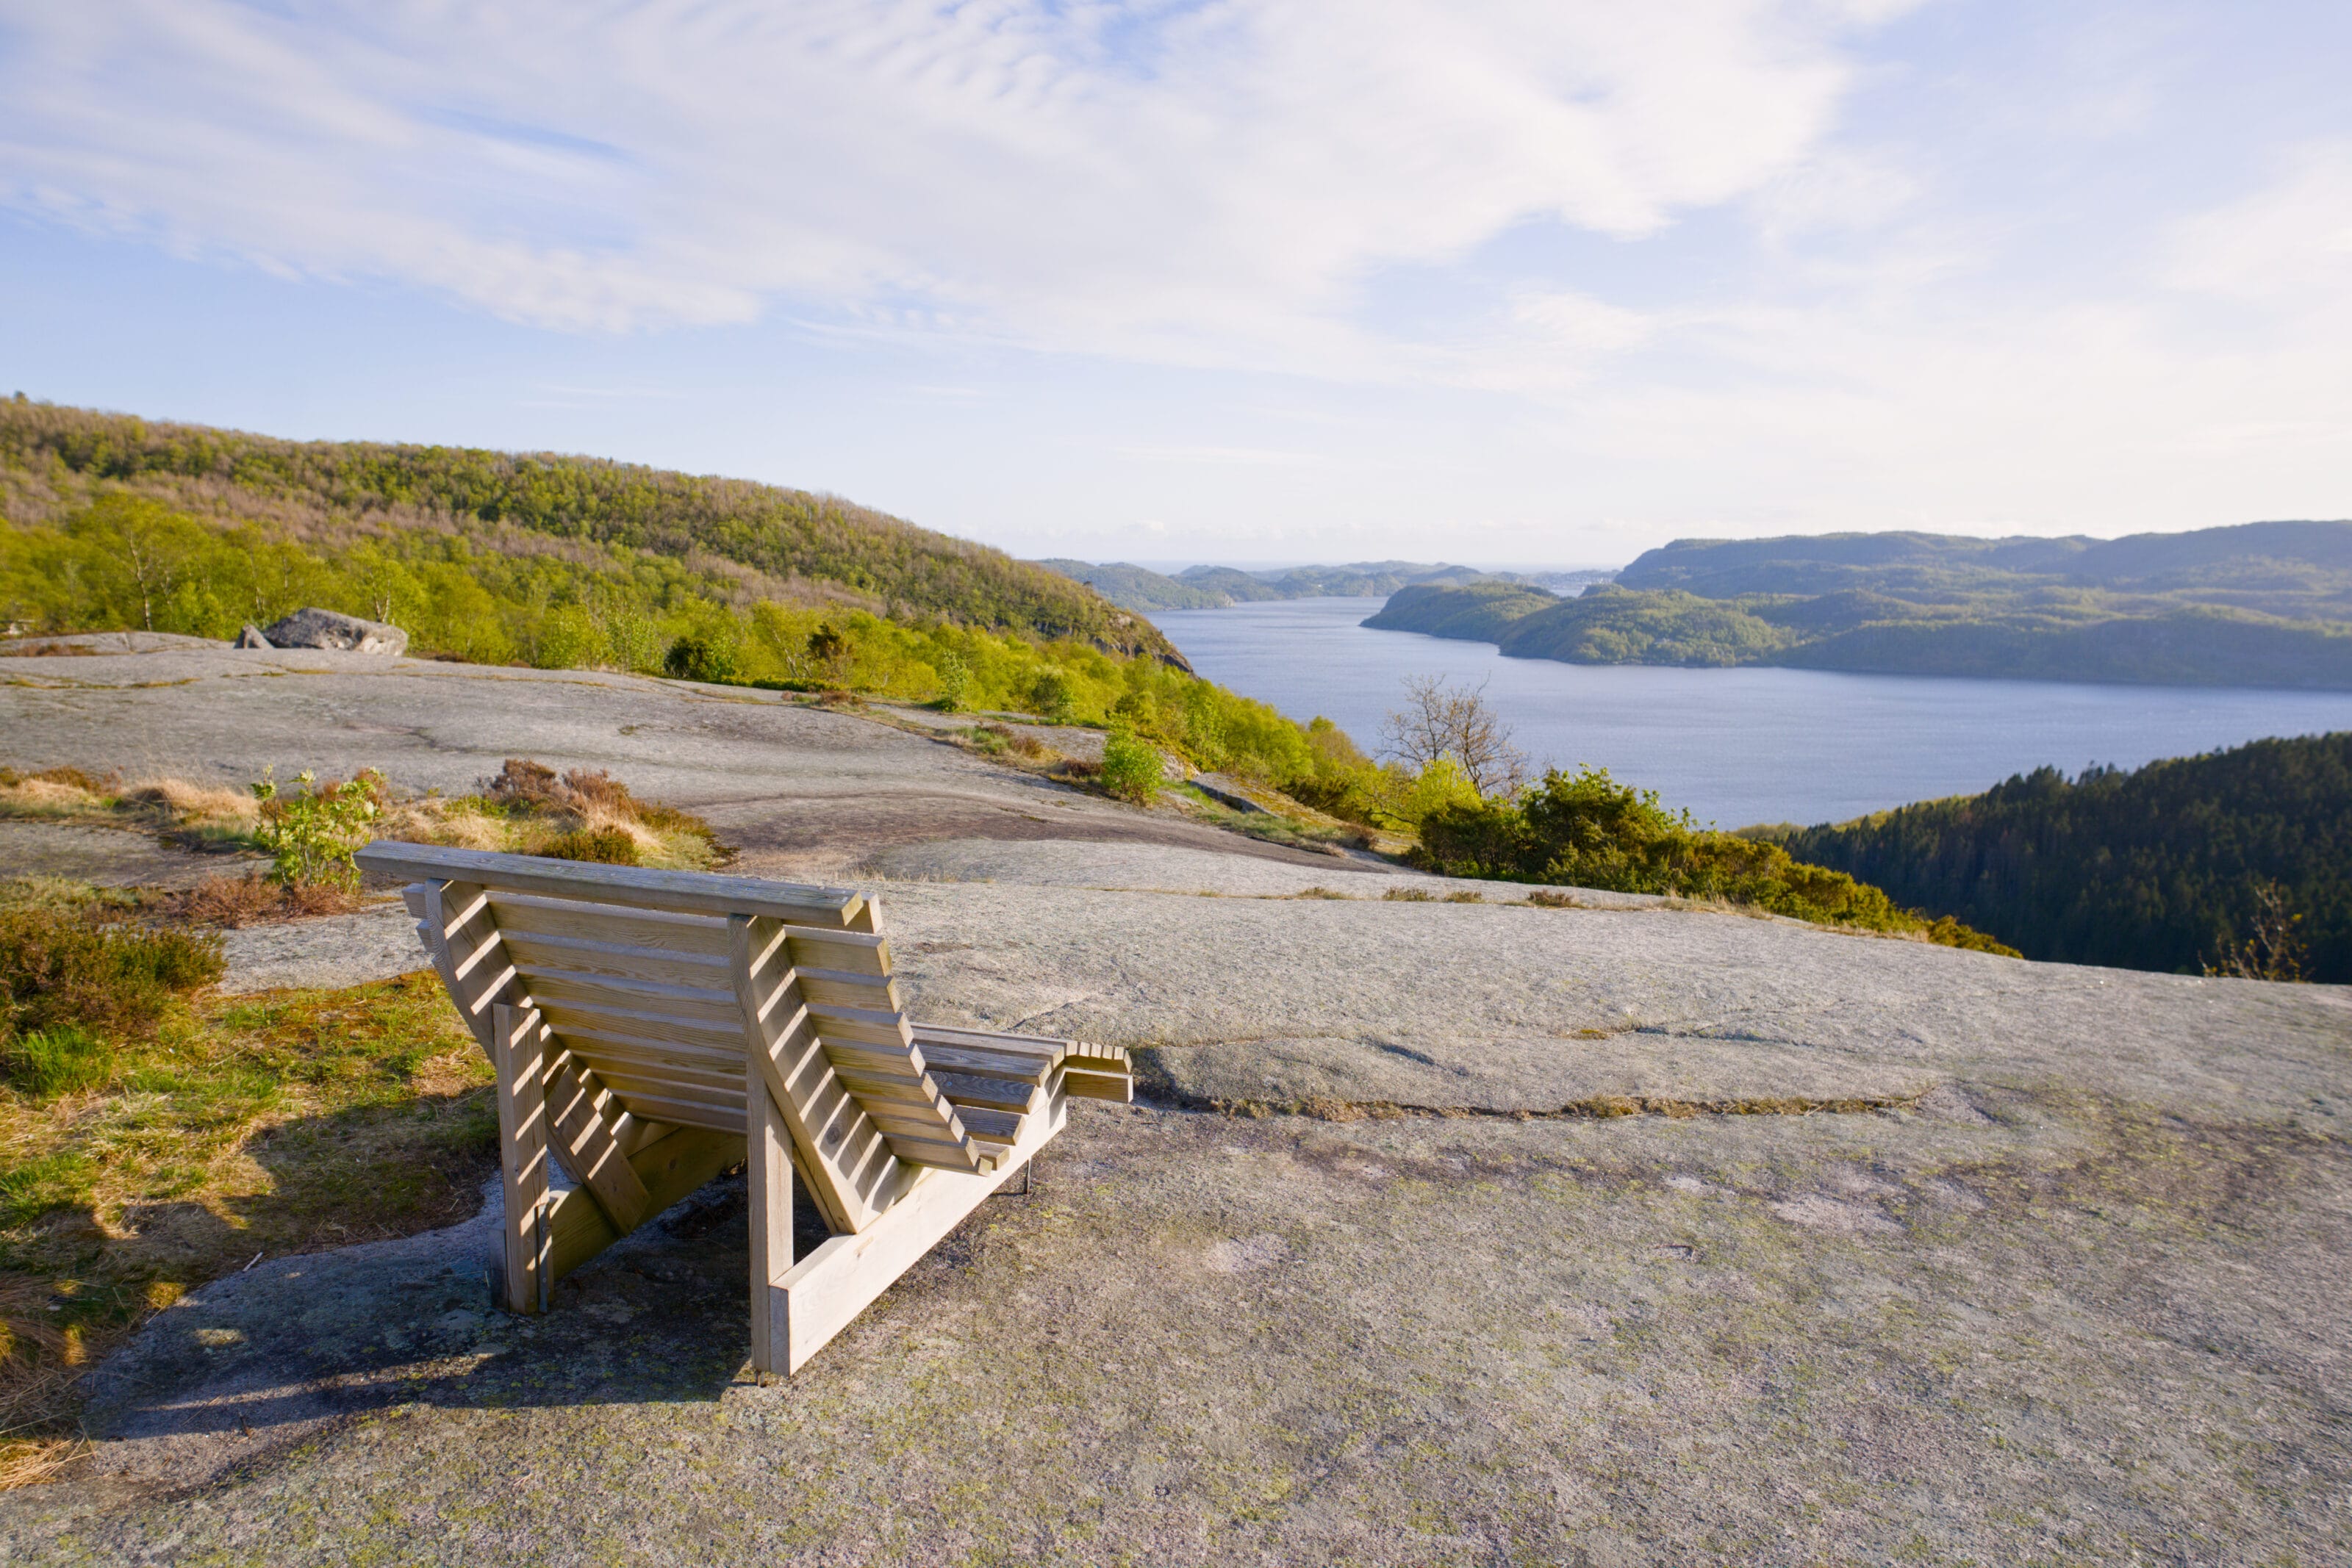
Since the summit is a large plateau, the cabin is practically right in the middle. The best view is definitely closer to the “edge,” but the cabin is still absolutely amazing! There’s even a small climbing wall set up on the outside wall, haha.
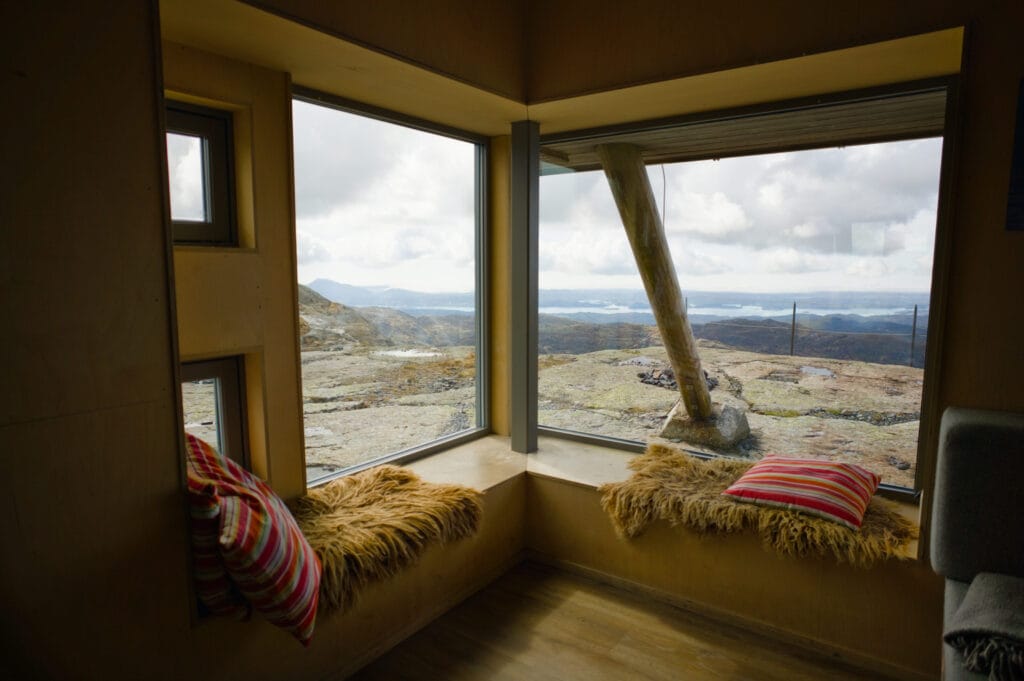
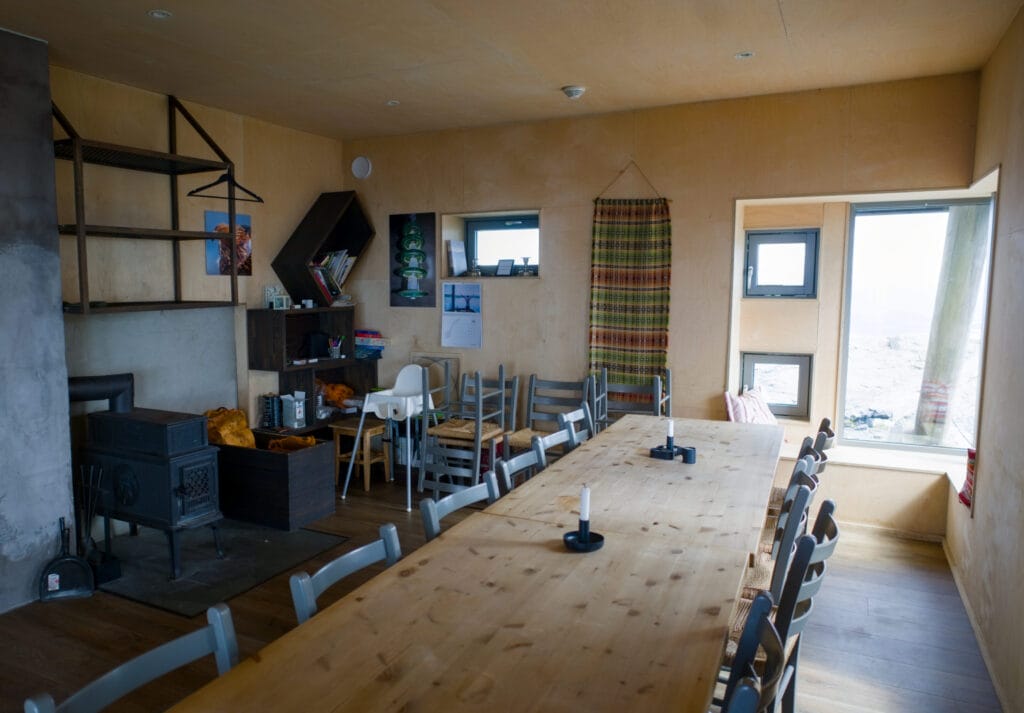
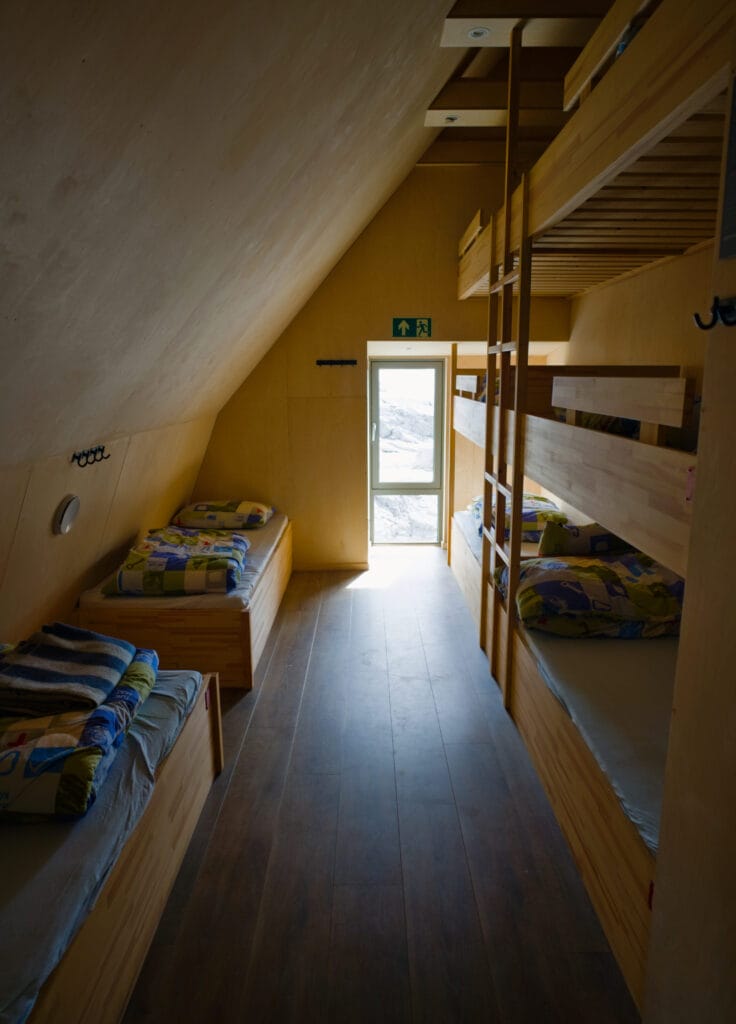
The Norwegians are truly impressive when it comes to architecture and design! Having stayed in quite a few mountain huts in the Alps (which are often known for their high quality), let’s be honest—the Norwegians have nothing to envy us! In fact, what really surprised us was that this is an unstaffed shelter yet just as well-equipped. Back home, I’d say that unstaffed shelters are generally more “basic,” and the style of Stovegolvet is more like that of the more modern shelters run by staff.
Stovegolvet is often cited as one of the most spectacular mountain huts in DNT Vestland, as it combines relatively easy access with exceptional views of the Norwegian coast.
We stopped here as part of a day hike, so we didn’t spend the night at the lodge. But keep in mind that it’s also possible to stay overnight. To find the rates for DNT huts, visit the official website. But to give you an idea, expect to pay 345 NOK for a night in a dormitory (DNT members) and 520 NOK for non-members. In total, the cabin has 21 beds. Note that DNT membership costs 860 NOK for one year, so if you plan to stay at several cabins during your trip, it might be worth it.
At Stovegolvet, the cabin is unstaffed and open year-round. There are no groceries on site, but you’ll find everything you need to cook (it’s really well-equipped) and firewood to keep you warm. Honestly, the cabin looked super cozy and comfortable.
Important: There is a fee of 50 NOK per person for daytime use (to relax in the living room and use the kitchen). We didn’t use it because we had a picnic outside and only went inside to take a few photos, but it’s good to know. That said, if the weather hadn’t been so nice, we would have been happy to pay.
For reservations and more information: the shelter’s website
Return via Kvelve
If you read our blog from time to time, you probably already know this, but if there’s a way to do a loop hike instead of a round trip, we’re always up for it. And luckily, at Stovegolvet, that’s definitely doable. In fact, I’d even say it’s an excellent option to give your legs a little break. The descent is a tad longer in terms of distance, but it has the big advantage of being less steep.
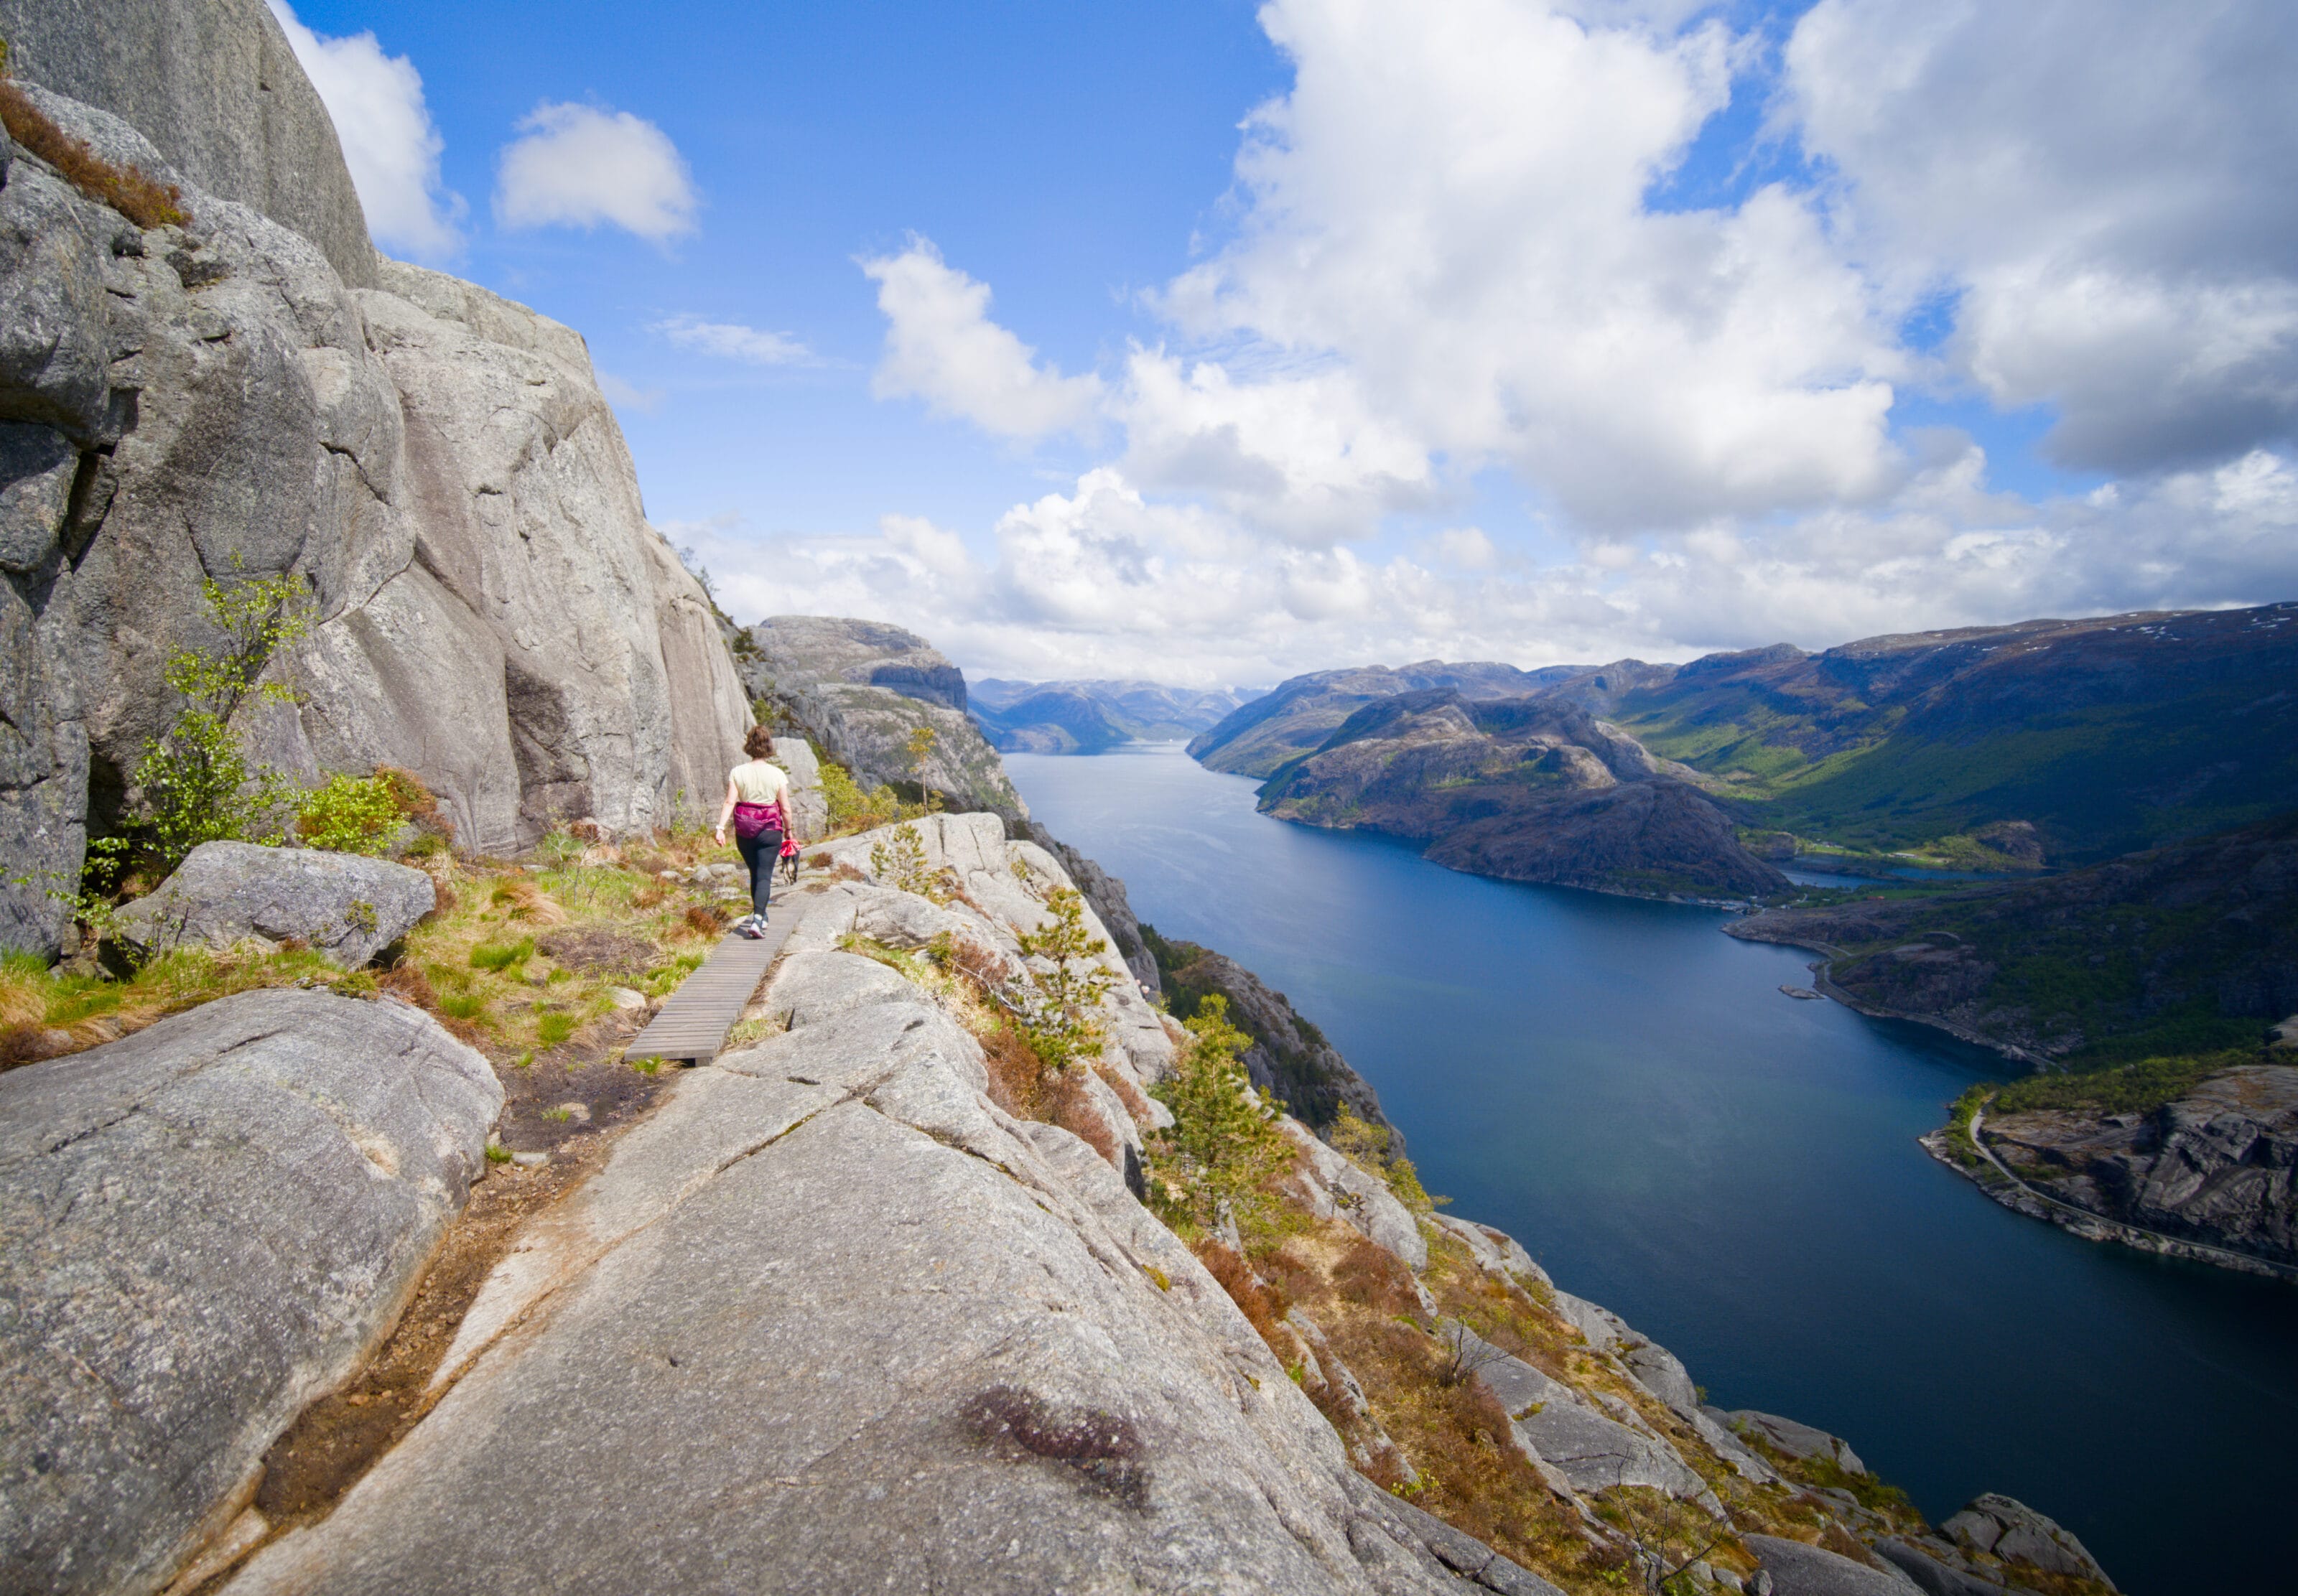
From the summit, we head northwest. The descent is steady, though it’s fair to say the terrain remains very rocky, so you still need to watch your step. 😉 We soon spot a road ahead of us. The trail back to the parking lot branches off to the right just before the intersection with the road. But if your knees are bothering you, you can also walk all the way to the road and follow it for 1.8 km. This adds a little bit to the distance, but it’s much easier to walk (and there’s practically no traffic).
Stovegolvet: Map and practical information
The Stovegolvet hike is a moderately difficult trail. The total distance is 6.3 km with an elevation gain of 536 m. It remains a hike that is truly accessible to a wide range of hikers, even though, once again, the Norwegian terrain is not the easiest. The walking times aren’t exactly comparable to those you might find on a perfectly maintained trail in the Alps. The actual walking time for the route is about 3 to 3.5 hours.
Map of the hike:
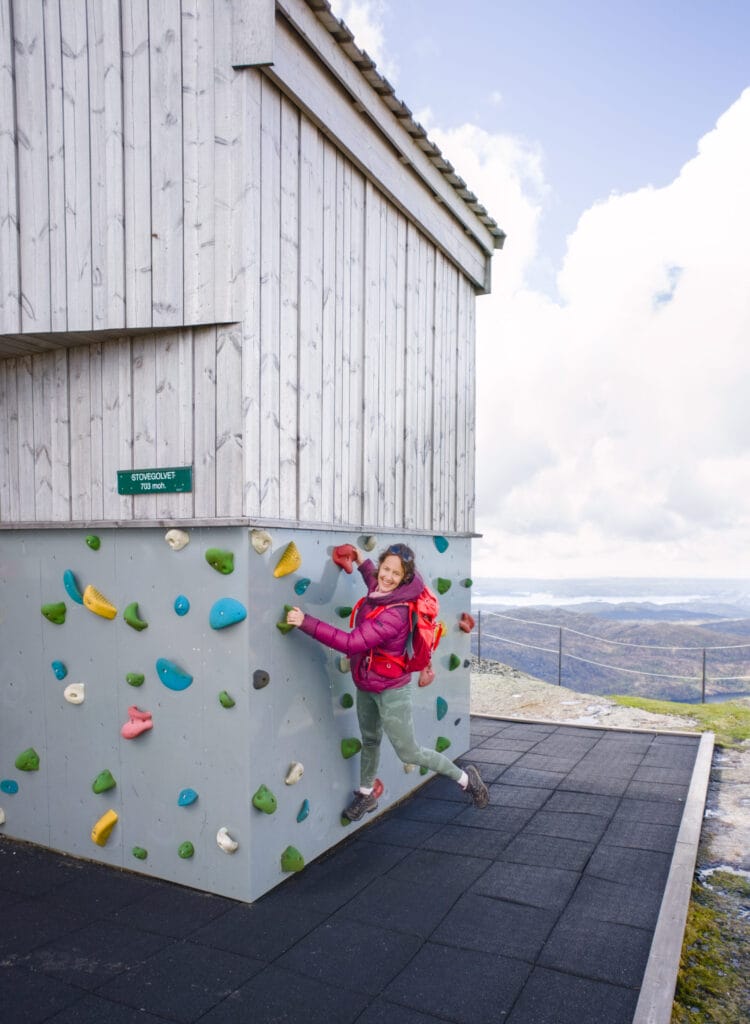
Note: If you’d like to take a shorter route and avoid the steepest section, you can park at Heio Turomrade Parkering, located on the road you’ll see on the descent during our loop. From this parking lot, the hike is much easier (about 4 km and only 200 m of elevation gain). This route is truly ideal if you’re hiking with kids (no doubt they’ll enjoy the climbing wall at the finish line at least as much as I did) or simply if you want to enjoy the view with a little less effort. 😉 That said, personally, we really enjoyed the views during the climb from the other side, so we would definitely do the full route described above again. But this is a viable alternative, and the view from the summit is the same.
Another hike on the island of Stord: The Dagsturhytta Utsletteslottet
Before wrapping up this article, we thought we’d throw in a little extra suggestion for a walk nearby. After all, if you’re on the island of Stord, you might as well take the opportunity to visit two cabins with incredible views, right?
This hike is really easy and will take you no more than an hour and a half round-trip. It’s not a DNT shelter but a Dagsturhytta. We actually discussed the concept of these Norwegian day-use shelters in this article.
The Dagsturhytta Utsletteslottet is located above the small village of Sagvag. From the parking lot of the previous hike, it takes about 20 minutes by car to reach the small parking lot behind the village soccer field (GPS coordinates for the parking lot). From here, the hike is just one kilometer long with a 165-meter elevation gain. In short, it’s a short hike of 30–40 minutes uphill, but the view from the top is magnificent!
P.S.: The ground is pretty wet up there… We had originally planned to do a loop (you’ll see there’s a trail marked on the map), but it was a bit too swampy for our liking, so we decided to come back the same way (the one on the left on the map). 😉
That’s it for today. We hope you enjoyed these two ideas for hikes south of Bergen. We’ll see you soon for more of our hikes in southern Norway.
Pin this post
Join the discussion