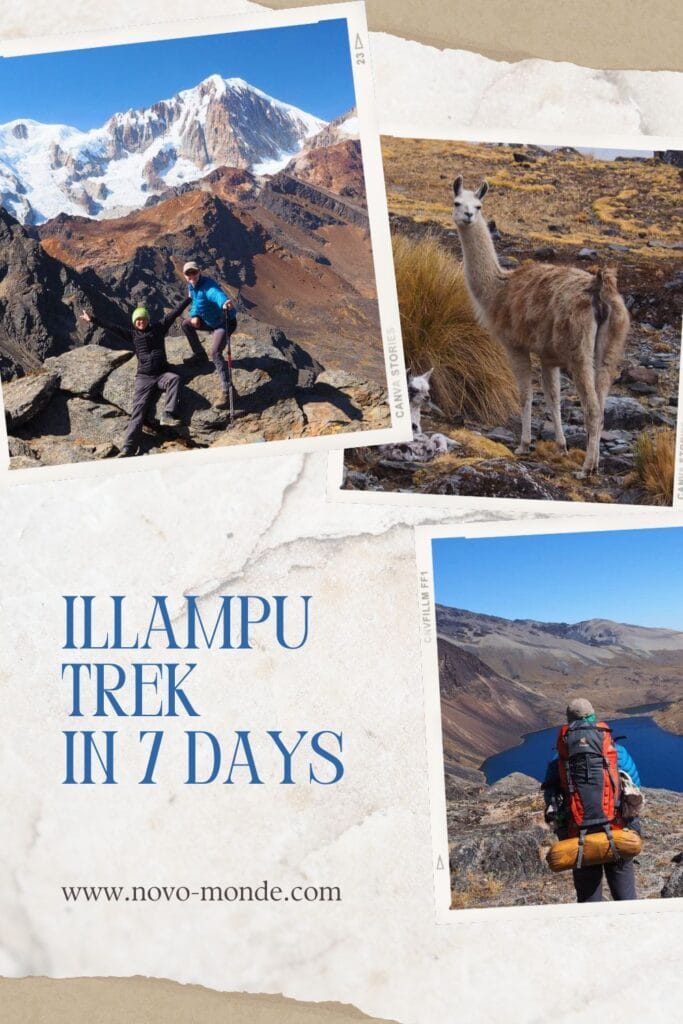
One thing we love most about blogging is the incredible encounters it allows us to have! Our friends Anaïs and Bruno are an excellent example. After using our articles to plan their long-term travel project, they invited us to their home in Strasbourg for a weekend to thank us for inspiring their adventure. Lovers of nature and wide-open spaces, they, like us, appreciate the incredible freedom that autonomous hiking offers. They too have climbed the Parinacota volcano and trekked from Choquequirao to Machu Picchu. After struggling to find information about the Illampu circuit in the Cordillera Real in Bolivia, they wanted to share their experience so you can undertake this magnificent 6-7 day trek in the Andes. We’ll let them tell you more!
- Introduction to the Illampu circuit
- What is the best time to do the Illampu circuit?
- Illampu trek: solo or guided?
- Organizing for the Illampu trek
- Day 0: reaching Sorata
- Day 1: from Sorata to Lackathiya
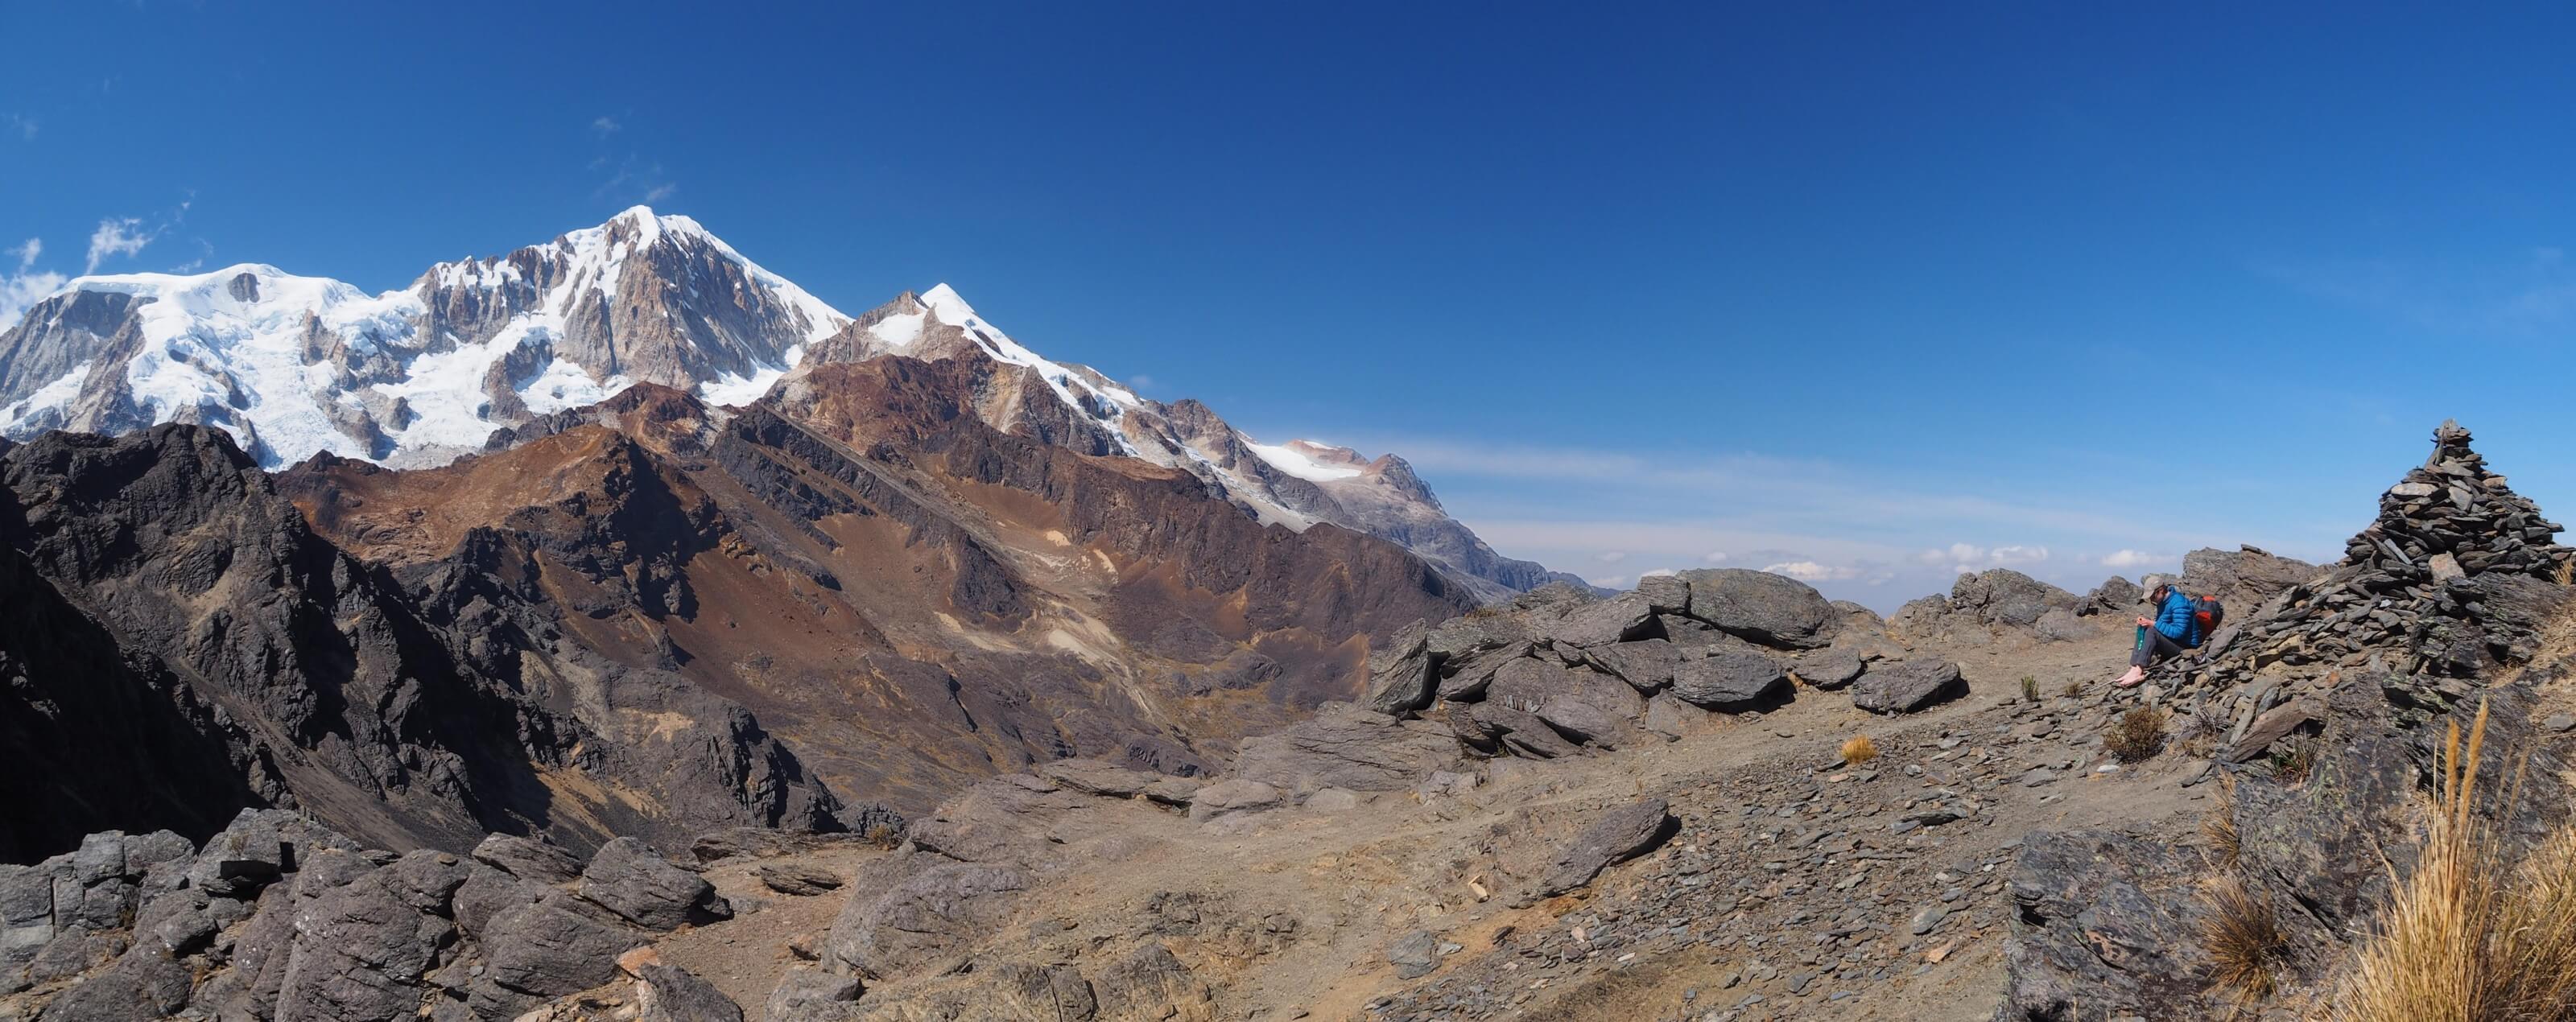
- Day 2: Illampu (4740 m) and Ckorahuasi (4480 m) passes
- Day 3: passing through the village of Cocoyo and the Sarani pass
- Day 4: passing the Calzada pass, the highest point of the Illampu circuit
- Day 5: Laguna San Francisco, first glimpse of Ancohuma and Lake Titicaca
- Day 6: Millipaya, return to populated and cultivated valleys
- Day 7: return to Sorata
Anaïs and Bruno took this trip in 2014, but the article was completely revised and updated in July 2024. If you see any price changes or have additional information that might be relevant, please feel free to leave us a comment!
Introduction to the Illampu circuit
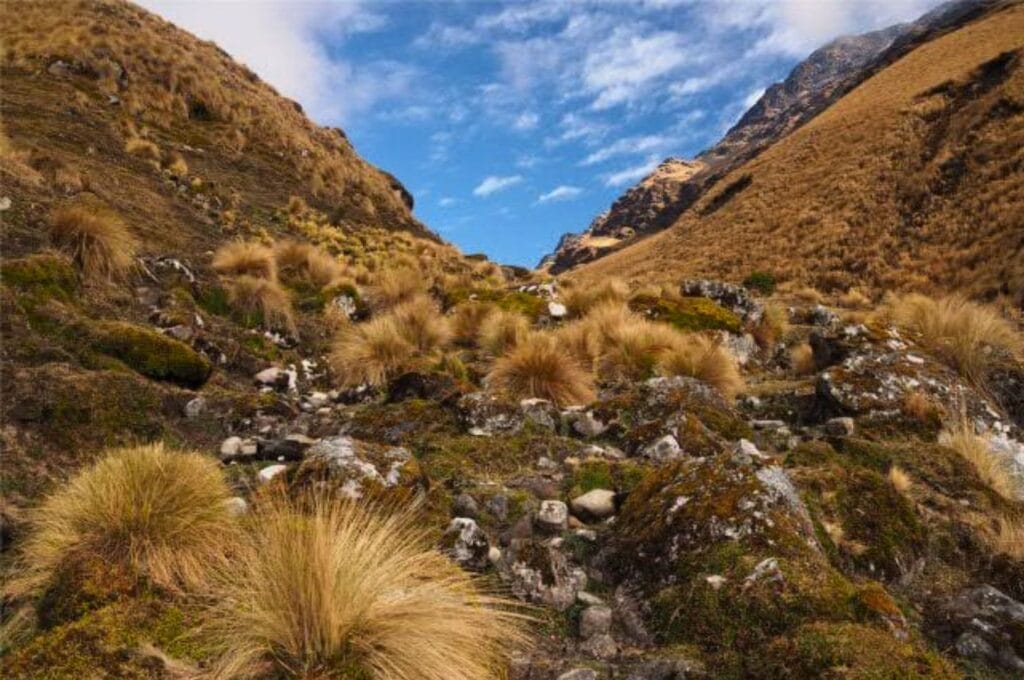
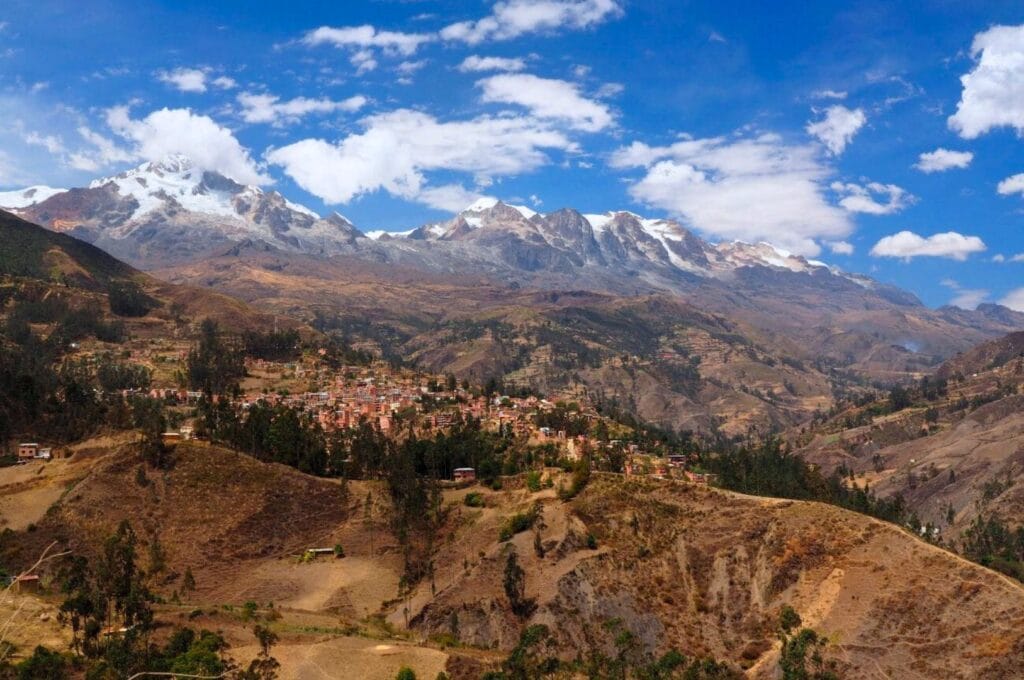
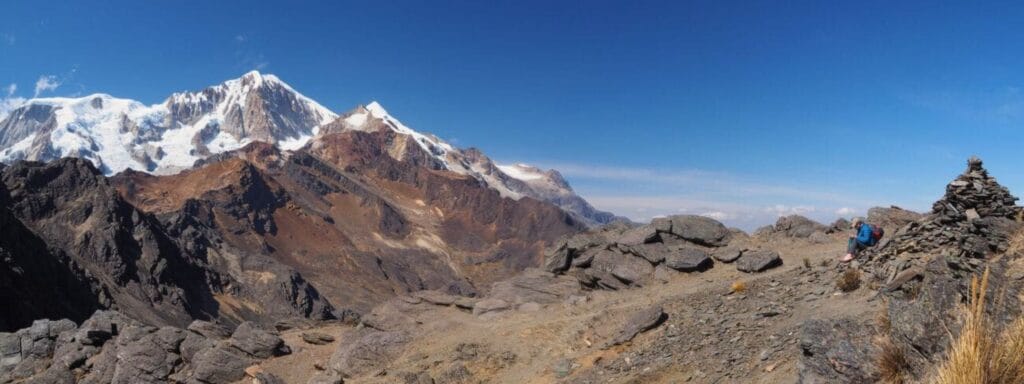
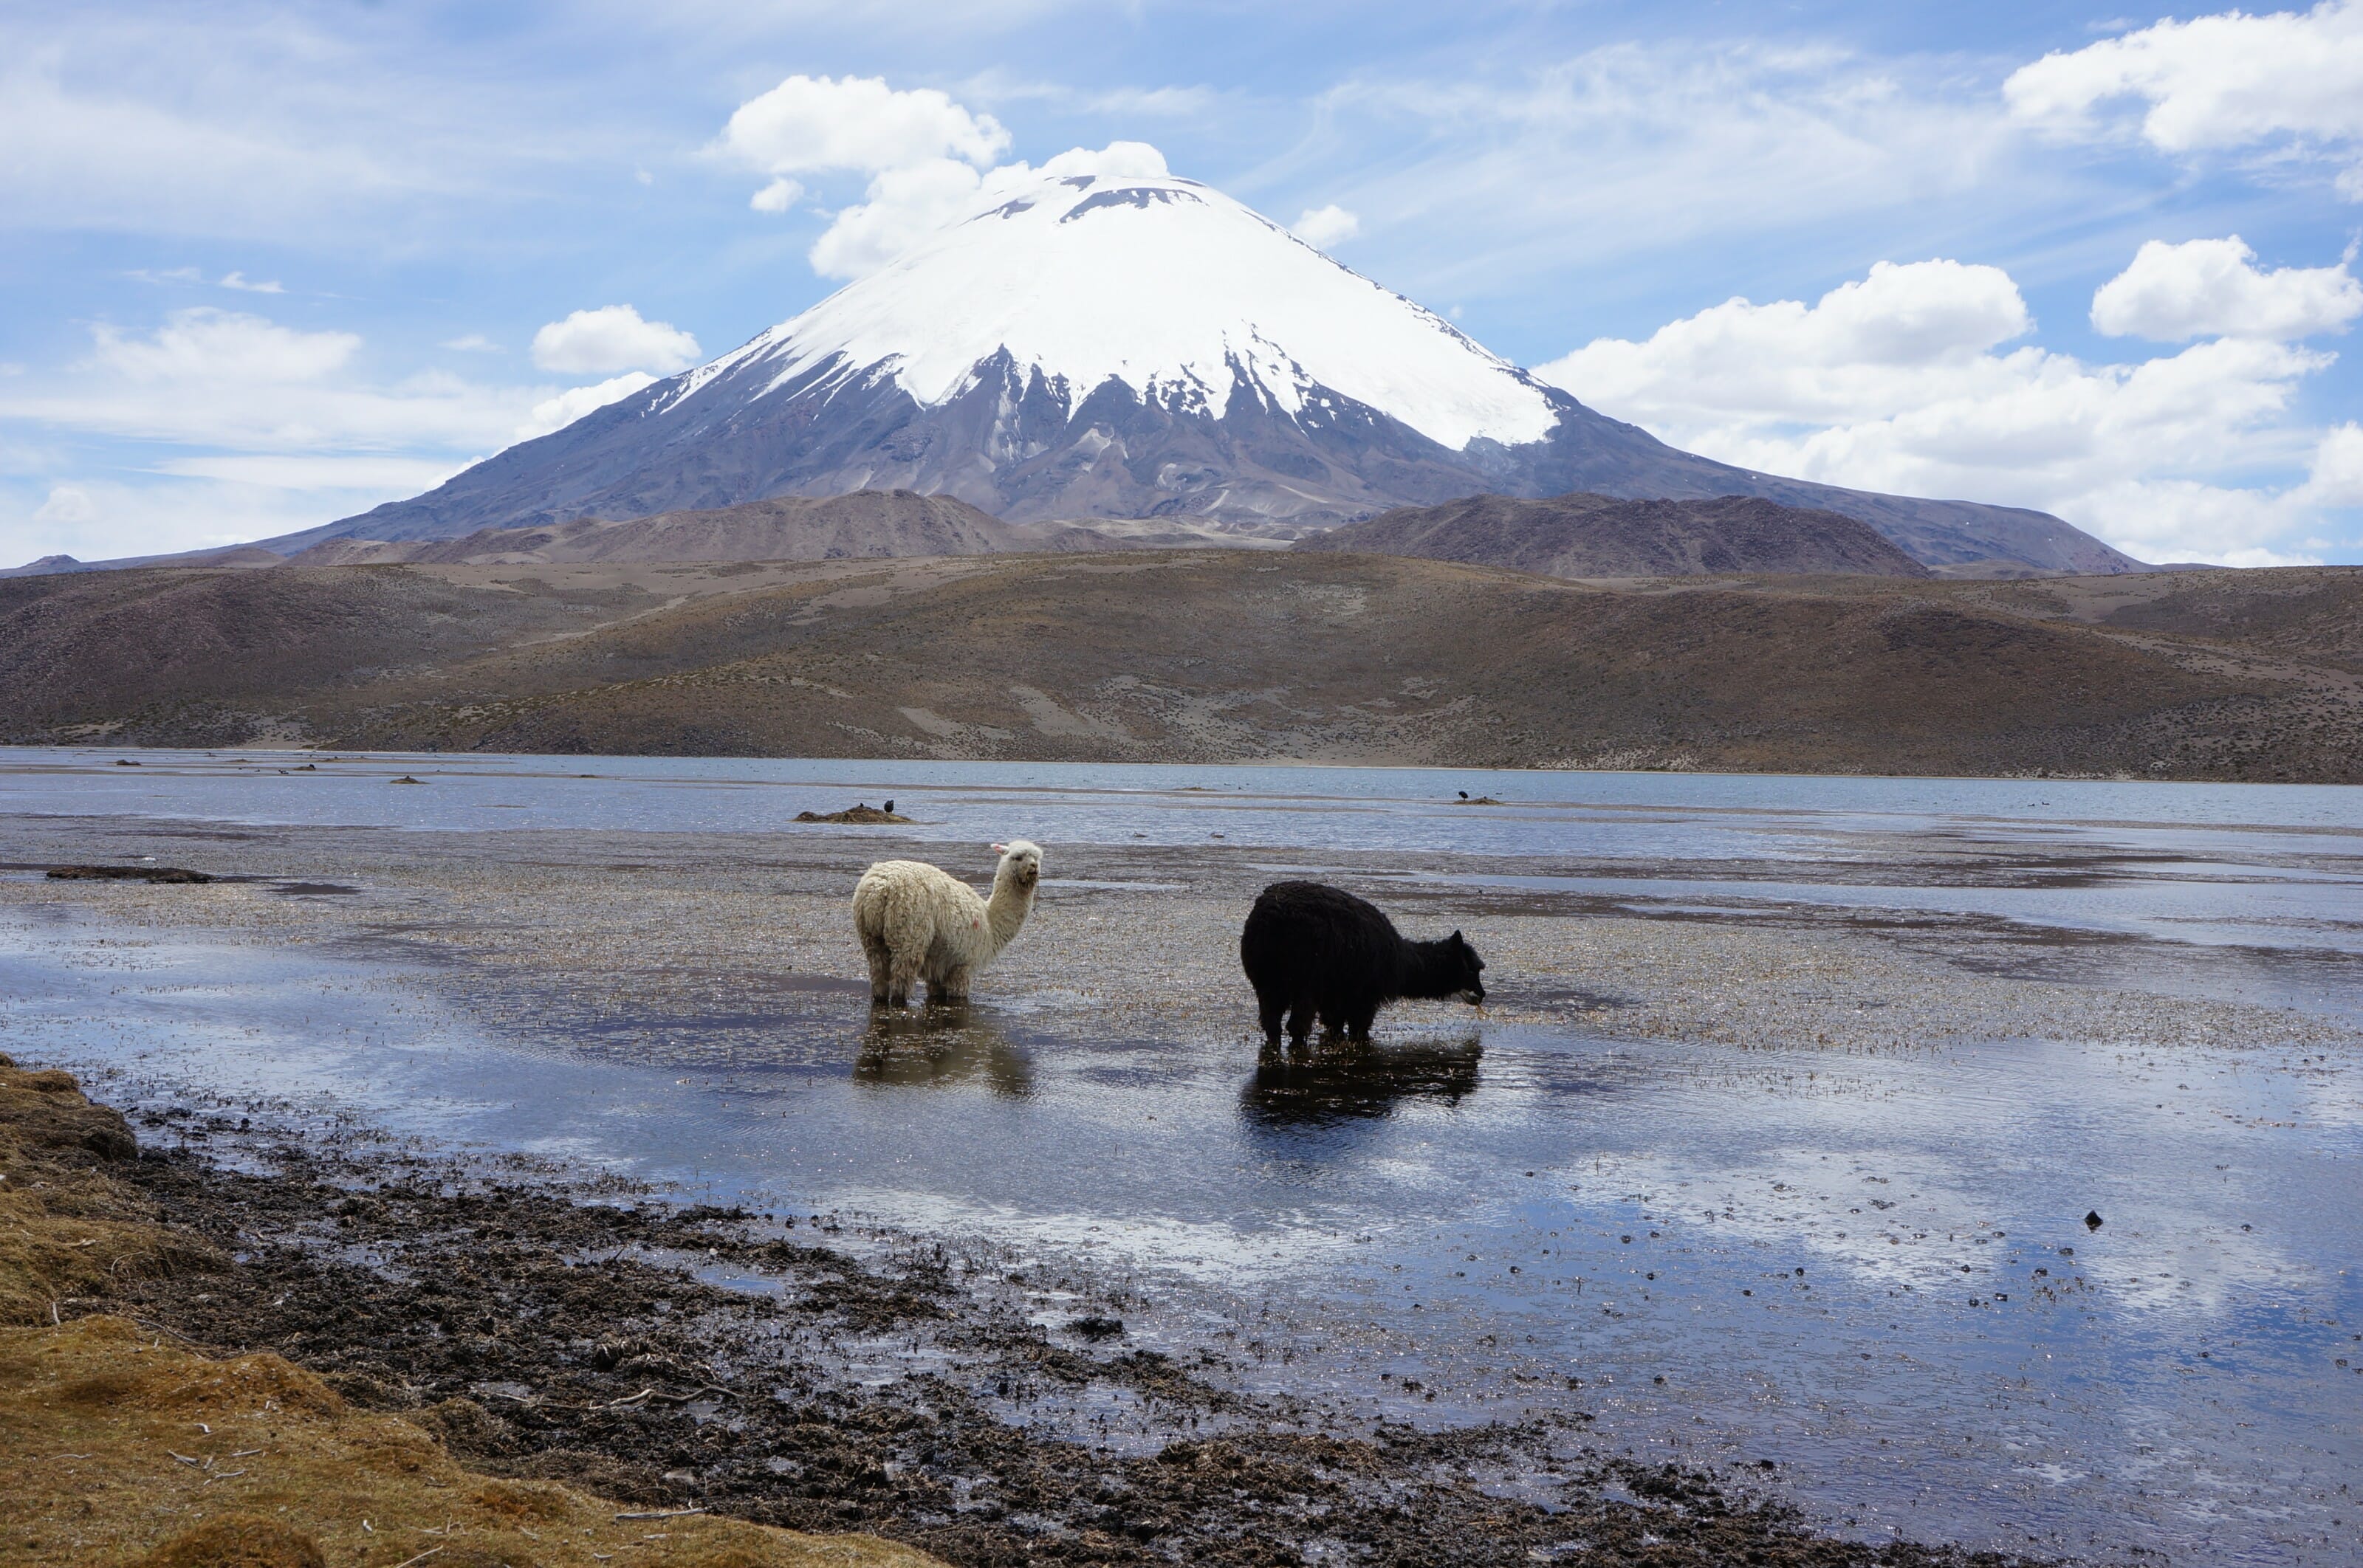
Located about a hundred kilometers northwest of La Paz, this beautiful trek describes a loop around the imposing Illampu massif in the Cordillera Real. In short: a journey through the remote valleys of the Bolivian Altiplano, passing through several high passes over 4500 meters in altitude. Pure bliss!
Summary of the Illampu circuit:
- Duration of the hike: 6 to 7 days
- Distance: a loop of 105 km
- Positive elevation: 6000 m
- Starting and ending point: Sorata
- Lowest altitude: departure from Sorata around 2700 m
- Highest altitude: Calzada Pass at 5045 m
- Difficulty: difficult trek
Highlights of the Illampu circuit
- Stunning and ever-changing high mountain landscapes
- Views of Illampu and Ancohuma mountains
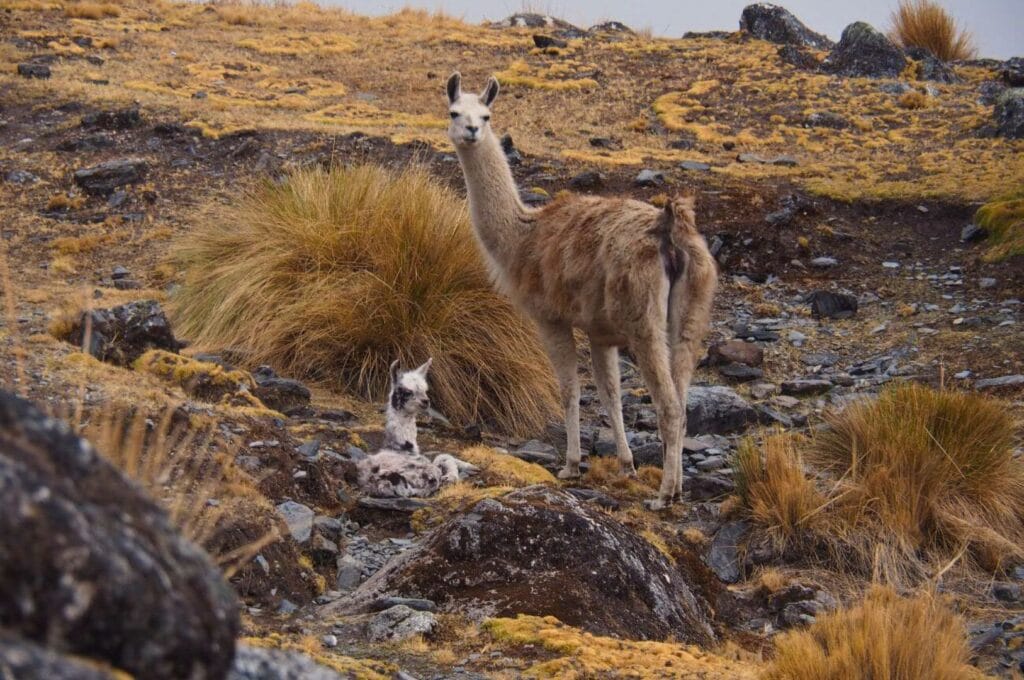
- Numerous llamas and alpacas along the way
- Remote areas where ancestral cultures are relatively preserved
- Almost non-existent tourist traffic in the Cordillera Real
- Views of Lake Titicaca and the peaks
Challenges encountered
- Walking at high altitudes, above 4000 meters, requires proper acclimatization
- Cold nights, down to -10 °C, requiring good sleeping gear
- Difficult-to-find paths; using an app in addition to the map is useful
- Only one resupply point in Cocoyo on day 3, requiring carrying food for 4 days
What is the best time to do the Illampu circuit?
The best time of year for the Illampu tour is during the dry season, from June to September. We did the trek at the end of August. The weather was generally stable, and daytime temperatures were pleasant. However, nights were freezing above 4000 m, and we encountered rain and snow showers. Cloud cover often set in by late afternoon. Thunderstorms in the late afternoon or early evening are also possible, especially in late winter.
Illampu trek: solo or guided?
There is little information available about this trek, and organizing this long hike was not easy for us. We completed the trek entirely on our own since there were no accommodations or campsites along the route. However, some agencies offer this tour for around $900. In short, if you are in good physical condition, we recommend doing it solo! This way, you have great freedom in the length and difficulty of the stages. The classic circuit involves crossing a pass each day of the hike. For us, we adjusted based on our fitness and motivation each day. We just made sure to always sleep as low as possible to minimize nighttime cold and far enough from hamlets.
Organizing for the Illampu trek
Map of the Illampu circuit

Here is the map of the Illampu circuit with our camping spots and the condition of the path we took. As for camping spots, it is easy to find a few flat meters to pitch the tent near a water source. However, some areas are more favorable than others compared to those indicated on the map.
With this and the GPS track below, you shouldn’t get lost! Download the trek map here.
There is also a map of the North Cordillera Real (Alpenvereinskarte) at 1/50,000 scale that covers almost the entire route except for the easternmost part (about 1 day of walking). Despite our searches, we couldn’t find this map in La Paz. Copies are supposedly available at the Sorata guide office, but again, no luck, the office was closed when we passed by. Fortunately, the owner of the campsite where we stayed had a black-and-white copy that we could take with us. Phew!
There is also an old English topo guide that doesn’t mention all the new roads. We had a copy that only helped us find the nicest camping spots.
This article contains affiliate links to partner sites. When you use our links to book accommodation, a car, or an activity, you don’t pay anything extra, but we get a small commission. This helps us to offer you free, independent, and ad-free content. Thank you for your support!
Guides and muleteers
You can opt for guide and muleteer services, which are easy to organize in Sorata. We didn’t study the price since we intended to hike alone from the start.
Necessary gear for the Illampu circuit
Common gear
For the two of us, we had:
- 1 tent
- 1 lightweight gasoline stove: gas cartridges can only be found in La Paz, on Illampu street, but at a high price. Count 40 bolivianos for a small 230 g cartridge and 80 bolivianos for the large 450 g model. In comparison, 1 liter of gasoline costs 6 bolivianos in Sorata. We consumed 1 liter of gasoline in 6 days with 3 hot meals per day for 2 people.
- 1 cooking pot
- 1 water filter: very handy as there is water (rivers) along the way, and the filter avoids carrying large water reserves.
- Food: about 125 g of carbohydrates (oats, pasta, polenta, rice, mashed potatoes) per meal per person + sauces (tomato, cheese) or freeze-dried soups and about 100 g of snacks (corn, peanuts) per person per day. In total, this takes about 1 kg of food per day for 2 people. Tip: Stock up in La Paz, you’ll have more choices than in Sorata.
- First aid kit
- Sunscreen
- Smartphone with GPS, maps.me app, and trek map
Per person
Each of us had:
- 1 50-liter backpack
- 1 inflatable mattress like Therma Rest
- 1 sleeping bag with a comfort temperature of -5°C + a silk sheet
- 1 headlamp
- Clothes for all weather conditions: fleece, raincoat, neck warmer, down jacket, hat, gloves, warm socks, hiking pants, night leggings, wide-brimmed hat or cap.
To go further, we also wrote a complete article on how to organize an autonomous trek during a long-term trip.
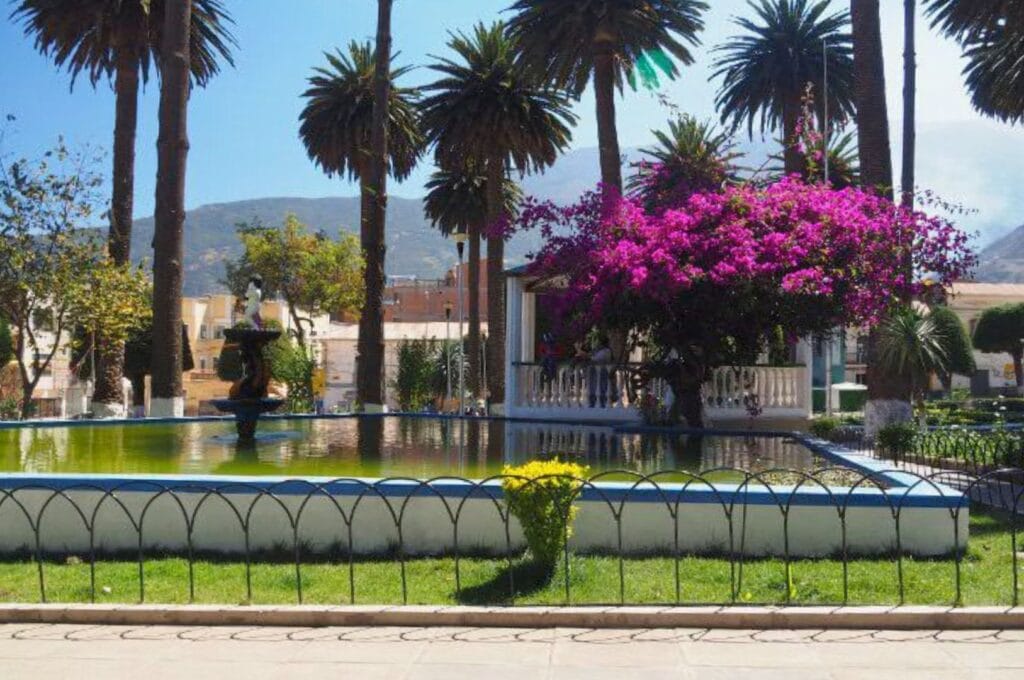
Day 0: reaching Sorata
The small town of Sorata is easily accessible from La Paz, and after a chaotic journey by combi, we arrive. The warmth comforts us. Here, we are much lower than La Paz, and especially, the valley plunges towards the Amazon and enjoys a much more temperate and pleasant climate than the Altiplano.
The departure for Sorata by minibus is from Bustillo Street, near the Cementerio in La Paz. The trip takes about 4 hours for 20 bolivianos per person.
Regarding accommodations, there are many hostals near the main square of the village. We stayed at Camping El Vergel, with David and Gisela. To get there, head down towards the river from the main square. Don’t hesitate to ask, everyone knows! The site is by the river in a beautiful vegetative environment. Plus, you have a kitchen at your disposal. The room costs 25 bolivianos per person, and camping is 12 bolivianos per person.
Note that there is no ATM in Sorata.
Day 1: from Sorata to Lackathiya
Departure from Sorata
Backpacks are packed, and we are ready to start the Illampu tour. The trek begins by climbing from Sorata’s main square. Many streets turn into trails leading to nearby villages. The easiest way is to regularly ask locals for directions. Well, you can guess that we got lost at this point. We never found the scenic path supposed to lead us to the community of Quirambaya after about 2.5 hours of walking. Too bad… We have marked it on the GPS track. Instead, we took the trail through Jumuco and another winding path out of the hamlet that led us to Quirambaya. But let’s admit, it was much less pleasant.
In Quirambaya, the climb continues on a small path bordered by exotic plants and running alongside an irrigation canal. The bags are heavy, Anaïs is complaining. It must be said that not knowing if we would find food along the way, we are carrying seven days of provisions…
First campsite
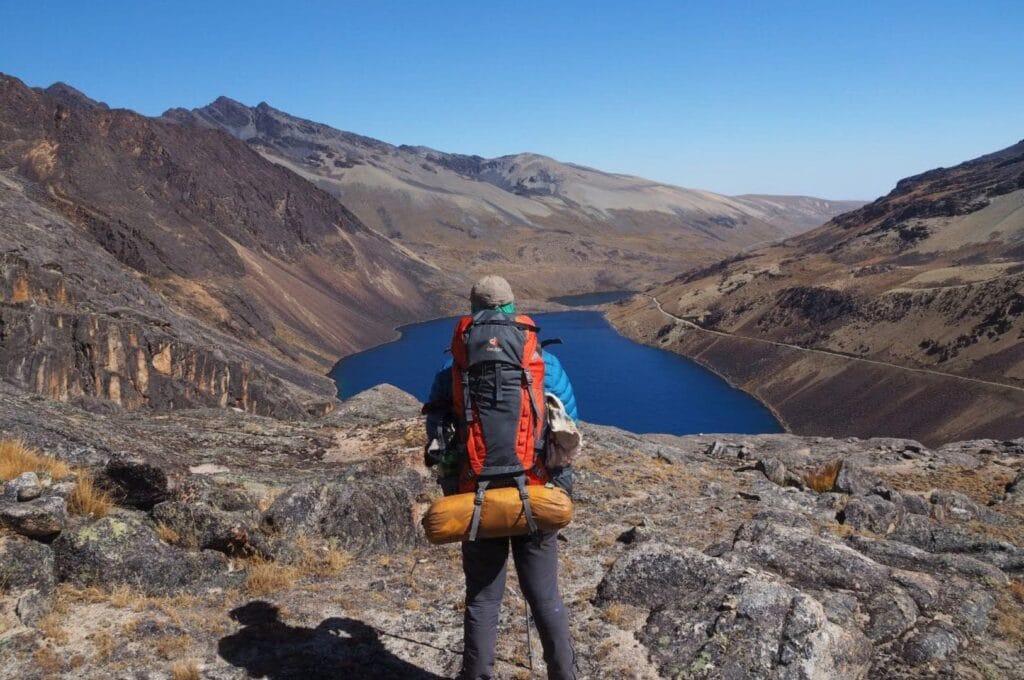
We finally arrived at Lackathiya, around 4000 meters above sea level, about 2.5 hours after Quirambaya. The sky is clouding over, the wind is picking up, and it is much cooler. We realize that we are finally entering the massif. The elevation gain and our bags have greatly fatigued us, so we decided to stop at the first camping spot, about an hour above Lackathiya. A large, comfortable grassy plain welcomes us. There is plenty of water and lots of llamas. These are the first we see!
- From Sorata to Lackathiya
- 10.8 km (6 hours)
- 1400 m de elevation gain
- 100 m elevation loss
The journey to Quirambaya is entirely on trails and is not very interesting. To shorten the hike, it is possible to take a taxi to this village or to start the circuit from Lackathiya by taking a 4×4. There is water all along the way, so there is no need to carry large reserves. A second campsite exists if you climb another 45 minutes towards the Paso Illampu pass. There is water there too, but the place seemed less flat and less comfortable.
Day 2: Illampu (4740 m) and Ckorahuasi (4480 m) passes
Illampu pass
Upon waking, we discover for the first time (and not the last!) a frozen environment. After a good breakfast of oatmeal porridge, we set off for the ascent of the first pass of this journey, the Paso Illampu. The altitude is noticeable, and we are quite out of breath but fortunately, there are no symptoms of altitude sickness. After 2 hours of effort, we reach the pass at 4740 m with the Illampu towering above us at over 6300 m. Magnificent!

After a snack and photo break, the descent is through a lovely sunny valley occupied by many llamas. At the bottom of the valley, we pass by small sheepfolds and llama enclosures, but we do not meet anyone. We reach Estancia Utjaña Pampa at around 3900 m, just in time for lunch. We decide to tackle the second pass rather than set up camp for the day.
Ckorahuasi pass
We enter the valley but unfortunately on the wrong side of the river. The path lies ahead on the other side of a raging torrent. We find a suitable spot to cross and remove our shoes. The water is icy! We grit our teeth and here we are on the right side. To avoid our mistake, stay on the river’s right bank. Then, the climb continues smoothly to the (paso) Ckurahuasi pass at 4479 m in about 3 hours. This time, we are less lucky, the pass is shrouded in clouds and it is cold. We do not linger and start the descent. We set up our camp about 30 minutes below the pass.
- From Lackathiya to Ckurahuasi pass
- 14.6 km (7 hours)
- 1300 m elevation gain
- 1100 m elevation loss
You will have no problems refilling your water, except for 1 hour before and 1 hour after the Illampu pass.
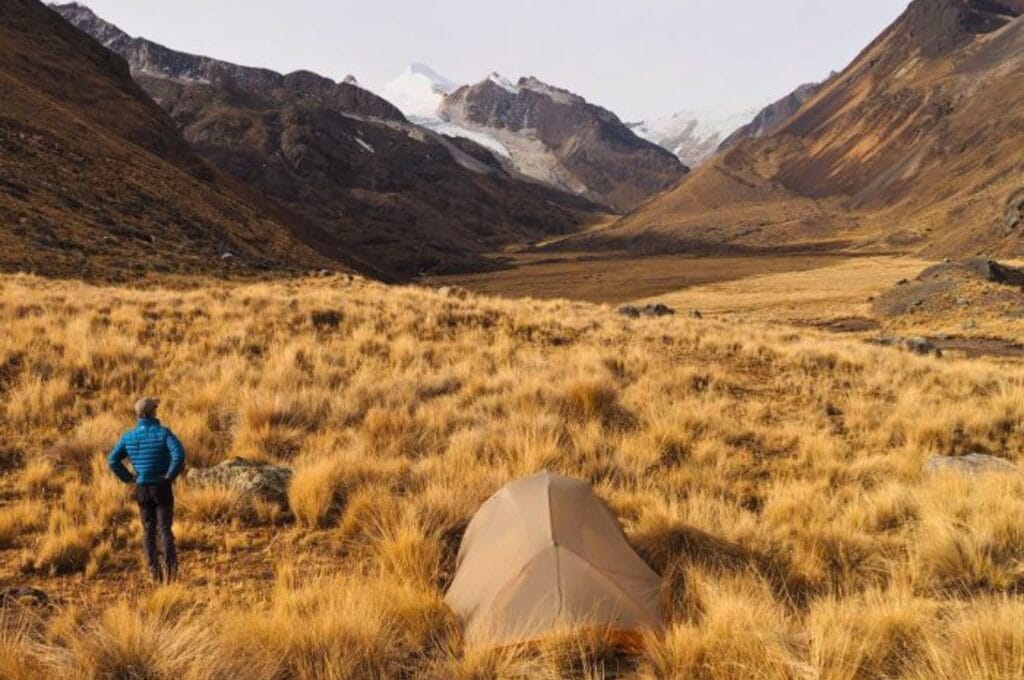
Day 3: passing through the village of Cocoyo and the Sarani pass
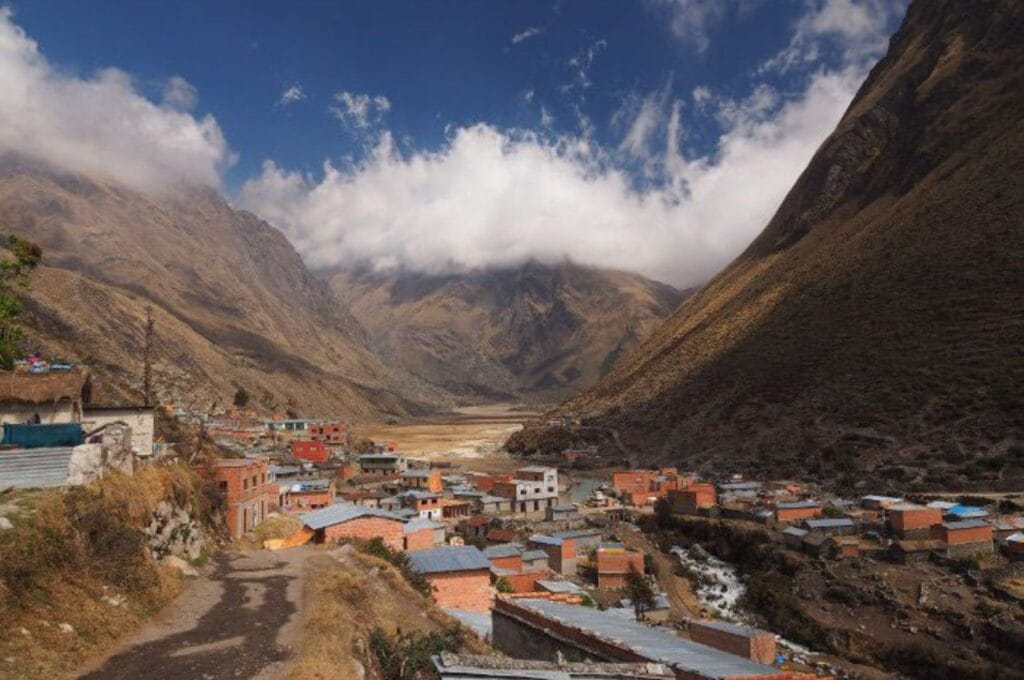
After enduring a heavy storm during the night, the tent is frozen again upon waking. We are very pleased with our sleeping bags: we do not feel the cold and have very restorative nights. The descent from the camp follows the river’s right bank. We have an impressive view of a large post-glacial plain with a meandering river. In the distance, we see the village of Cooco (Cocoyo). Amazing!
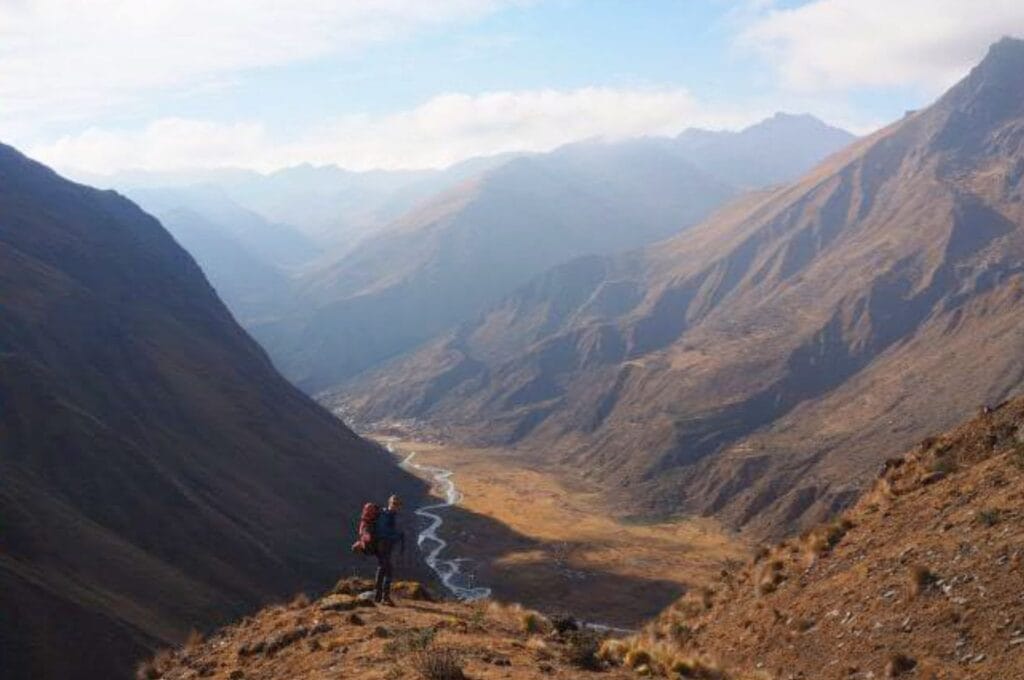
Cooco
Arriving in the plain, we follow the river’s left bank until we reach Cocoyo at 3500 m after 2 hours of walking. We expected a hamlet, but it is a small town that we discovered, recently connected to the rest of the world by a new road! We especially discover small shops selling everything. In short, we can replenish our supplies for the rest of the trek. And we have been carrying everything since the beginning… We cross the river and climb through the village, greeted by the warm smiles of the inhabitants.
Sarani pass
Leaving Cooco, we set off into a new valley where cows, llamas, sheep, and even pigs graze. We climb for about 3.5 hours to the Sarani pass at 4500 m. The ascent is very gradual and offers beautiful views. Fortunately! Because, when we arrive, this new pass is also in the clouds.
We begin the descent relying more on the GPS as visibility is very poor. A recently constructed trail has destroyed the hiking path, making our progress even more difficult. But after an hour of hesitation and alternating between trail and path, we arrive in a marshy plain. We set up our camp at the end, slightly elevated, at the foot of a pretty waterfall.
- From Ckurahuasi to Sarani pass
- 17.7 km (6 hours)
- 900 m elevation gain
- 1300 m elevation loss
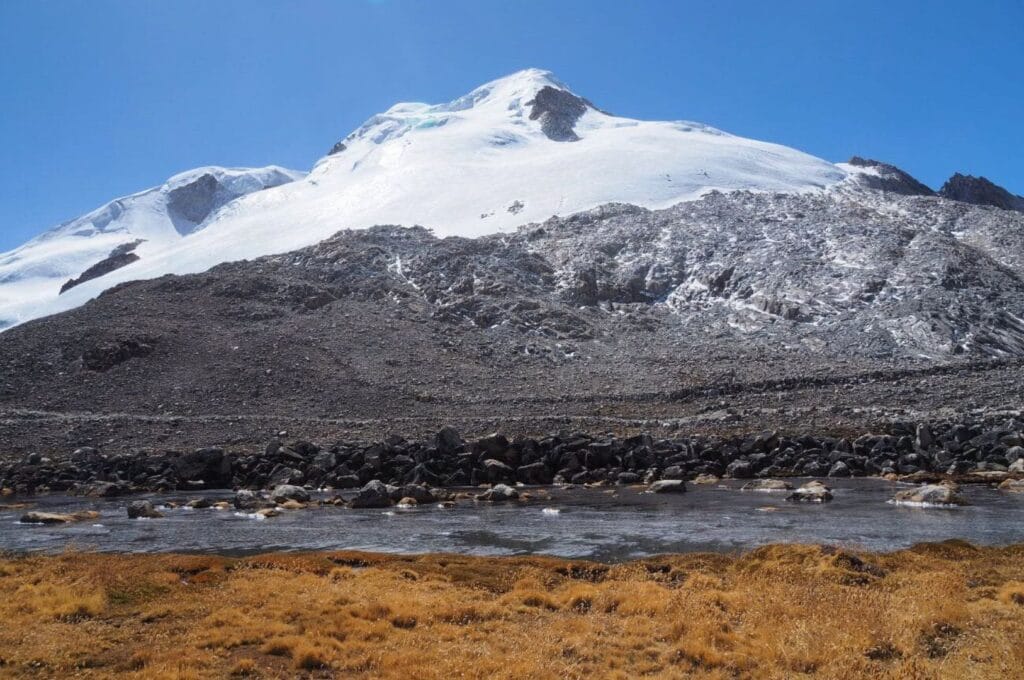
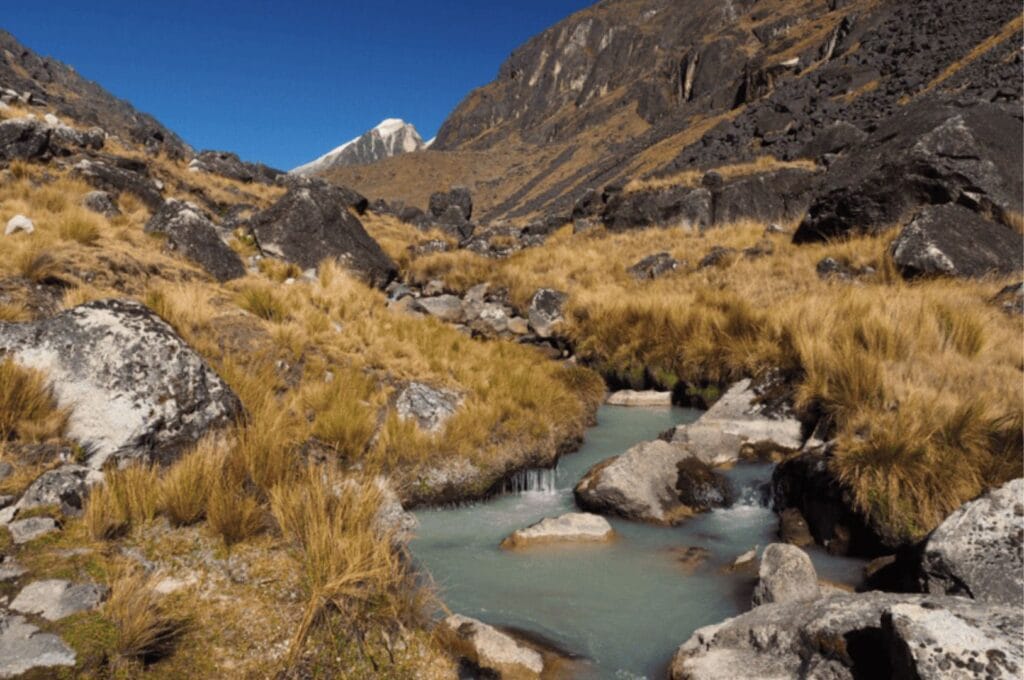
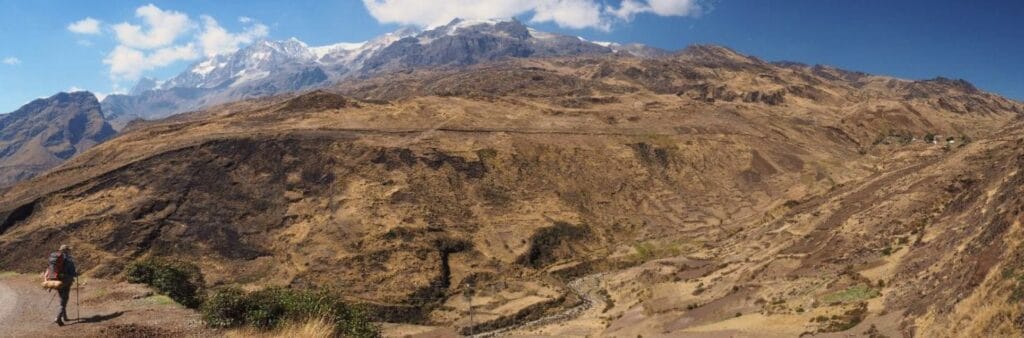
Day 4: passing the Calzada pass, the highest point of the Illampu circuit
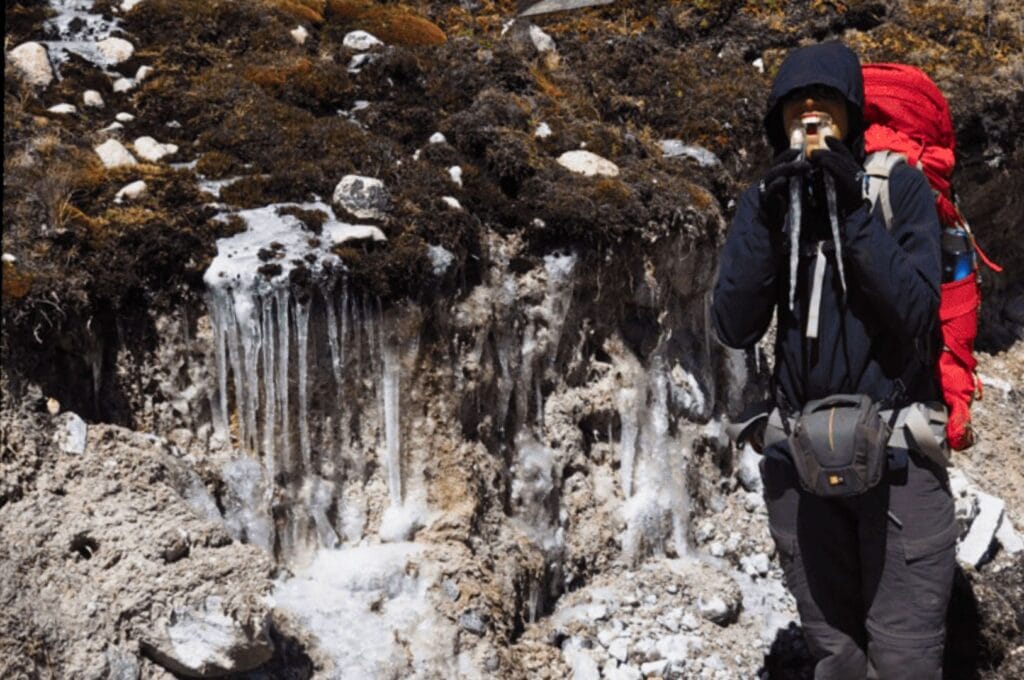
At the risk of repeating ourselves, it’s freezing this morning! Under the effect of the frost, our tent pole breaks… Fortunately, we have the repair kit with us. But today, we struggle to get going. The valley is still in the shadow and our muscles are not yet warmed up.
We first follow the narrow and very pretty Chajolpaya Valley through which flows a lovely stream, still partly frozen from the night. We follow the river along a partially paved pre-Columbian path. The valley then widens. Some streams are no longer flowing because they are frozen, and we also see our first ice falls. We do not regret our decision to organize our walking days to avoid sleeping in this valley. It is beautiful but there is a glacial atmosphere that the ambient sun struggles to warm. Especially since throughout this day, we face a persistent and icy headwind.

Calzada pass
The scenic path quickly disappears under the rubble of a trail under construction. We have no choice but to continue on the trail. The climb to the pass is gradual, and the panorama of the snowy peaks is breathtaking. But it becomes endless. Every time we think we have reached the pass, new switchbacks appear. The wind tires and slows us down. It takes us 5 hours of walking to reach the Calzada pass at 5045 meters, the highest point of the trek.
We are then by a small lagoon at the foot of imposing glaciers. Advancing a little, we find ourselves facing the Lagunas Carizal and Chojna Khota below. The wind does not calm down, but we take the time to savor the moment. Here we are at the top of this trek, the air is thinner and colder, and time seems to be suspended.
The campsite
However, we must leave quickly. The goal? Sleep as low as possible to avoid unbearable nighttime temperatures. By mistake, we try to take the pedestrian path again but, as often, it is partially destroyed by the new vehicle trail. In short, we struggled in a moving scree, and Anaïs even had a serious vertigo attack. We are really tired by this day.
Arriving in the valley, the vegetation is made of cacti and tufts of grass. Not great as a camping spot… We finally found a relatively comfortable place to set up our camp slightly above the lagoon. It is 7 p.m., but we dive into our sleeping bags, exhausted, already freezing but captivated by what we saw today.
- From Sarani pass to Calzada pass
- 15.9 km (6 hours)
- 950 m elevation gain
- 350 m elevation loss
You will find water (and some ice) throughout this day of walking. We tried as much as possible to avoid walking on the trail by taking parts of undamaged paths when we saw them. But if we had to do it again, we would not try it. Several passages were quite dangerous, filled with unstable rubble. The trail is more boring and longer but much safer!
Day 5: Laguna San Francisco, first glimpse of Ancohuma and Lake Titicaca
Freezing morning
That morning, we experienced extreme cold. There was snow inside the tent, our water bottles had completely frozen, and even the river next to the tent was frozen solid. Does anyone know at what temperature rivers freeze? As soon as we filled the pot with water, it froze instantly. We’ve never seen anything like it! So, we decided to linger a bit that morning, waiting for the tent and our feet to thaw.
We then followed our preferred GPS track, which indicated a path climbing up the right side of the valley. The path was more or less visible, but we managed to gradually ascend to a new pass at 4900 m, reaching it after an hour of climbing. The landscape was magnificent! We enjoyed the most beautiful panorama of the trek, surrounded by snowy mountains and glacial lagoons. We felt alone in the world and privileged to witness such a spectacle. In the distance, we could also see Lake Titicaca and Nevado Ancohuma, standing tall at 6427 meters.
The excuses
And then, the cold, fatigue, hunger (or other excuse) caused us to lose our bearings. To save time, we cut across the terrain, heading towards what we believed to be Laguna San Francisco. A clear navigational error! After some struggles among the rocks, we realized our mistake and turned back, grumbling. A few ridges later, we spotted the correct lagoon and the path leading to it. This detour added 1.5 hours to our journey and tested our patience.

Due to the accumulating fatigue over the days, we decided not to go any further and set up our camp near the waterfall on the right bank of the marsh upstream from the lagoon. We enjoyed a sunny afternoon to rest, rejoicing in being able to do some laundry and have a proper wash in the stream covered in icicles ;).
- From Calzada pass to laguna San Francisco
- 9 km (2 hours, 4 hours with detours!)
- 500 m elevation gain
- 600 m elevation loss
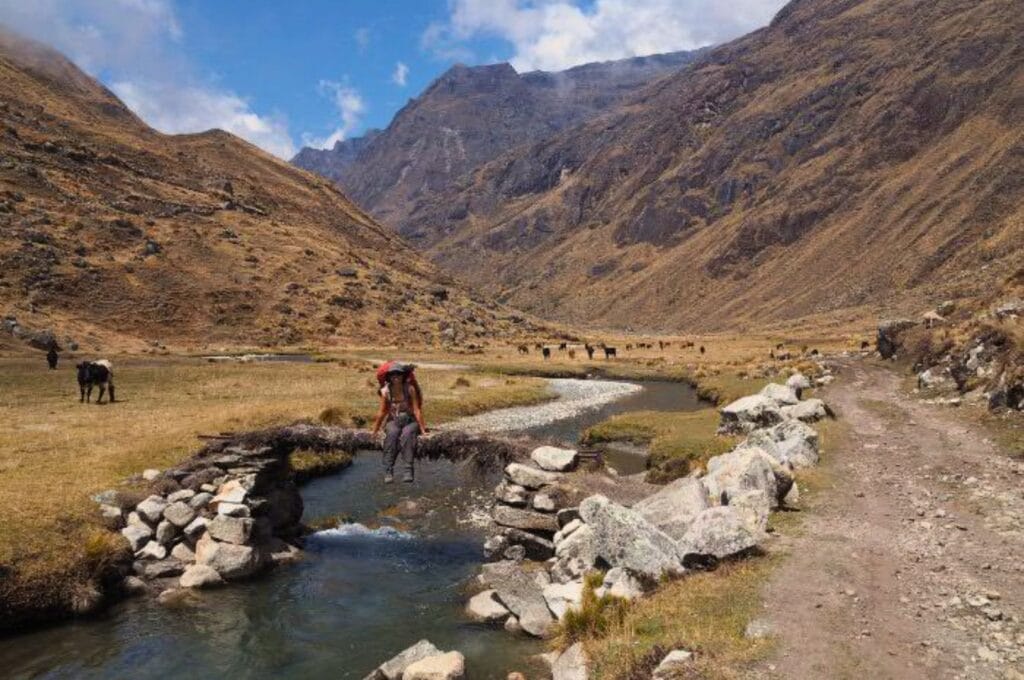
Day 6: Millipaya, return to populated and cultivated valleys
View of Lake Titicaca
This afternoon of rest had reinvigorated us, and we set off brightly the next morning to tackle the last pass of this circuit, the unnamed pass at 4867 m. Once again, a track had replaced the trail, and we followed it sensibly for 2 hours, ascending above the vast Laguna San Francisco.
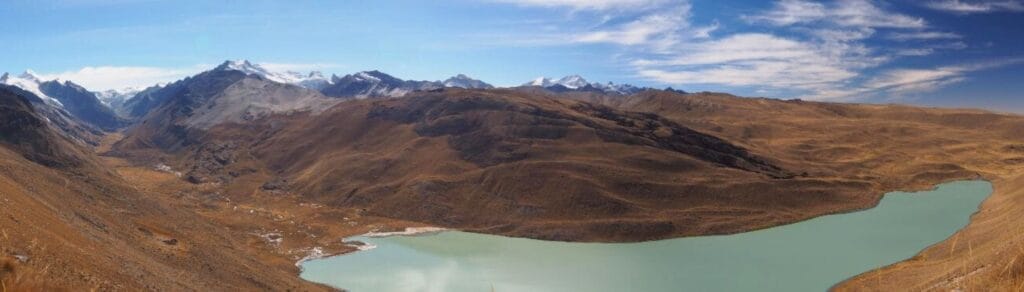
At the summit, the Altiplano and Lake Titicaca unfolded before us in all their vastness. We thought we saw the sea, with its myriad of islands, among which Isla del Sol stands prominent. And to think we were there just a few days ago! We also saw the track zigzagging down to the Altiplano. What, another endless track? The weather was clear, visibility perfect, and our legs were in better shape. So, we decided to cut across, off-trail.
Heading to Millipaya
After traversing grassy expanses and cultivated fields, we arrived at the Alto Logena community after 3 hours of descent. Children played in the village, pigs and sheep grazed along the path. Men worked in the fields, preparing the land for the new season, greeting us as we passed. Life had returned, making us feel shy. We hadn’t seen anyone for four days. After another 1.5 hours of descent, we reached the village of Millipaya at 3500 m, following the track on the left bank of the river.

After Millipaya, the path usually continues on the left bank of the valley. As locals indicated it would be hard to find, we chose to take the track on the right bank of the valley. It was very infrequently used by vehicles, so we weren’t disturbed. We were heading towards the Amazon and leaving the mountain peaks. The views became less impressive, signaling the end of our journey. We camped near the mining company about 1.5 hours after Millipaya, close to the track on the right bank of the valley.
- From laguna San Francisco to Millipaya
- 22 km (7 hours)
- 600 m elevation gain
- 1600 m elevation loss
Unlike other valleys we crossed, this one was much more populated and cultivated. From Alto Logena onwards, unless you ask a farmer for permission, it’s quite difficult to find a quiet spot to camp. If you wish, the Illampu circuit can be completed in 6 days, as combis run daily to Sorata and La Paz from Millipaya.
Day 7: return to Sorata
During this half-day trek, which wasn’t particularly interesting, we walked along the track, passing through hamlets. We witnessed scenes of local rural life. Quickly, we spotted Sorata in the distance, but despite the dozens of paths leading there, it was difficult to find the shortest route. After several twists and turns, we finally reached the road leading to Sorata and its welcoming warmth.
- From Millipaya to Sorata
- 14 km (2.5 hours)
- 100 m elevation gain
- 700 m elevation loss
We felt like we were reaching for the stars during this trek, which was undoubtedly one of the most challenging but also one of the most surprising, with new views at every turn. Thank you, Illampu circuit!
Thank you to Anaïs and Bruno for sharing their experience and for their warm hospitality in Strasbourg. We hope they’ve inspired you to push your limits and try this adventure in the heart of the Cordillera Real in Bolivia. We wish you all the best for the future, friends, and see you soon!
It’s time for us to close this chapter with the final practical article about the budget needed for a trip to Bolivia. Otherwise, see you in Chile!
Pin it
What a great story. We are about the do the same trek and I wonder how much can we rely on the small tiendas in Cocoyo. Are those real stores? Do they have vegetables? Cookies? Instance soup/noodles?
It will be great to curry food just for 3 days instead of the all trek.
Hi Matan.
Have you been there? How was it?
What about the robbery warnings I can see in the old books? Is it still happaning?
Hi Gilad, hope this response will reach you on time.
We started our trek from cooco. We found a collectivo from Sorata to the middle of nowhere and from there we hitchiked to cooco. Not very recommended but possible.
So we didn’t look for stores in cooco for this reason.
Unfortunately we found out the all way from cooco to Laguna Carizal including the pass and the campsite before is a road, not a trail. Vehicles drive this road everyday, and it wasn’t nice to walk next to them on the road.
At the end we continued with the road to Casamaya, and didn’t complete this trek. So I can’t say anything about the last two days, where there are robbery warnings.
Unfortunately I wouldn’t recommend this trek now days, because major part of it is just walking on roads next to vehicles.
Sorry for my disappointing comment :/