
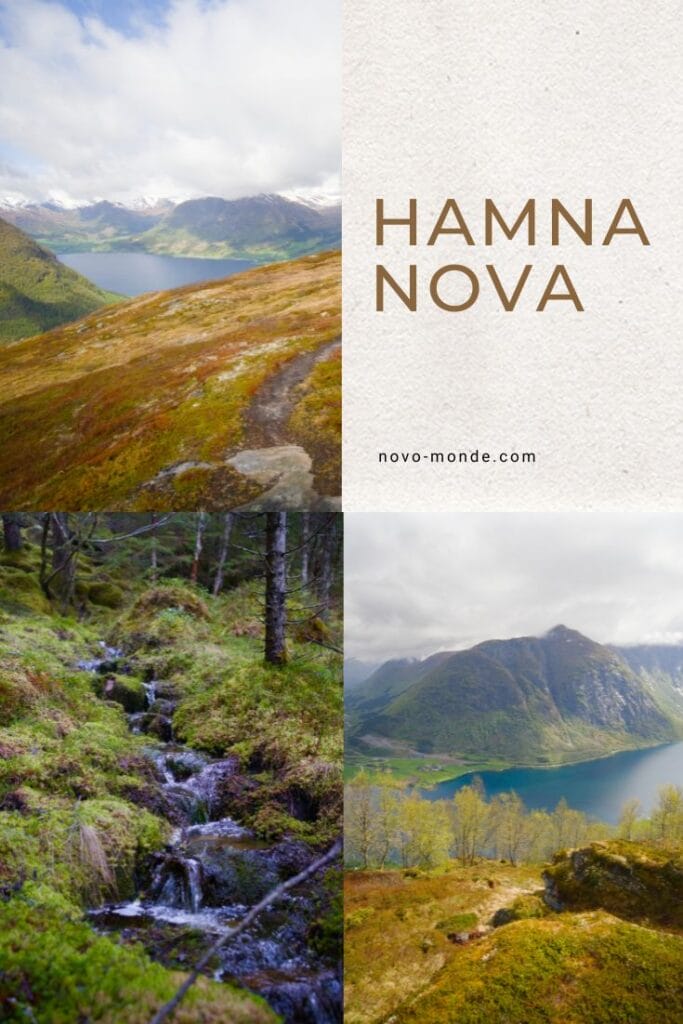
Today we’re taking you on an easy hike in Norway’s fjord region. And I really do want to emphasize the word “easy,” because in Norway, hiking and “easy” don’t necessarily go hand in hand. 😉 The elevation gains are often impressive, and the terrain is definitely not a walk in the park. But this time, the Hamnanova hike is a great way to enjoy breathtaking views of the Kjøsnesfjord and Lake Jølstravatnet without having to climb extremely steep slopes or tackle a major elevation gain.
Where is the Hamnanova hiking trail?
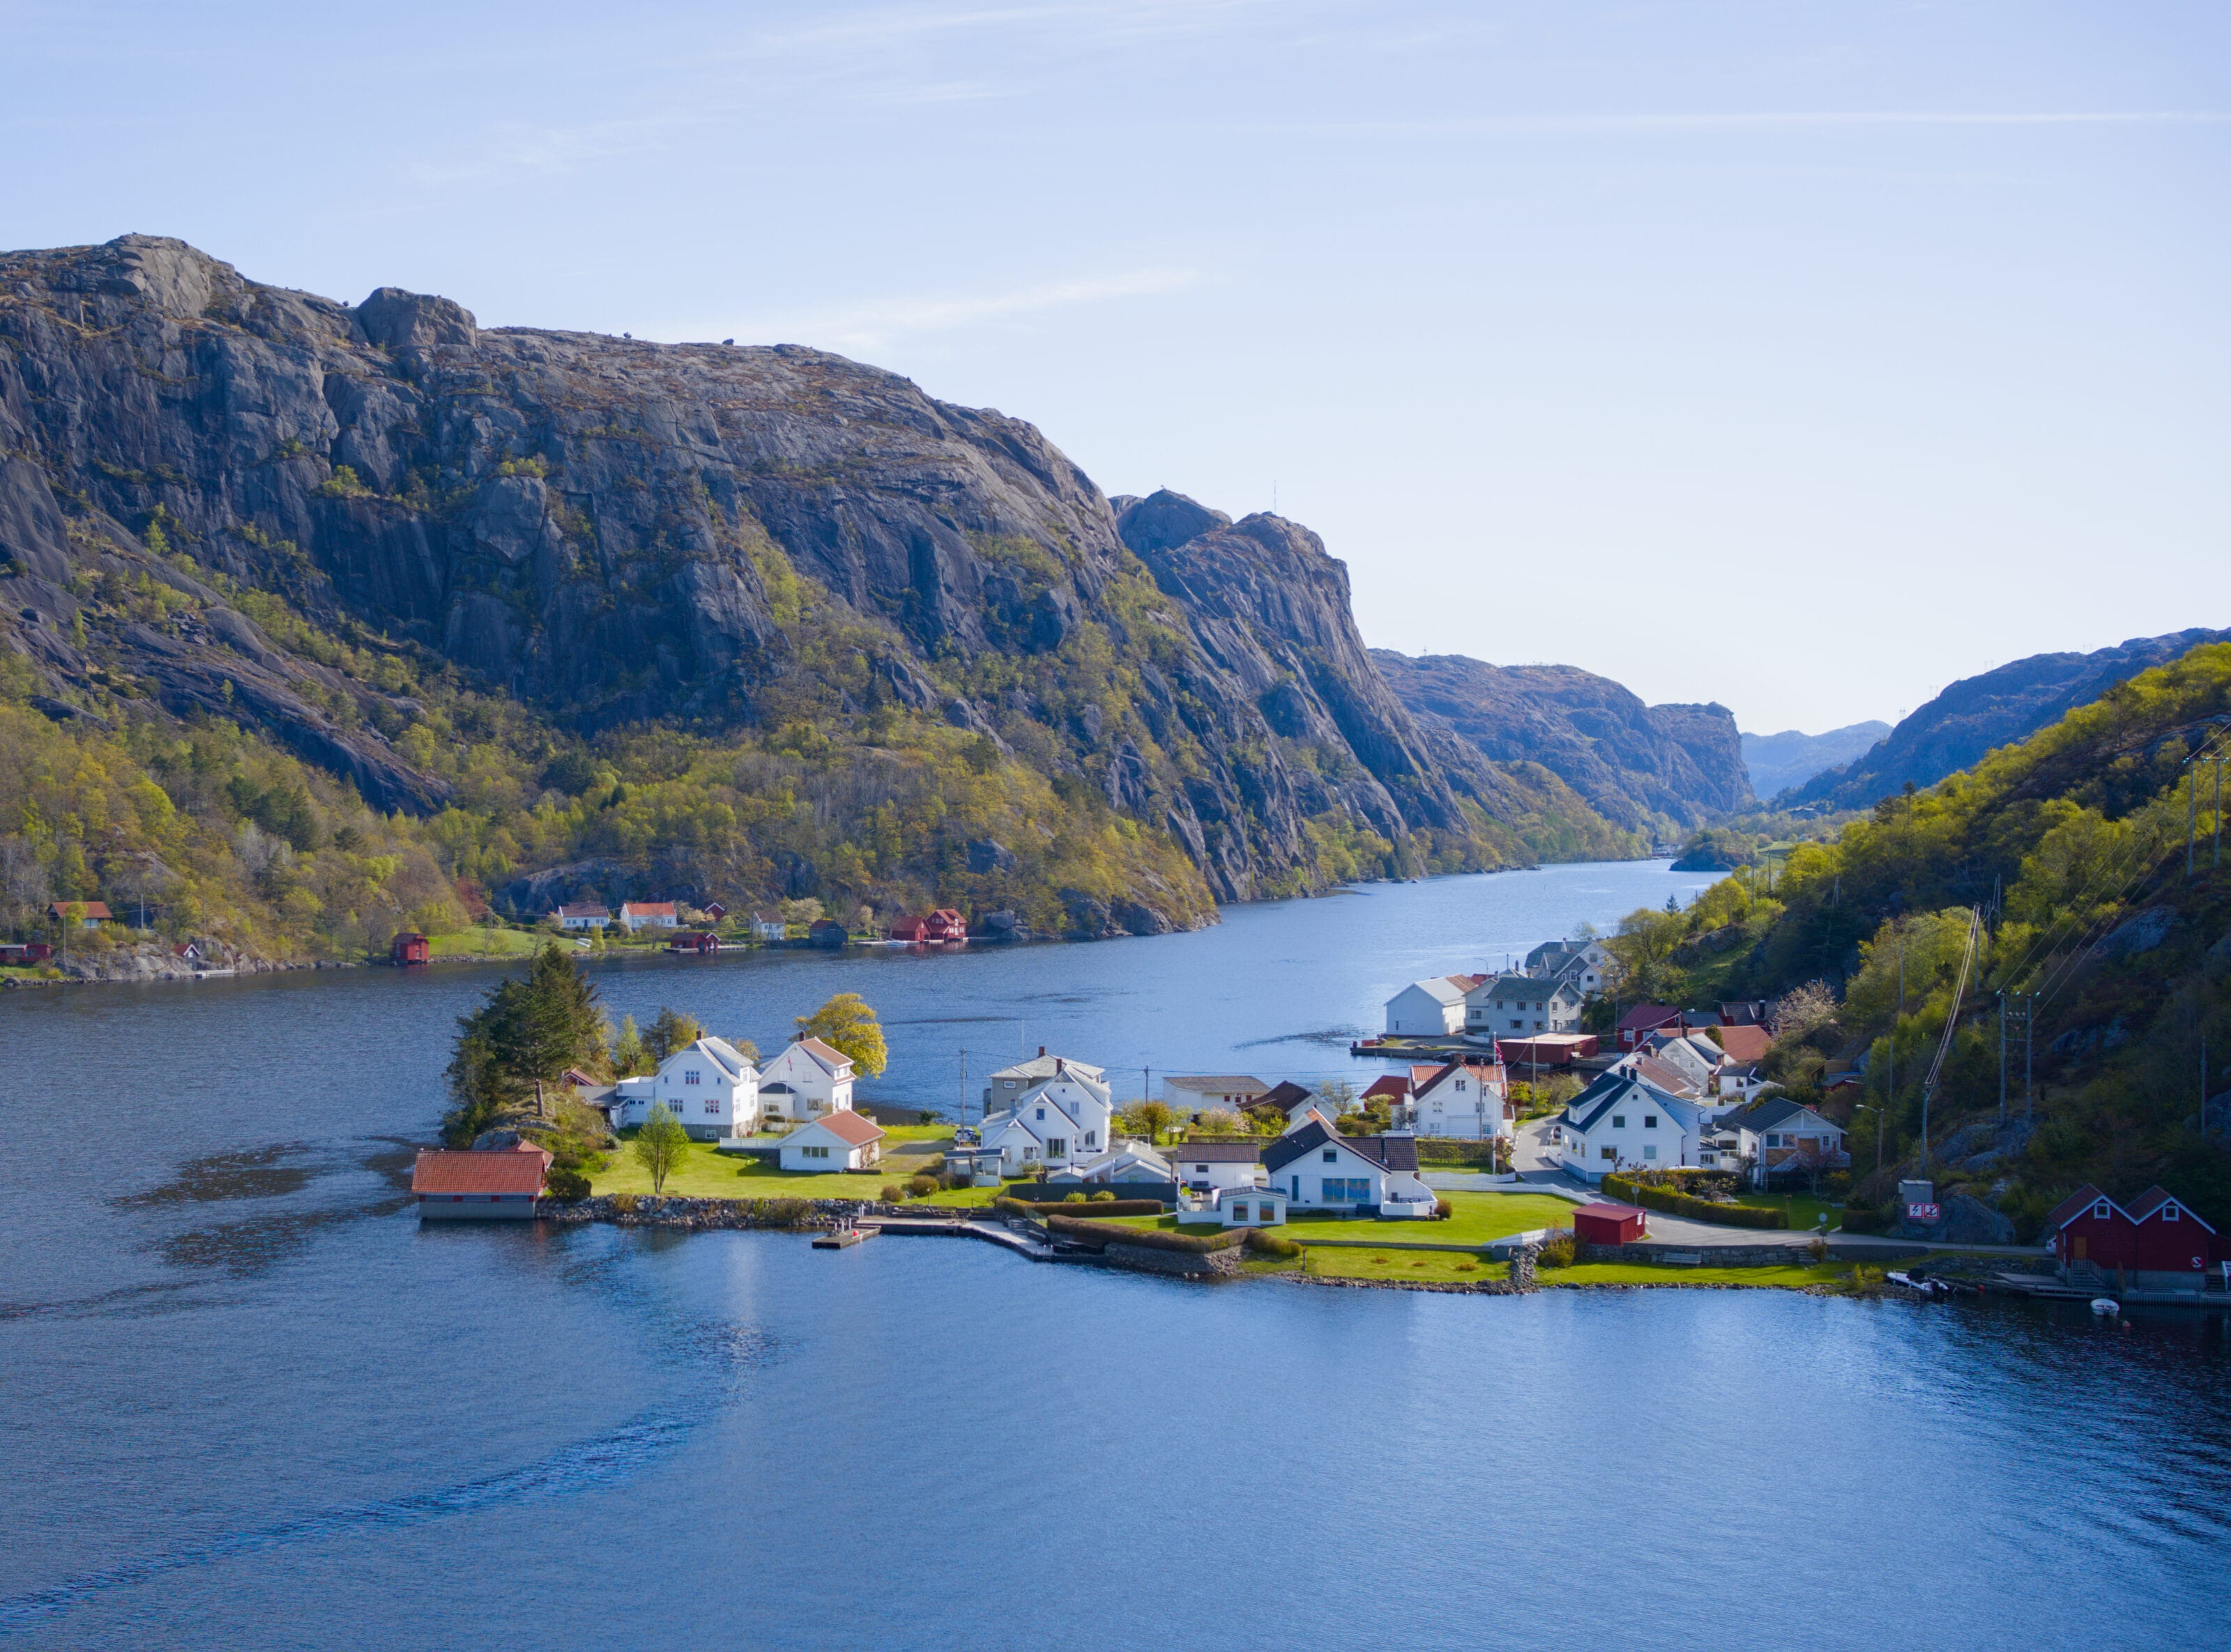
The Hamnanova hike is located in the Vestland region of Norway. There aren’t really any well-known attractions right nearby, but the trail is situated not far from the E39, which connects Bergen to Ålesund. We took this route while traveling between the Bergen area and Olden. The day before, we had hiked Raudmelen, another scenic peak located near the small town of Balestrand.
Our Hike to Hamnanova
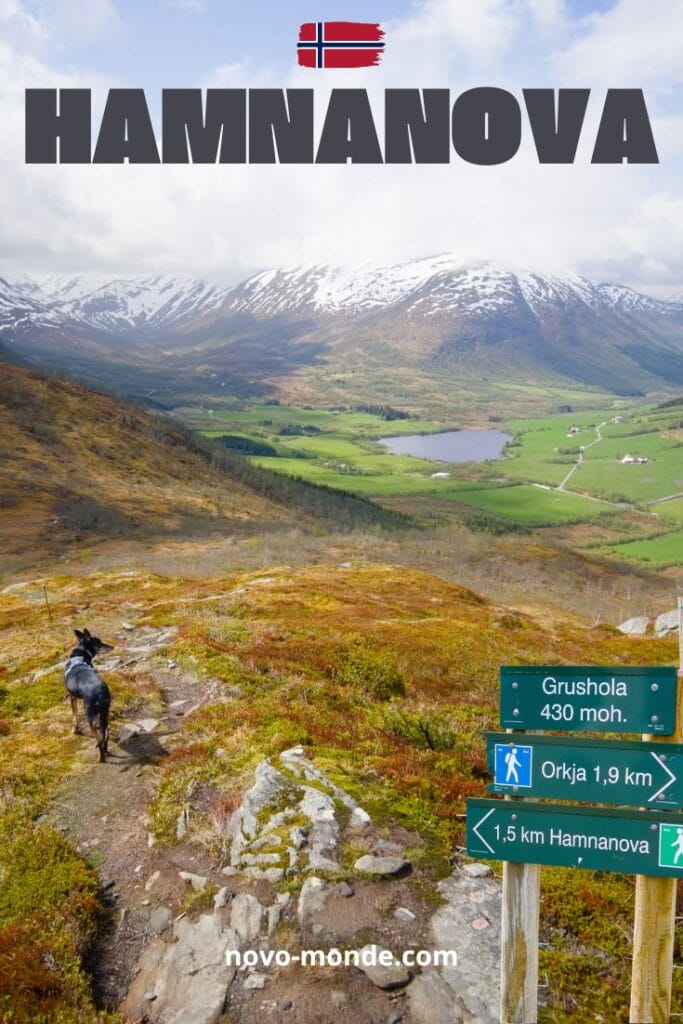
We arrived around 11 a.m. at the small parking lot located along the “Orkavegen” road. The sky was gray and it was raining a little… But hey, we’re in Norway, and a few raindrops aren’t going to discourage us! Especially since the radar imagery on the Yr.no app seemed to show some clearing.
In short, we set off in the rain, feeling confident. Since this route was recommended on Norway’s official website, we figured the trail would surely be well-maintained along the entire way… How naive of us!
Note: I’d like to briefly mention a weather app—if you’re traveling to Norway, I recommend downloading the YR.no app. It’s the official weather app, and although the Norwegian weather can always throw in a few last-minute surprises, we found this app to be the most reliable. The satellite animation tab, which shows the forecast for the next 90 minutes, is especially helpful for figuring out whether you’ll get caught in a downpour or manage to dodge the rain. The app is 100% free.
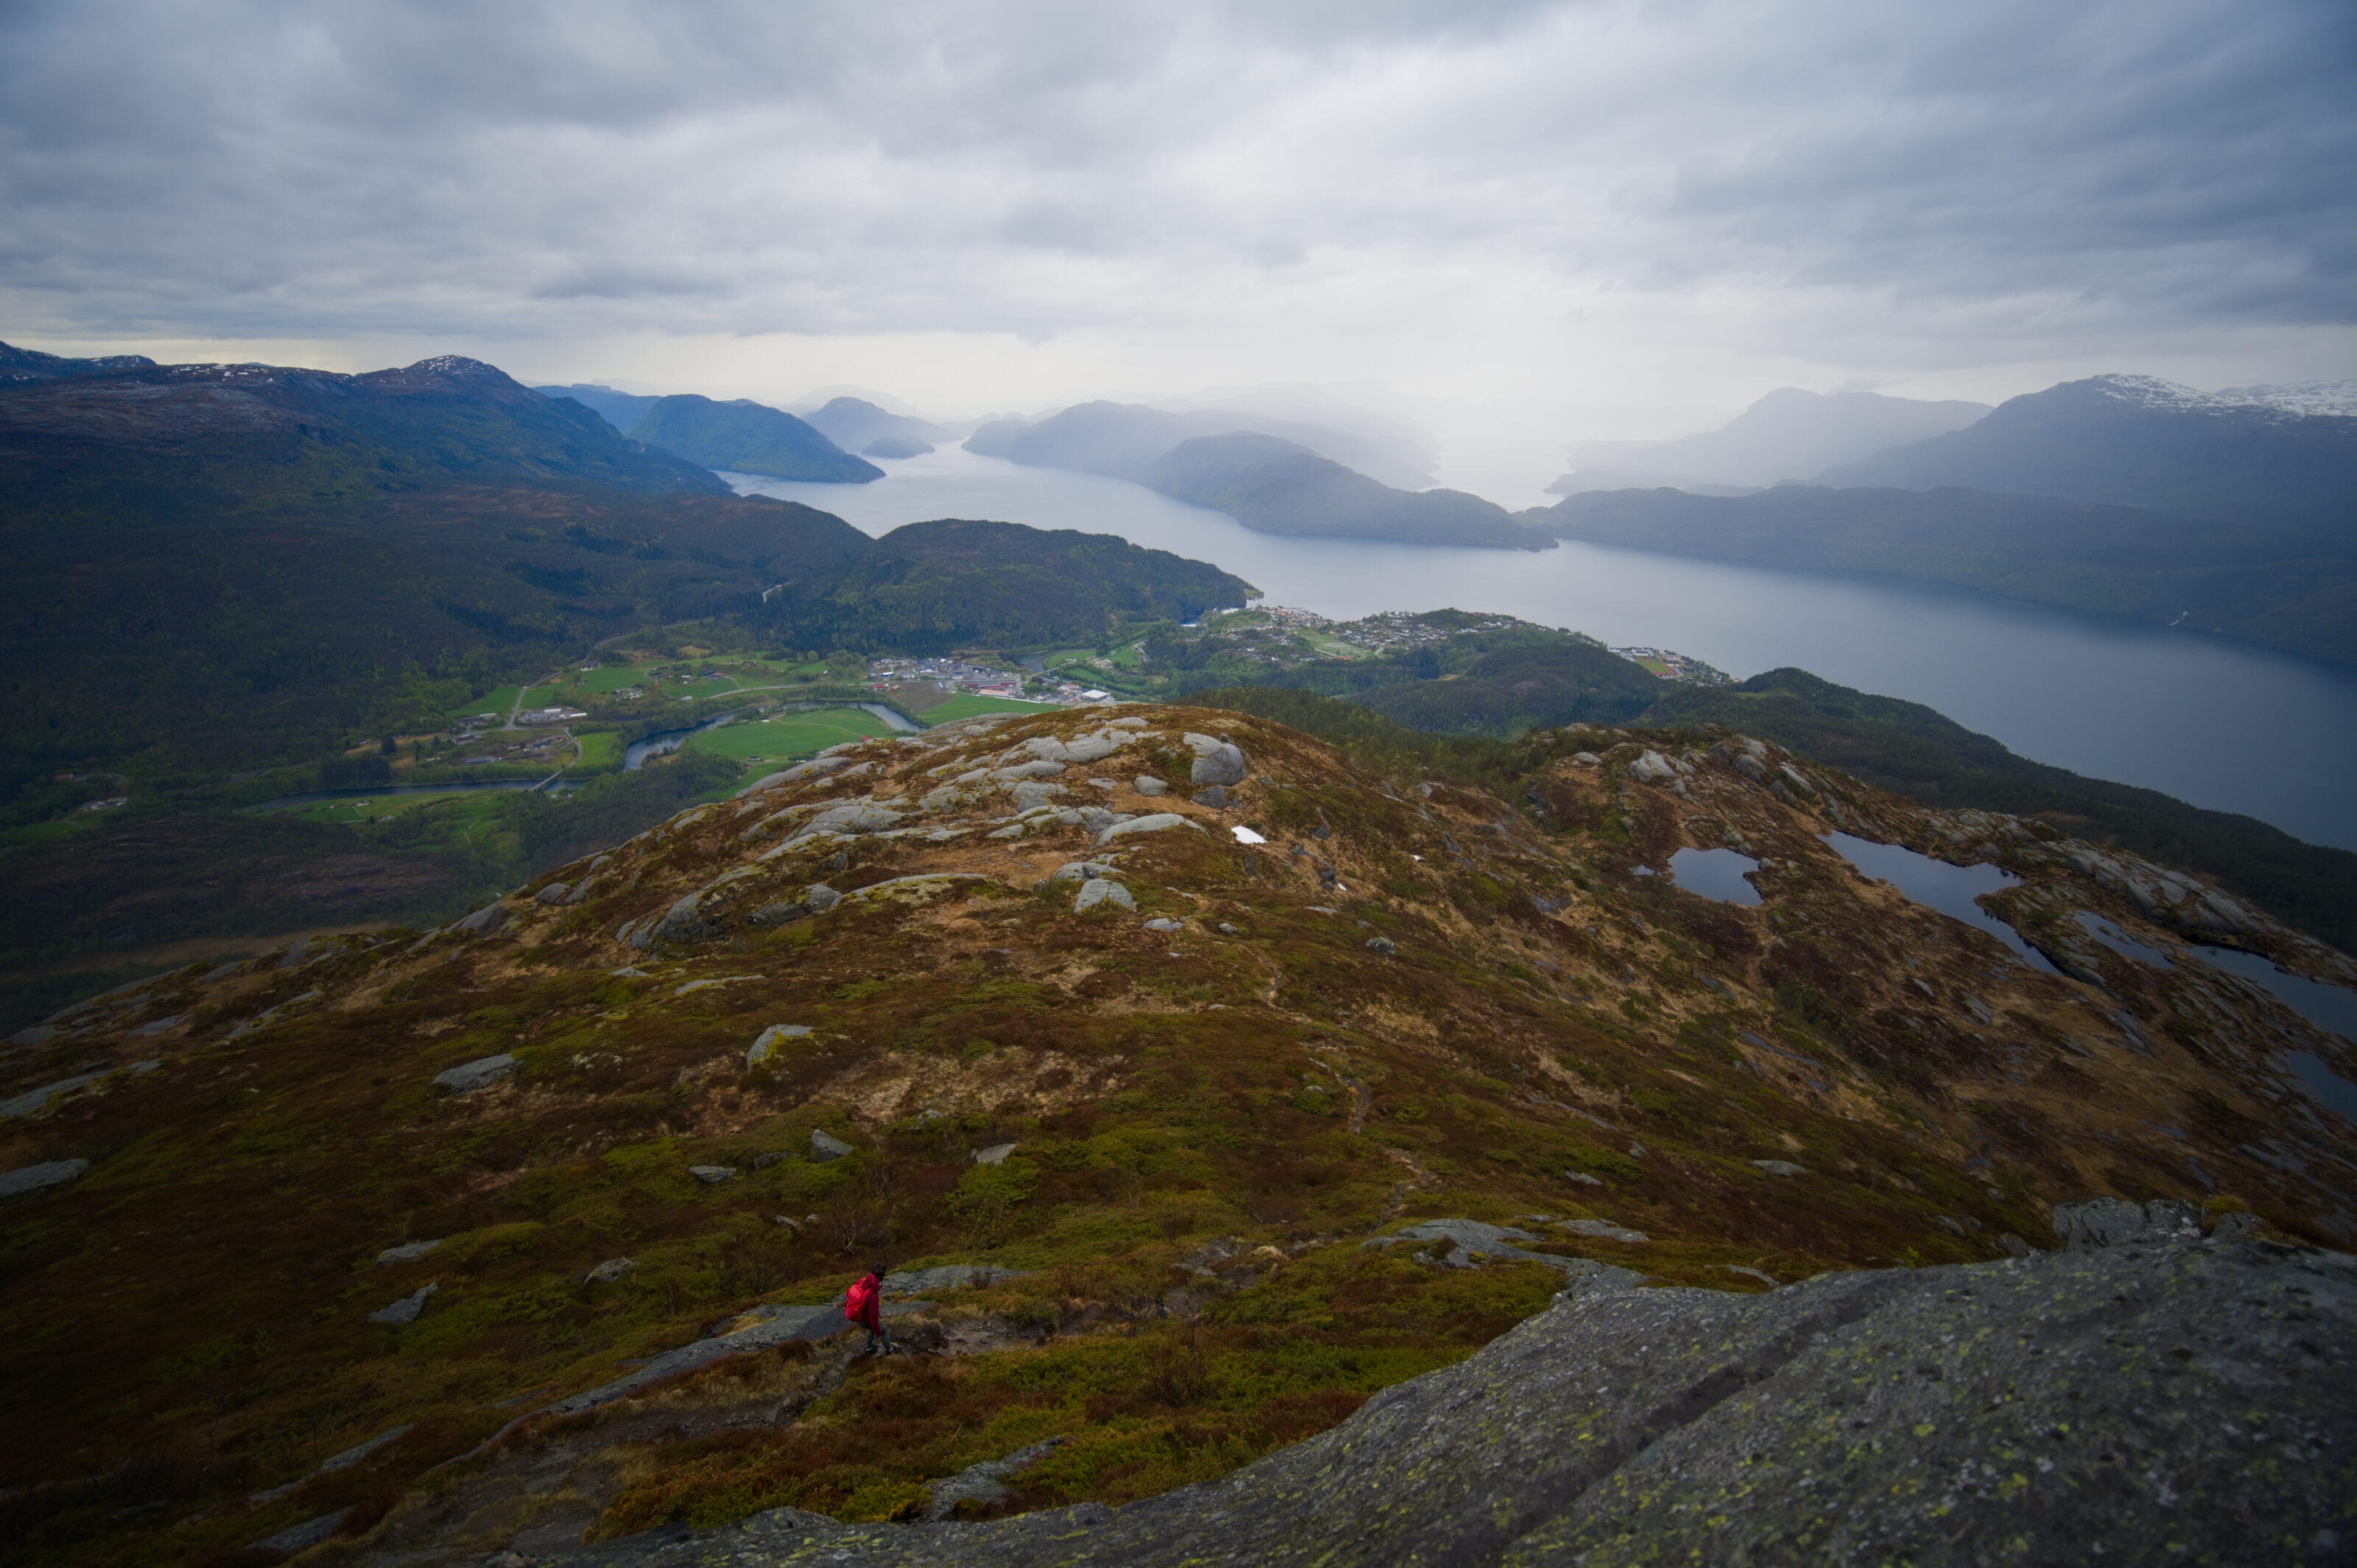
The hike up to the small shelter and its panoramic restrooms
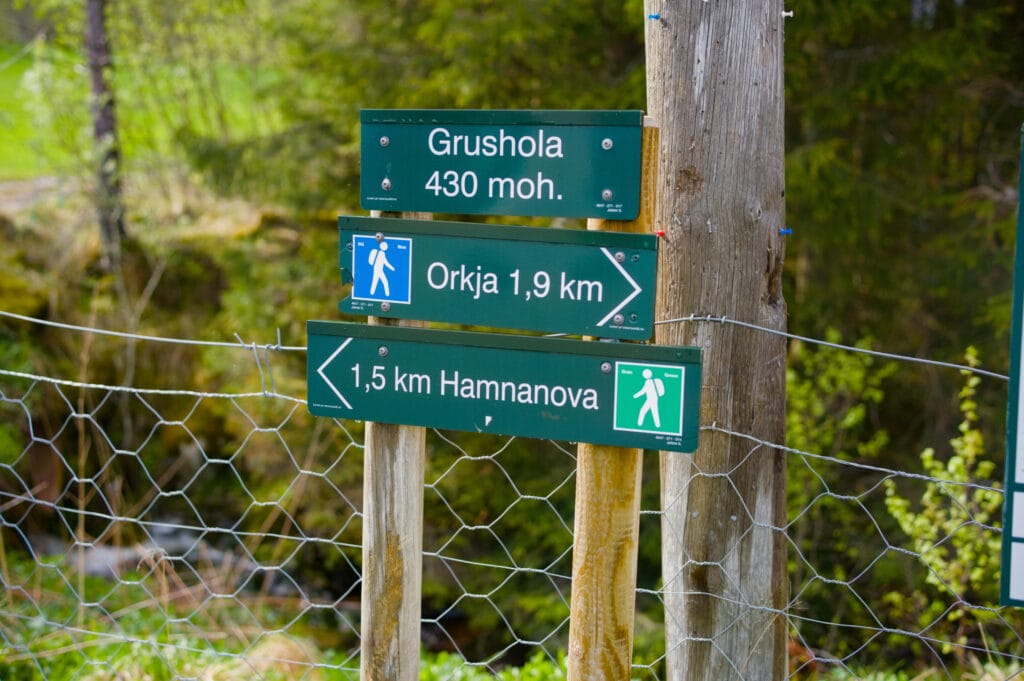
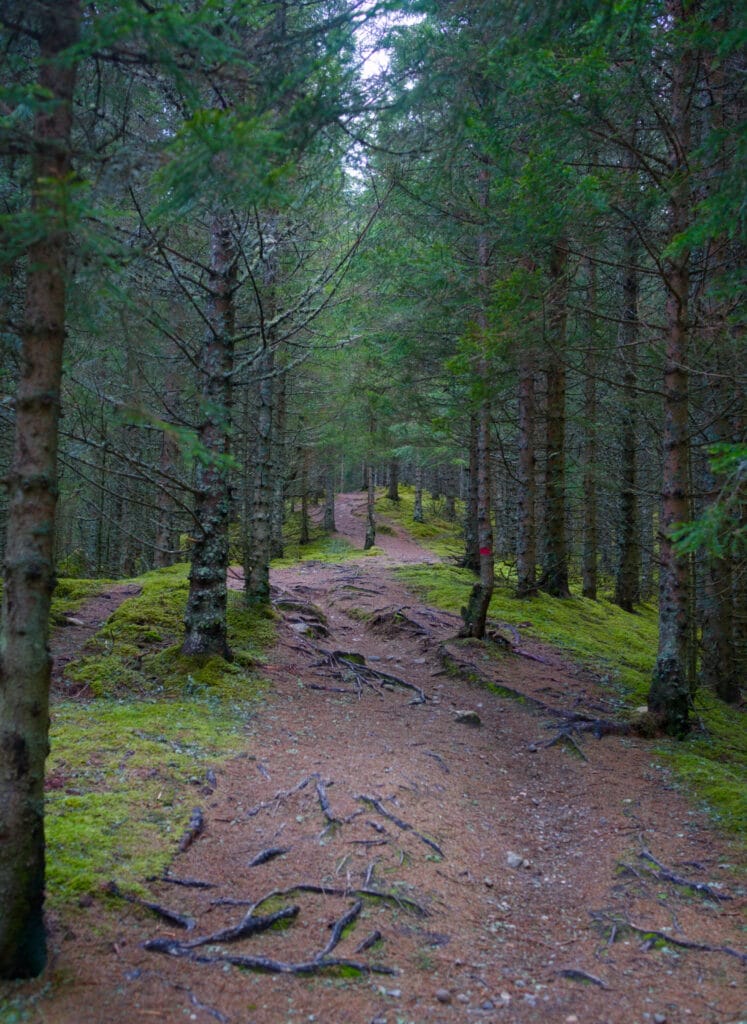
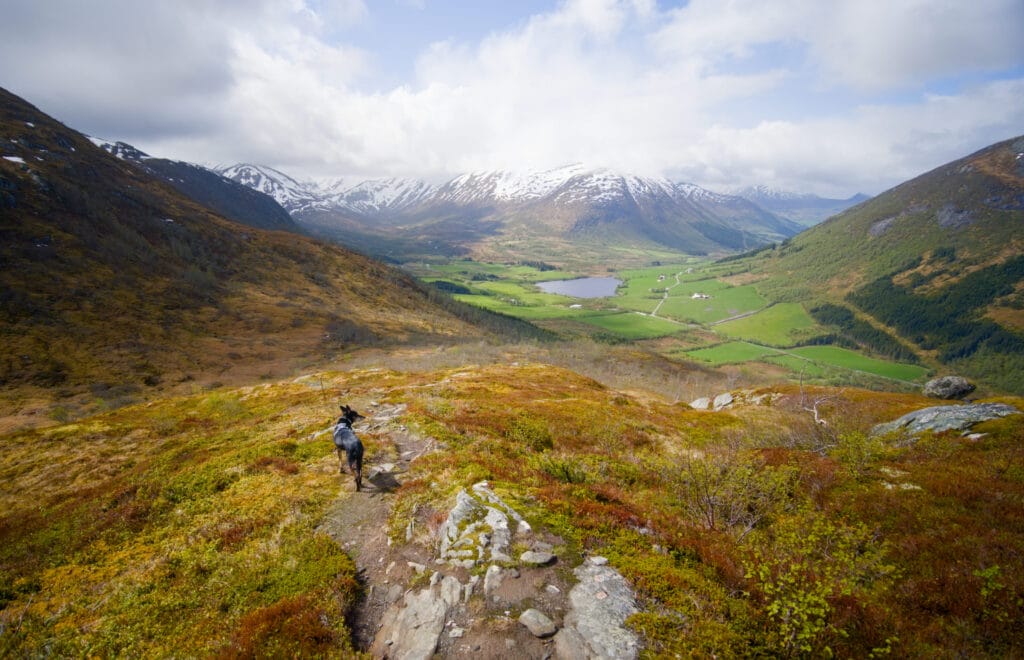
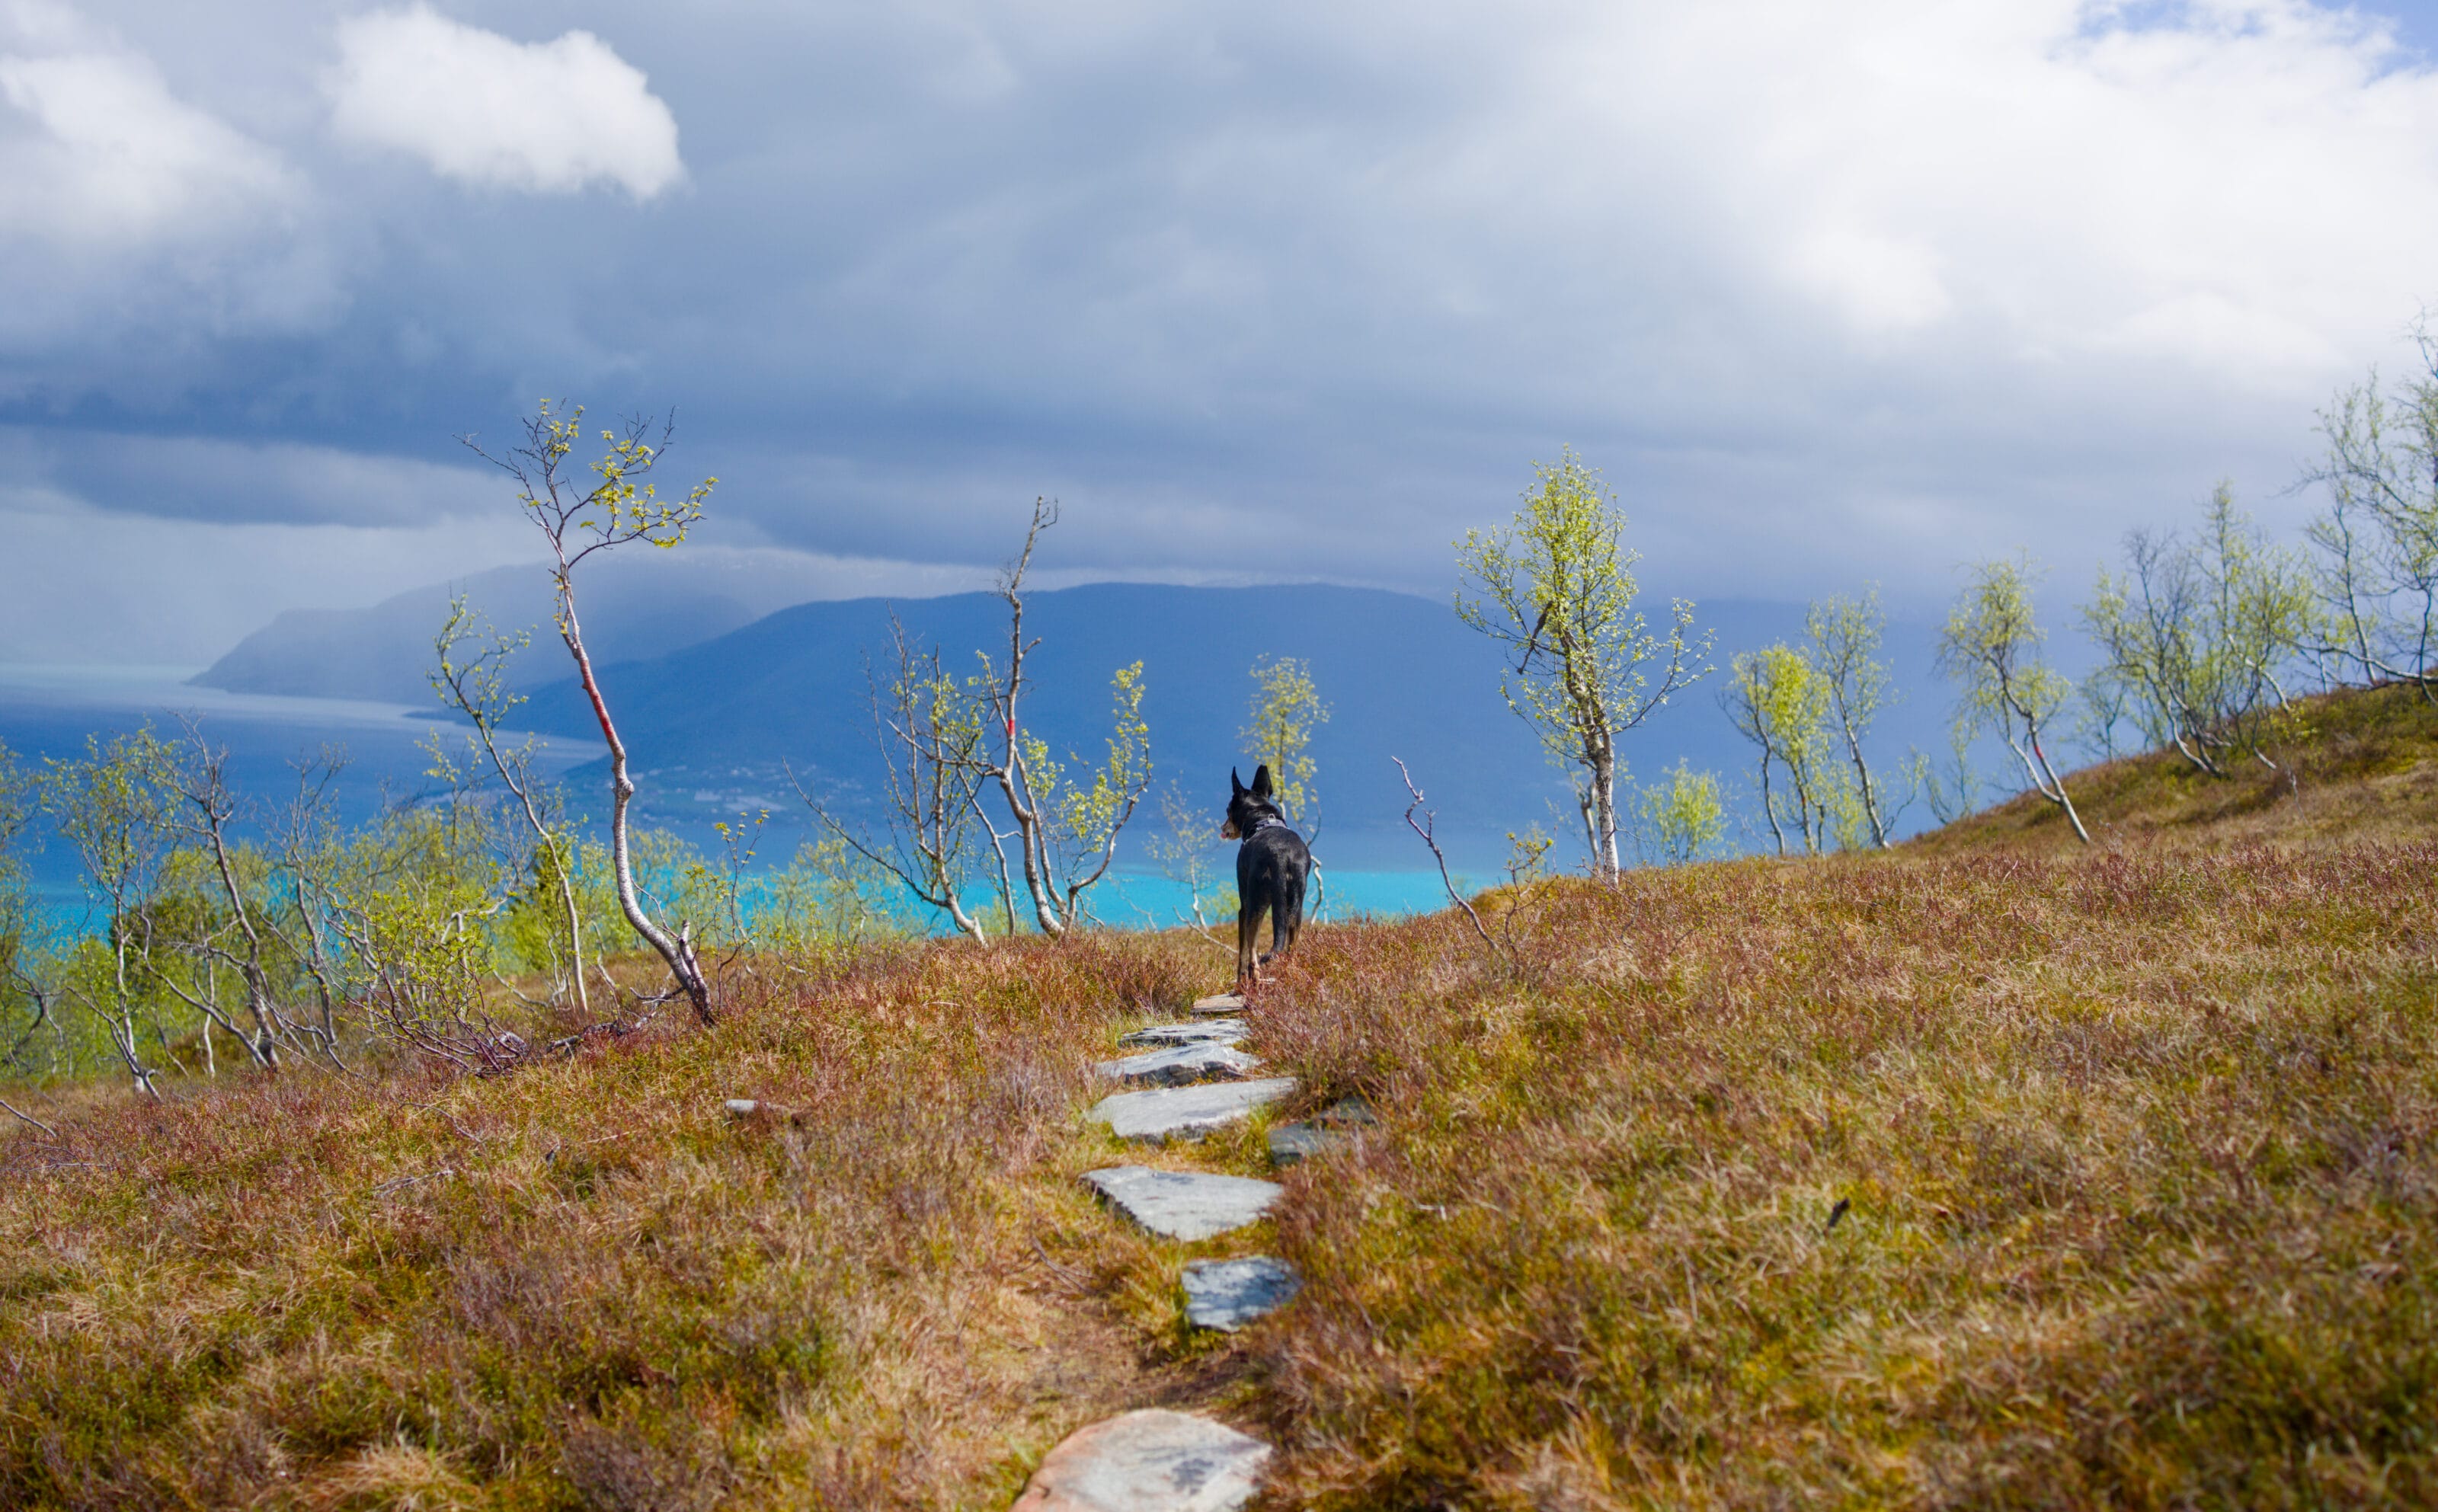
Starting from the parking lot, we were pleasantly surprised to see that the trail is perfectly marked and, best of all, large stone slabs are laid out in a very even pattern, which keeps our feet from getting (too) wet. At that moment, we’re thinking to ourselves that the Norwegians really are pretty impressive. 😉 After about 400 m through the forest, we reach a fork where today’s route splits in two. A quick glance at the forecast shows that a nice break in the clouds is on the way in about 30 minutes. So we decide to turn left (the most direct path) in the hope of catching a few rays of sunshine at the summit.
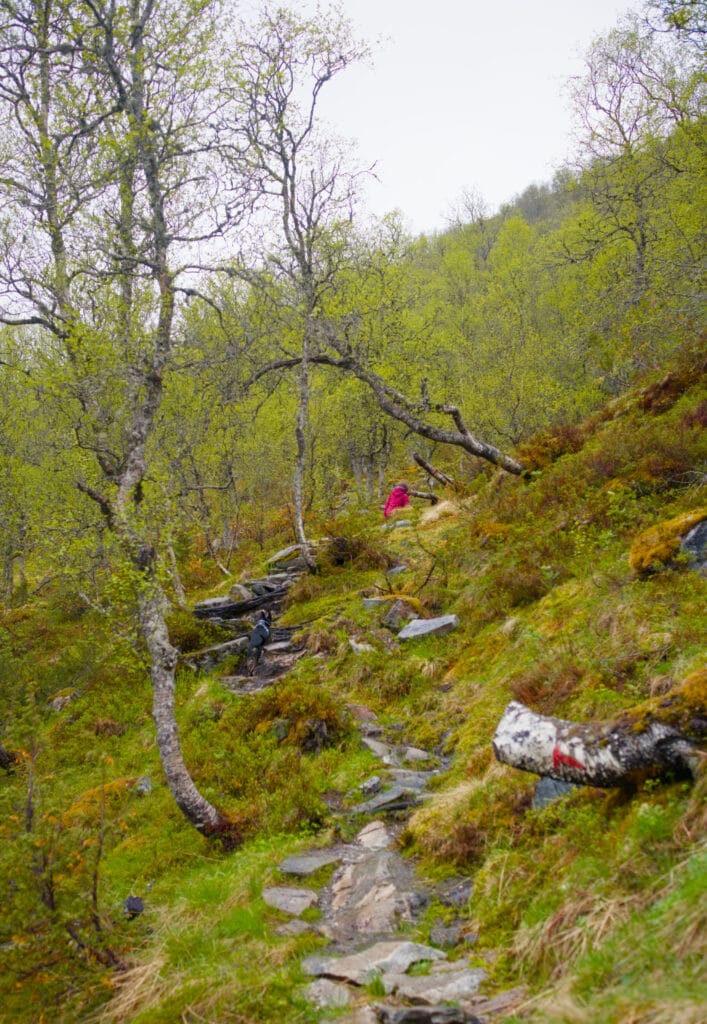
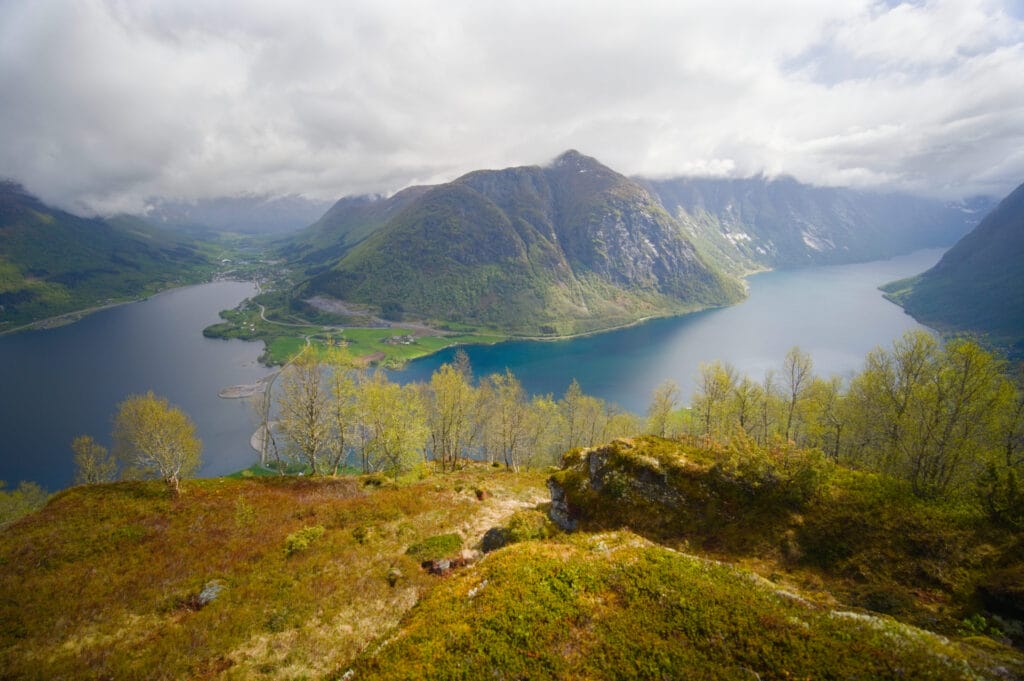
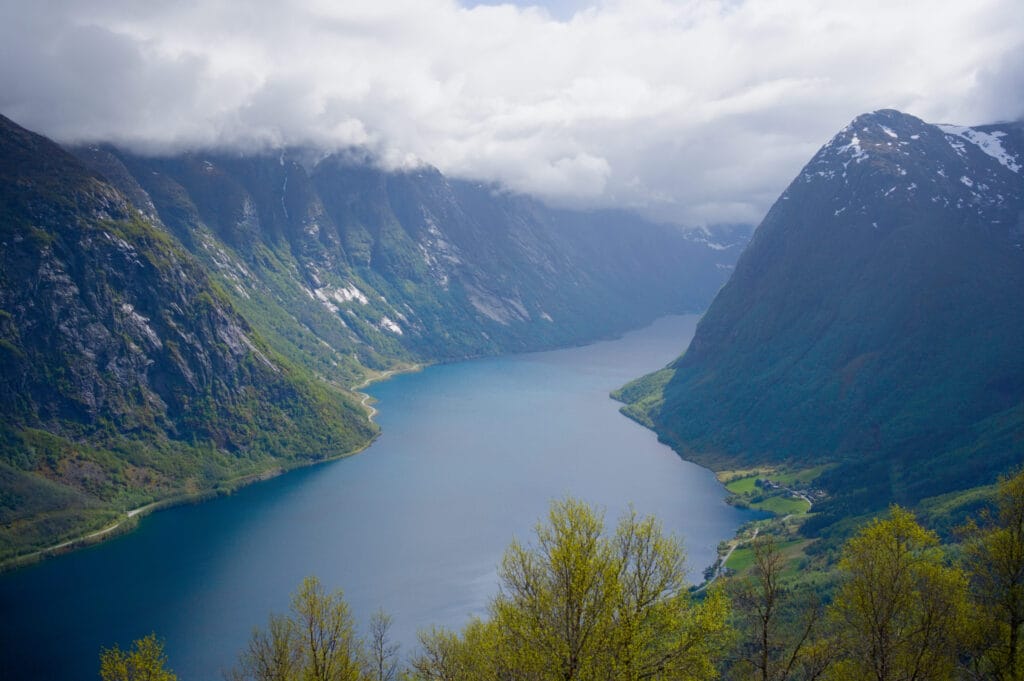
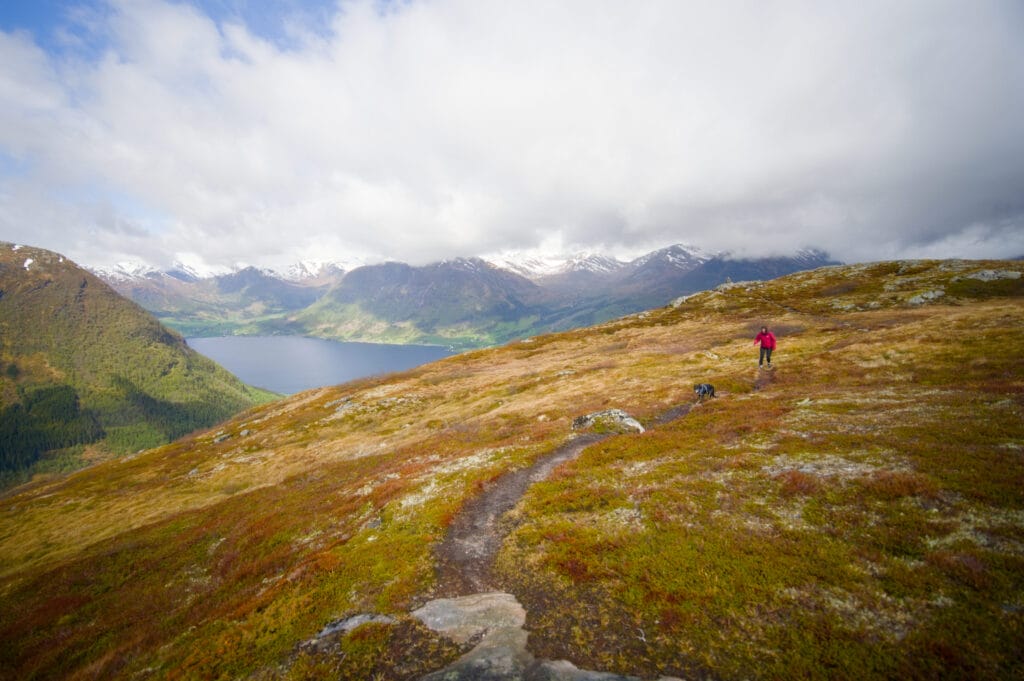
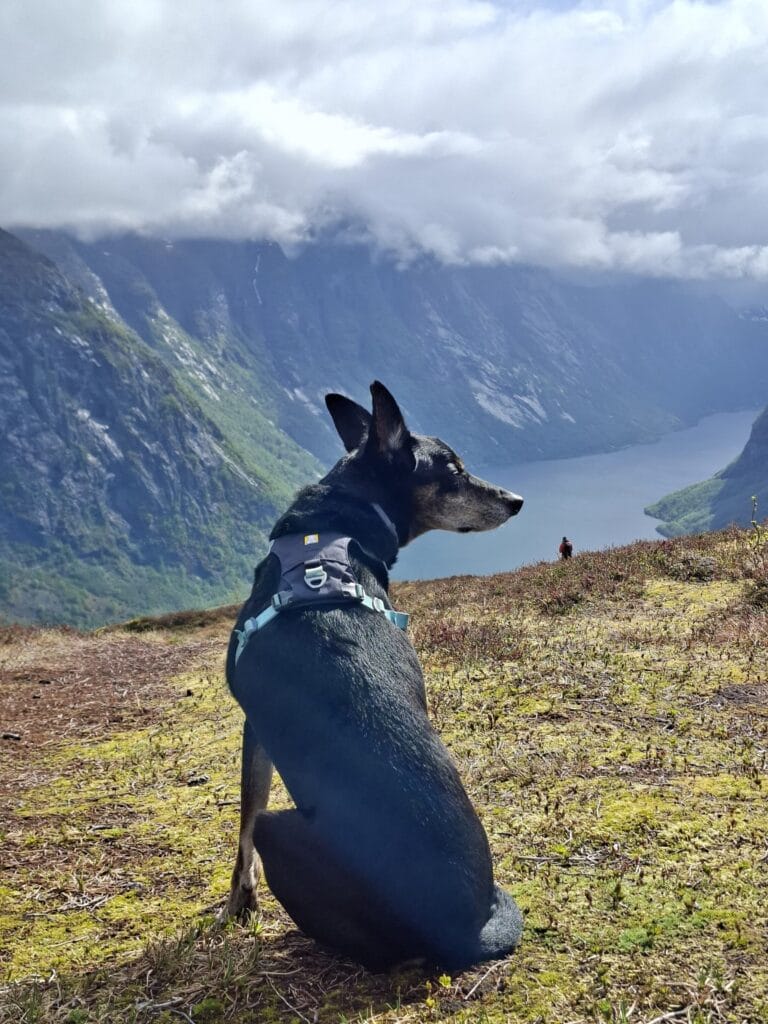
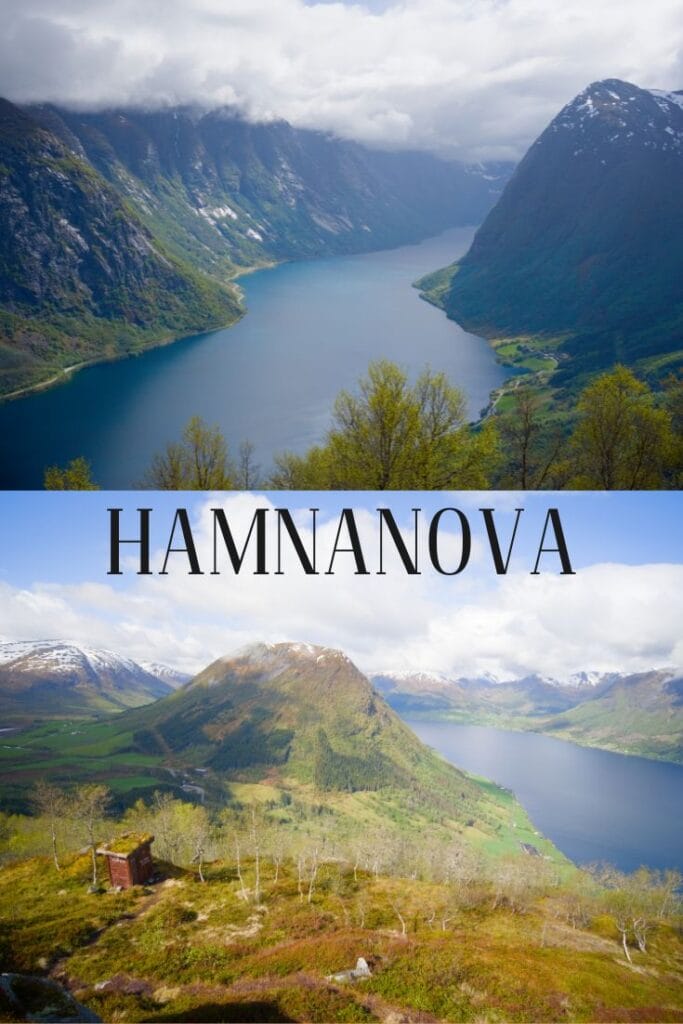
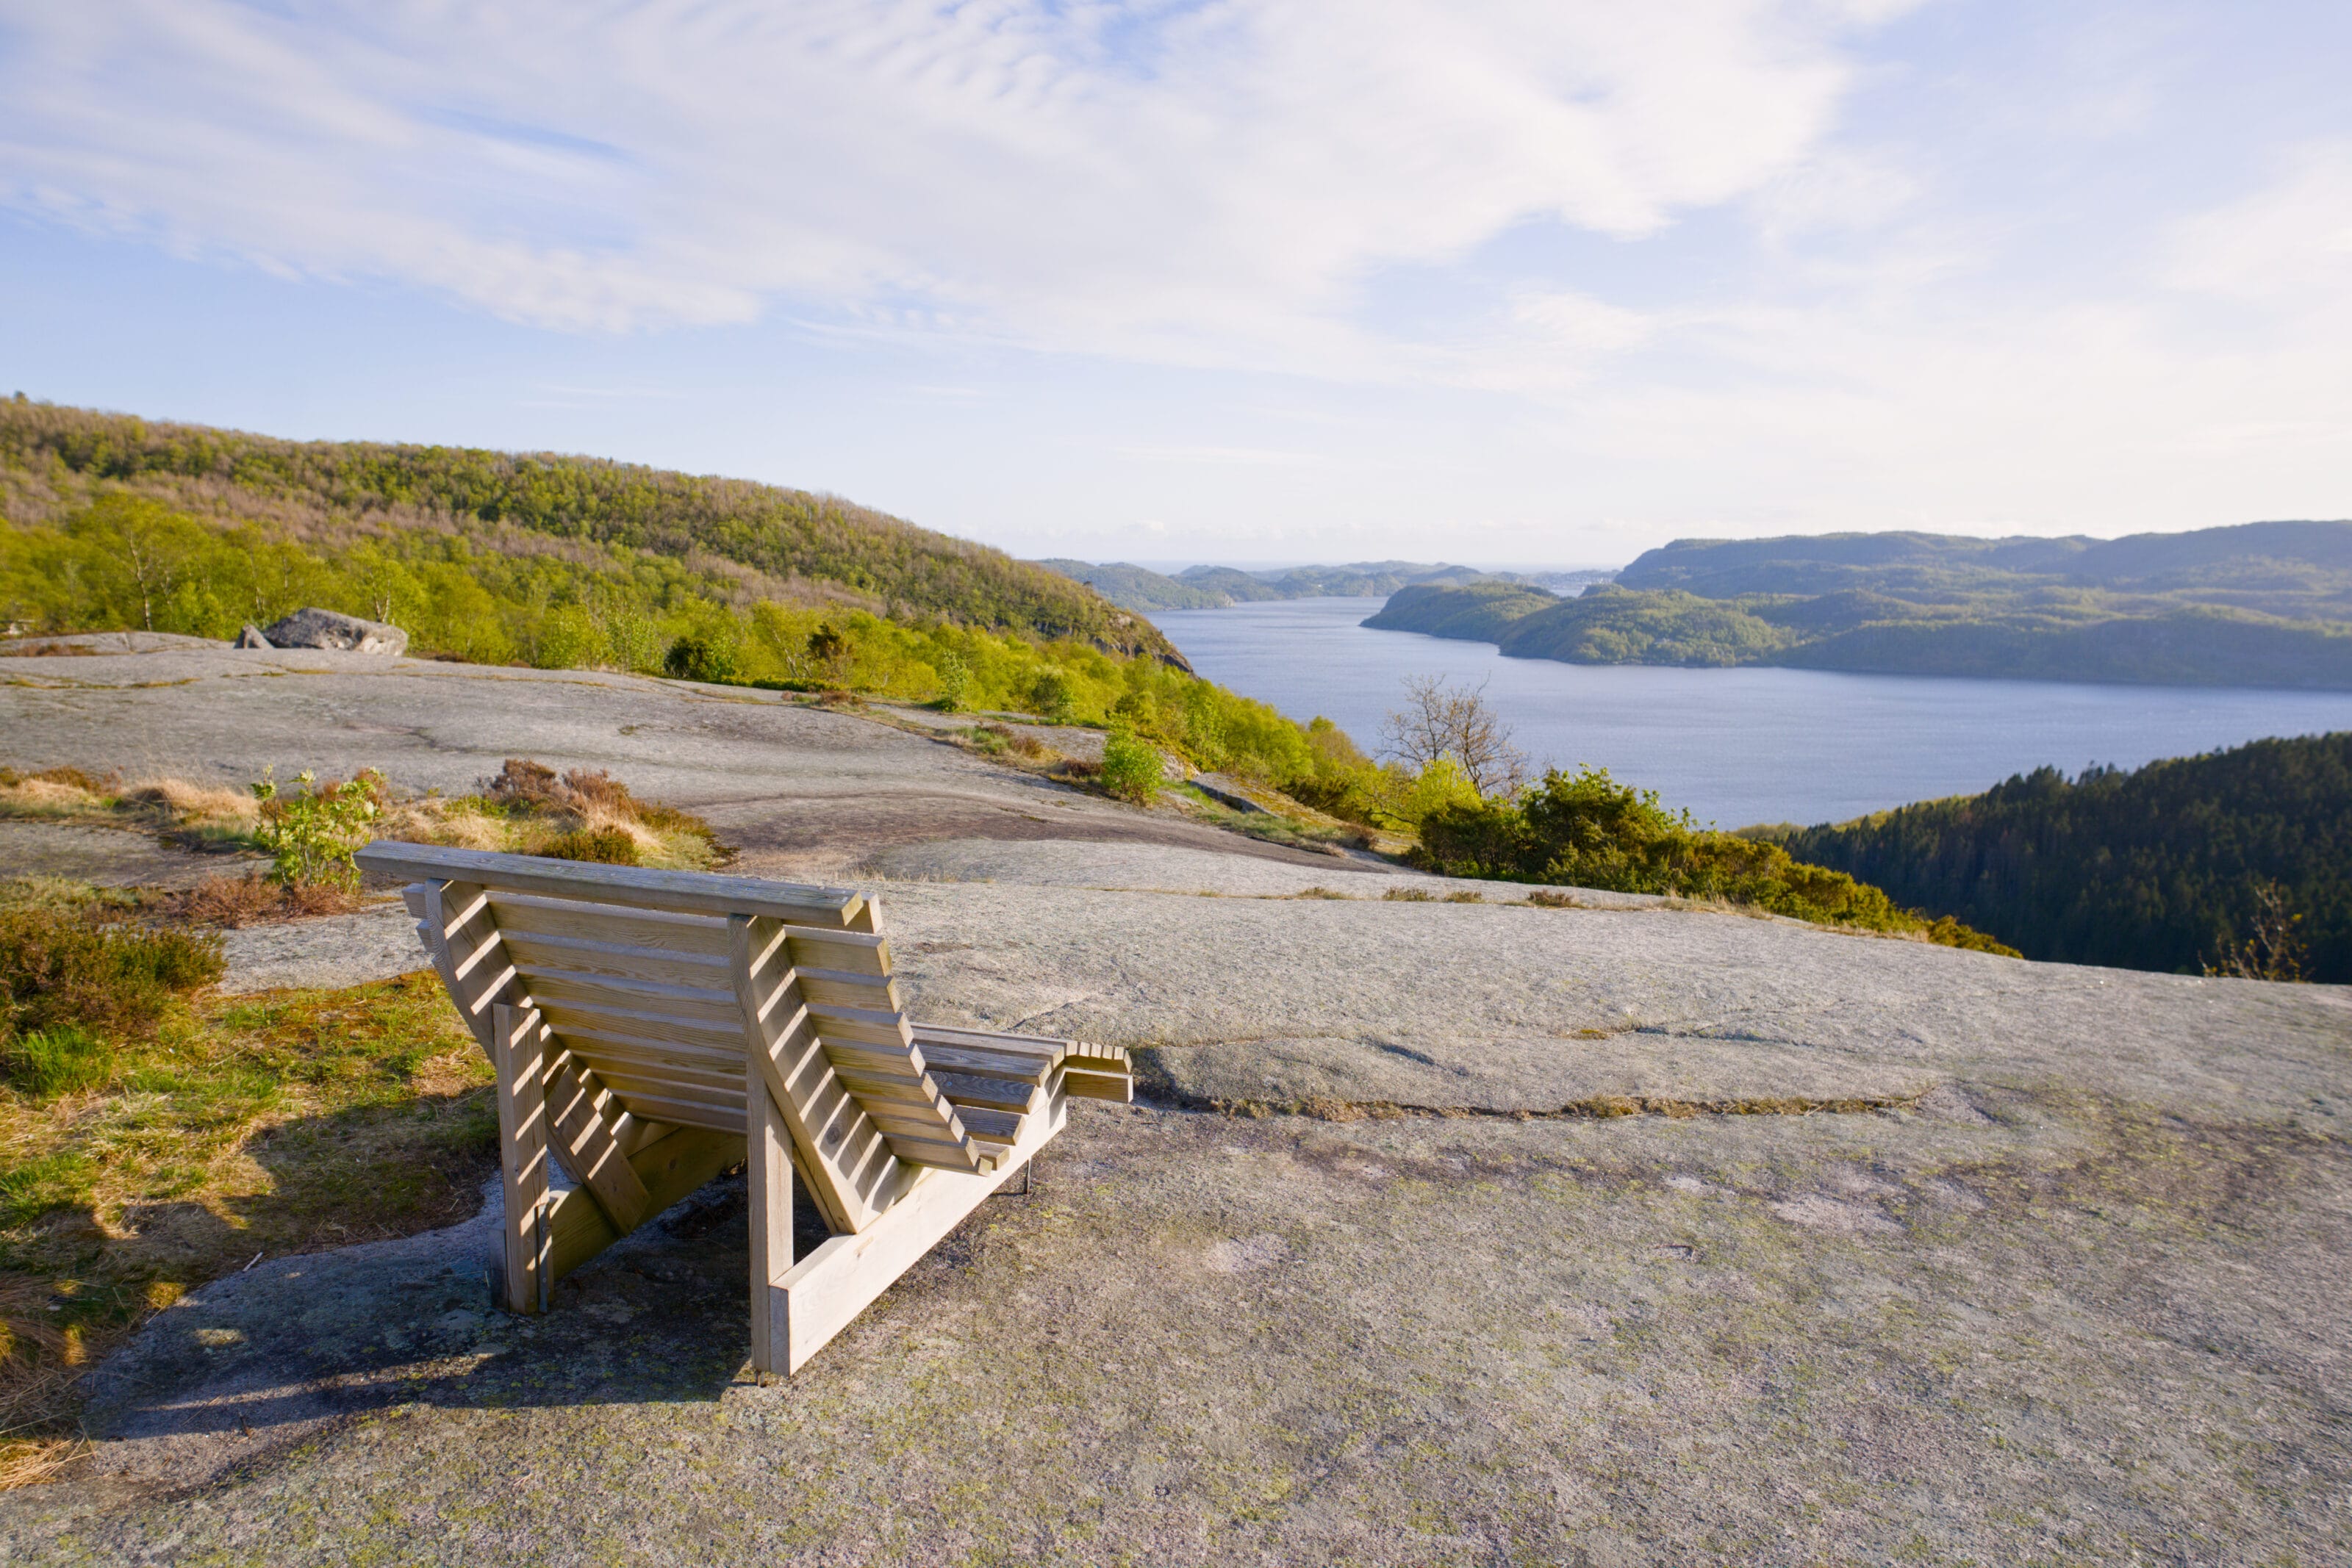
The climb is really enjoyable! The slope is gentle, and you’ll reach this first plateau—where the small shelter is located—with no trouble at all. Best of all: a breathtaking view of the Kjøsnesfjord and Lake Jølstravatnet. For the best view, we recommend walking a little further toward the fjord (away from the small mountain hut).
We were quite proud to see that our calculations turned out to be spot on! We had exactly 20 minutes of sunshine and blue skies that day, and guess what: it was right when we were at the summit and unwrapping our picnic. Looking at our stats from the past few weeks, I’d say we have every reason to be proud of that timing. 😉
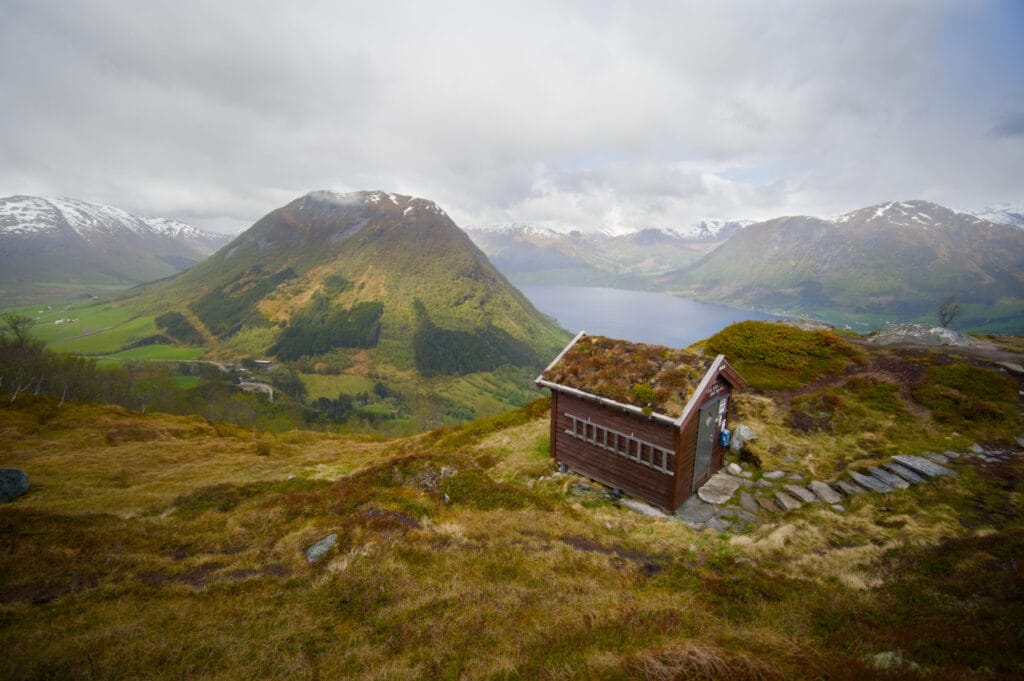

Fun fact: At the summit, there’s also a restroom that looks like it’s suspended over the fjord. It made us laugh because, ever since the start of the trip, we’ve been amazed by how often we come across public restrooms in Norway. Needless to say, we weren’t expecting one here! And just so you know, these are top-notch Norwegian restrooms! They were super clean, with toilet paper available and even hand sanitizer to wash your hands. That said, it’s better to do your business with the door open (if you’re alone up there—we’re definitely on the same page about that). For one thing, keeping the door open will give you the view of a lifetime while you’re taking a quick pee, and well… let’s be honest, it’ll spare your sense of smell… Because yes, it’s clean, but of course there’s no running water or drainage system. It’s basically just a hole with a toilet bowl on top. 😉
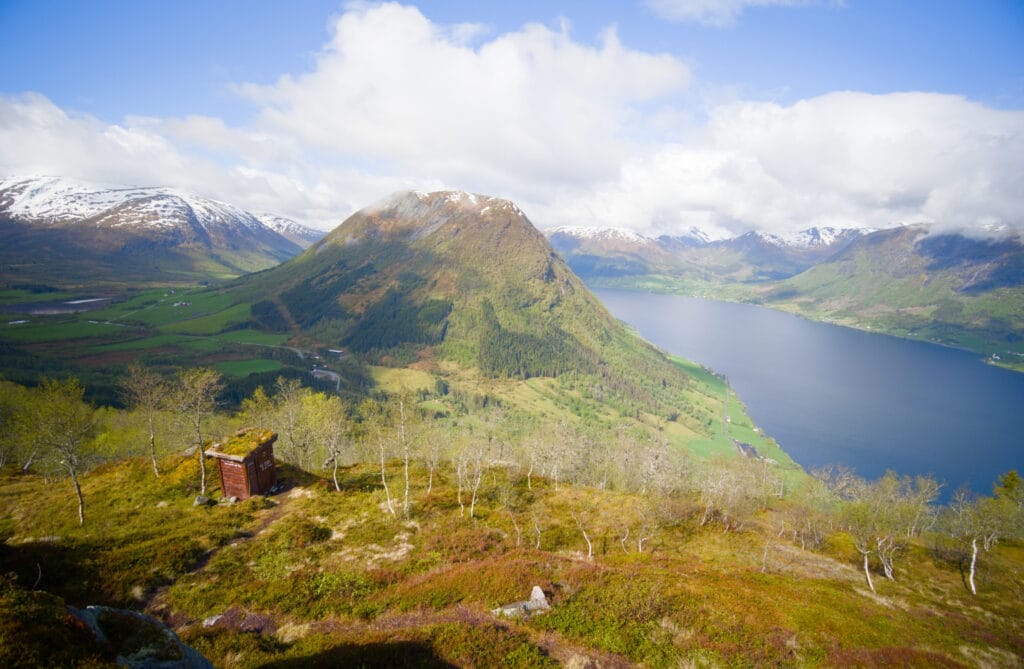
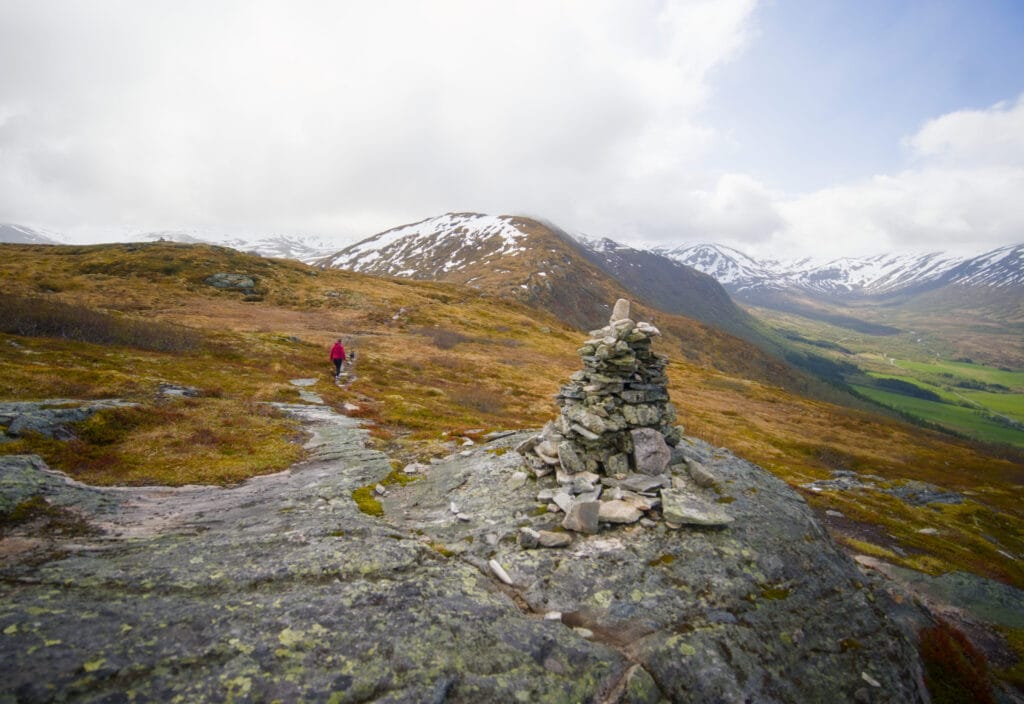
The “real summit” is a little further on
The small shelter is “officially” the destination of the hike, but in reality, the true summit is about 80 meters higher up and is marked by a large cairn. That said, it’s true that the view of the fjord is better from the shelter, but we still really enjoyed the panorama that opened up on the other side once we reached the summit. In short, we definitely recommend continuing a little further after taking in the view at Hamnanova!
Return to the parking lot via the other side
As spot-on as we were with today’s weather forecast, we could have done better when it came to the trail back… The first part up to the summit was perfectly fine (as was the first stretch of the descent toward the parking lot). But things took a serious turn for the worse as we approached the forest.
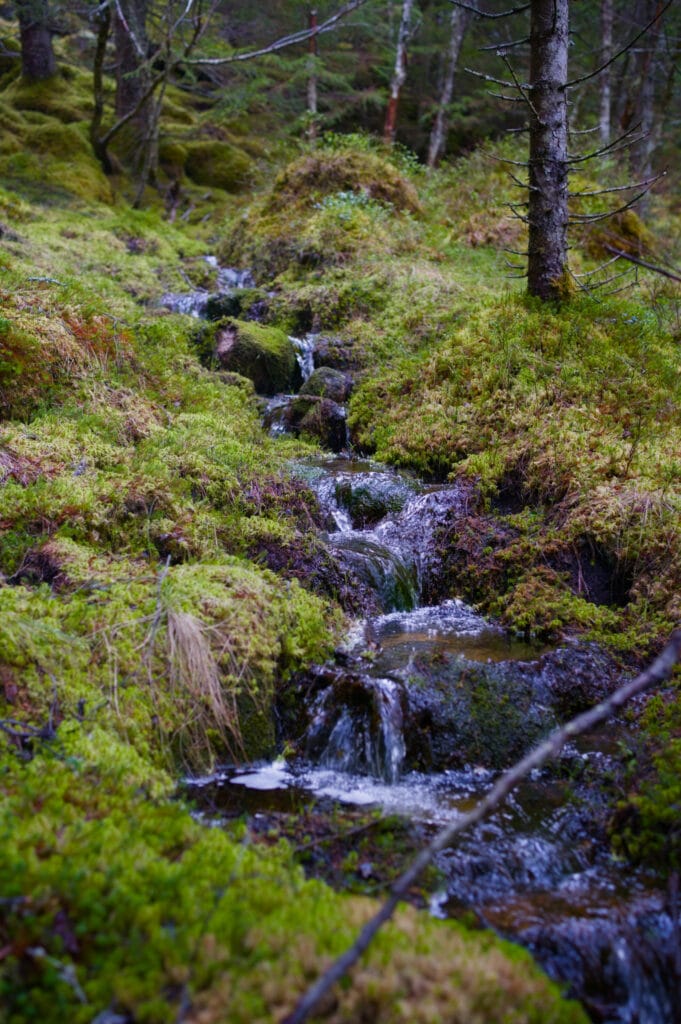
Here, you immediately forget about the neatly laid slabs meant to keep the mud at bay… Instead, it’s more like a Ninja Warrior course where small branches suddenly seem like islands of dry ground in the middle of the slush. We could have (should have?) turned back after the summit, but what can you do—we’re stubborn when it comes to completing a loop.
So it’s hard to tell you what this part of the trail looks like when it’s not raining… but on a rainy day, let’s just say it was “tricky.” With sturdy hiking boots, it’s manageable, but if, like me, you’ve decided to wear lightweight trail running shoes, I’d better warn you that it’s going to be tough to stay dry.
At the start of the descent, I had to be pretty resourceful to avoid “slipping up.” I had even brought along two or three rocks to “place” on what I thought would be two or three wetter sections. In the end, I gave up and simply accepted defeat.
Below is one last picture of my feet, which were still relatively dry, before I gave up and simply accepted that I was “in it” up to my ankles.

In short, we’d only recommend the loop hike if the weather is dry. Otherwise, opt for a round trip to the summit instead.
Practical Information About the Hamnanova Hike
Parking:
There isn’t really a parking lot per se at the start of the hike. It’s more of a small space by the road where 3–4 vehicles can park. You can also pull over on the side of the road, which doesn’t see much traffic. And well, the hike is relatively popular with locals, but it’s a far cry from the “classic” hikes, and you won’t run into hundreds of people. To give you an idea, during our hike we passed exactly five people on our way back down.
Distance, Elevation Gain, and Map of the Hike
As I mentioned in the introduction, this is a short hike that’s truly accessible to everyone. In total, the full route is 3.6 km long with 350 m of elevation gain. If, instead of doing the loop, you just go back and forth to the small shelter, the hike is 2.8 km long with 280 m of elevation gain.
As for the walking time, it will obviously depend on your pace and the terrain, but I’d say you should allow about 1 hour and 30 minutes to 2 hours to complete the loop. That might seem like a long time given the distance, but if the weather is damp—like it was when we were there—then that’s actually pretty realistic. Although I have to admit that toward the end, once I’d given up on keeping my feet dry, I actually went faster. haha
Important information about maps: In Norway, trails are generally very well marked on apps (Maps.Me, Alltrails, Komoot, or others). Strangely enough, the Hamnanova hike is completely missing from topographic maps. This is somewhat surprising, since the hike is also featured on Norway’s official website. In short, the track below shows our route, but don’t worry—the trail is perfectly marked! There’s no chance of getting lost. 😉
When is the best time to go on the hike?
The hike doesn’t go very high in elevation. The summit is “only” about 750 meters high, which makes this hike accessible for much of the year when there’s no snow. In May, we had no trouble hiking up. That said, I’d note that the terrain in this area tends to be pretty “muddy,” so it’s best to plan your visit for dry weather—and preferably not right after heavy rain. Of course, that’s all relative… If you don’t mind getting your feet a little wet, the view is definitely worth it, even if it’s damp. Personally, I made the “mistake” of leaving my heavy hiking boots at home that day because, when I saw the distance and elevation gain, I figured I’d be more comfortable in trail running shoes. So I was certainly comfortable, but let’s be honest—I ended up with shoes soaked through. 😉
Well, we hope you enjoy this hike and that it inspires you to come explore the region a bit. We’ll see you very soon for the next installment of our trip to Norway. We went on more than 40 hikes during our 6 weeks there, so needless to say, you’ll have plenty more to read on the blog. 😉
Pin this article

Join the discussion